Hello,

I am new to Zapier and am struggling to get my zap to work. I am attempting to import a .csv file from email parser by Zapier into Webflow CMS. Ultimately, emails will be sent to the parser with .csv attachments every 6 minutes and I need this information to auto update in Webflow. I would like my customers to be able to see this information in live time.

I am able to get the email through the email trigger, use the formatter utility to pull the .csv file, but it will not send to Webflow to create a new item. (ValidationError:ValidationFailure).

If anyone has any ideas I would appreciate it.

Scratch that. I turned my Zap on and all records are now populating in Webflow!

Thanks for the help. I’m sure I’ll be back with more questions as I move further on this quest.


@Jfff 

Per the linked help article:

Looping help article: https://zapier.com/help/create/other-functions/loop-your-zap-actions


Thanks for the clarification. When I run a test only one CMS item is sent to Webflow. Shouldn’t all items in the loop be sent?


@Jfff

Looping help article: https://zapier.com/help/create/other-functions/loop-your-zap-actions


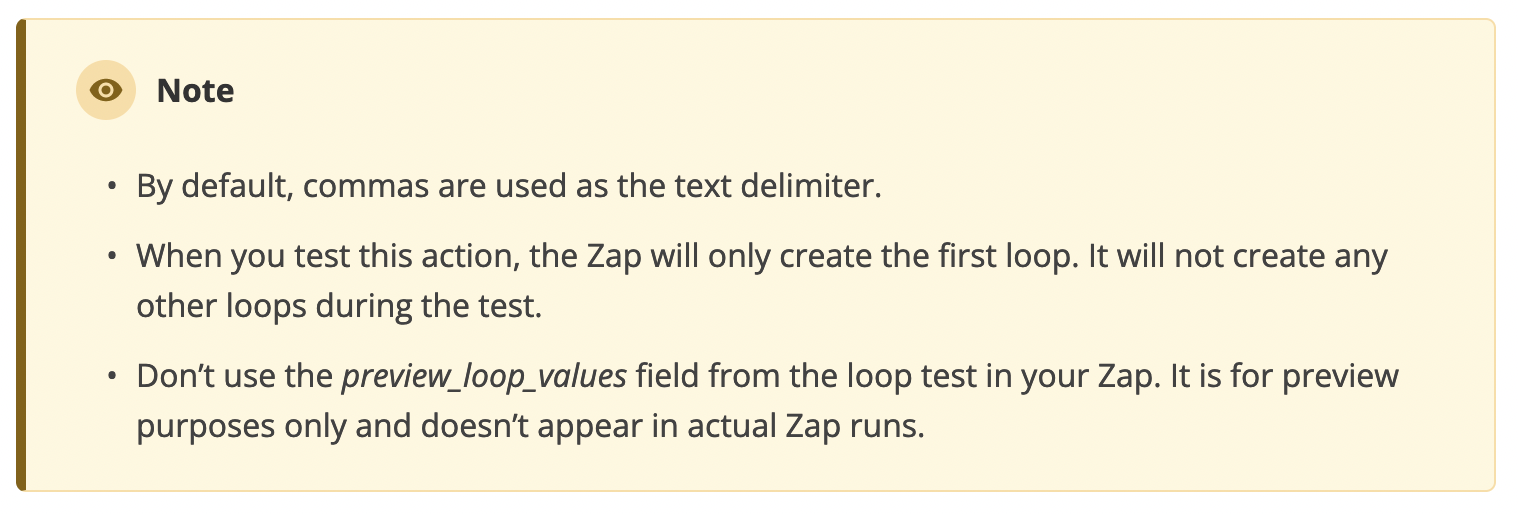
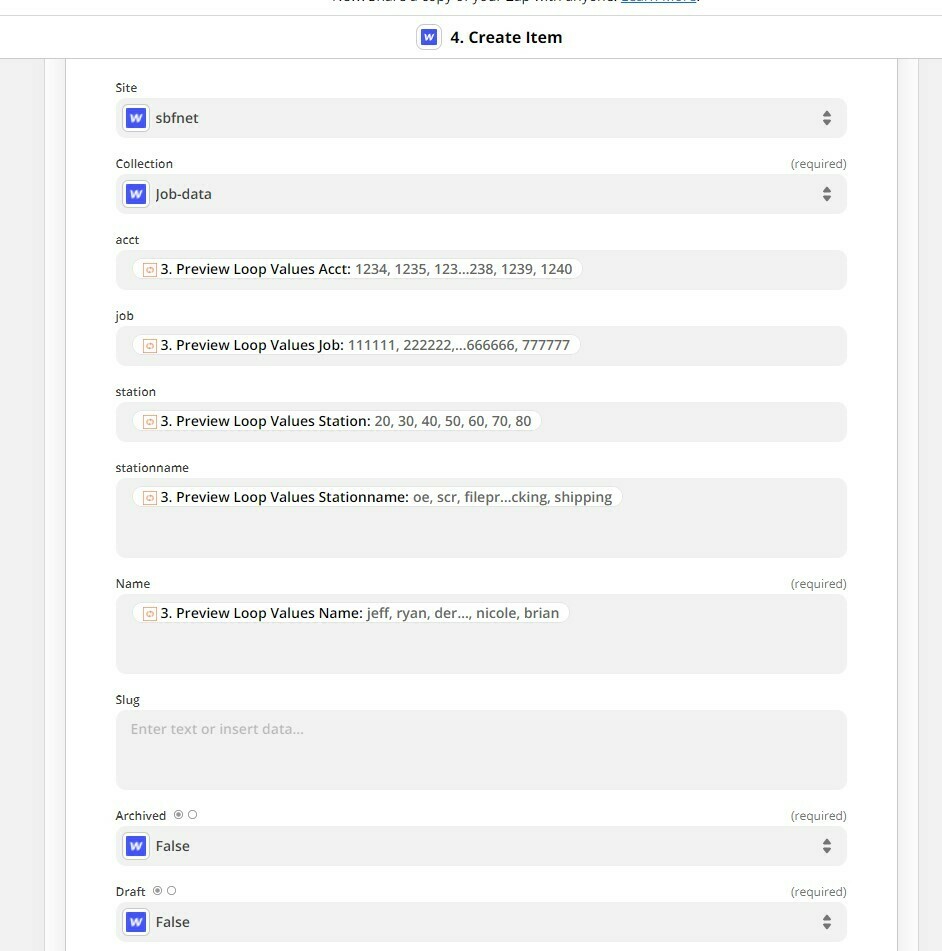
Don’t use the preview_loop_values field from the loop test in your Zap.
It is for preview purposes only and doesn’t appear in actual Zap runs.


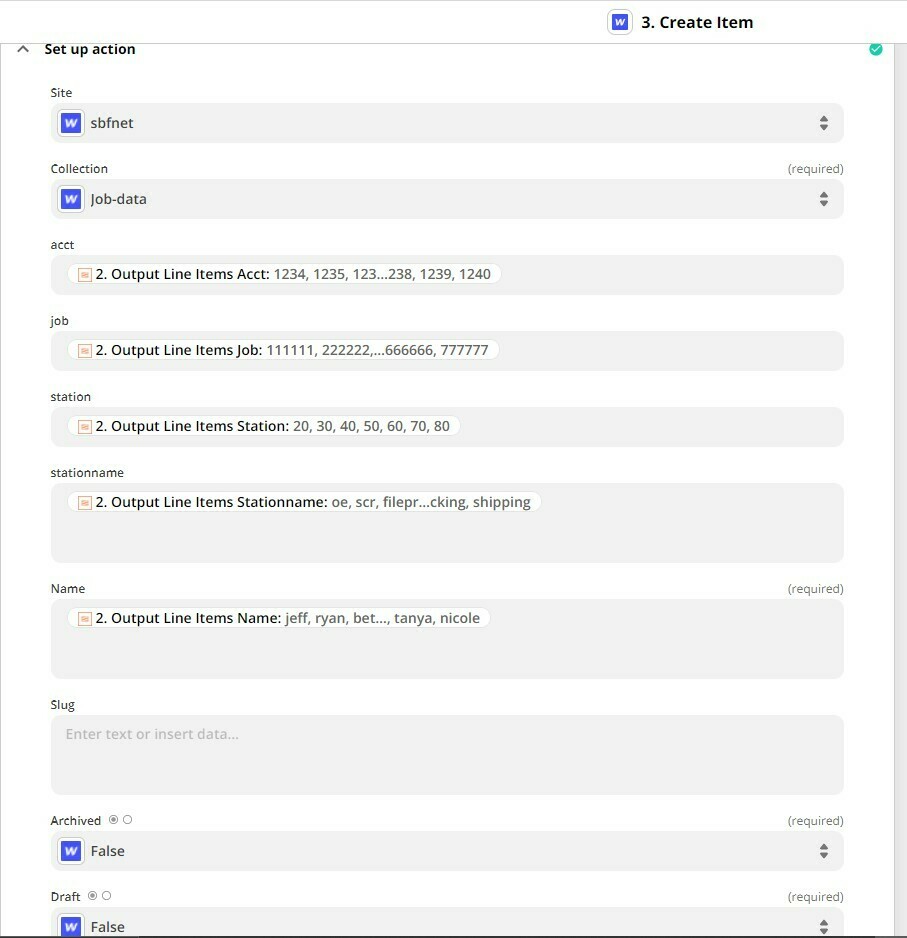
You need to map different output variables from the Looping step.

The mapped variable should only have 1 value.


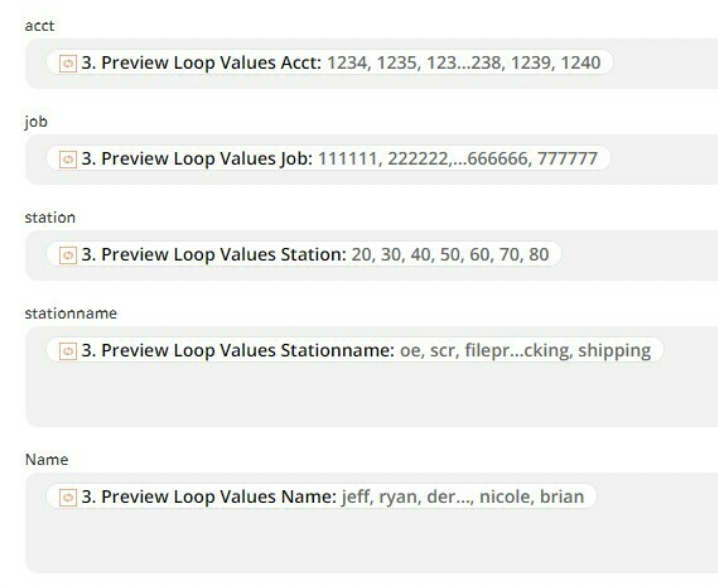
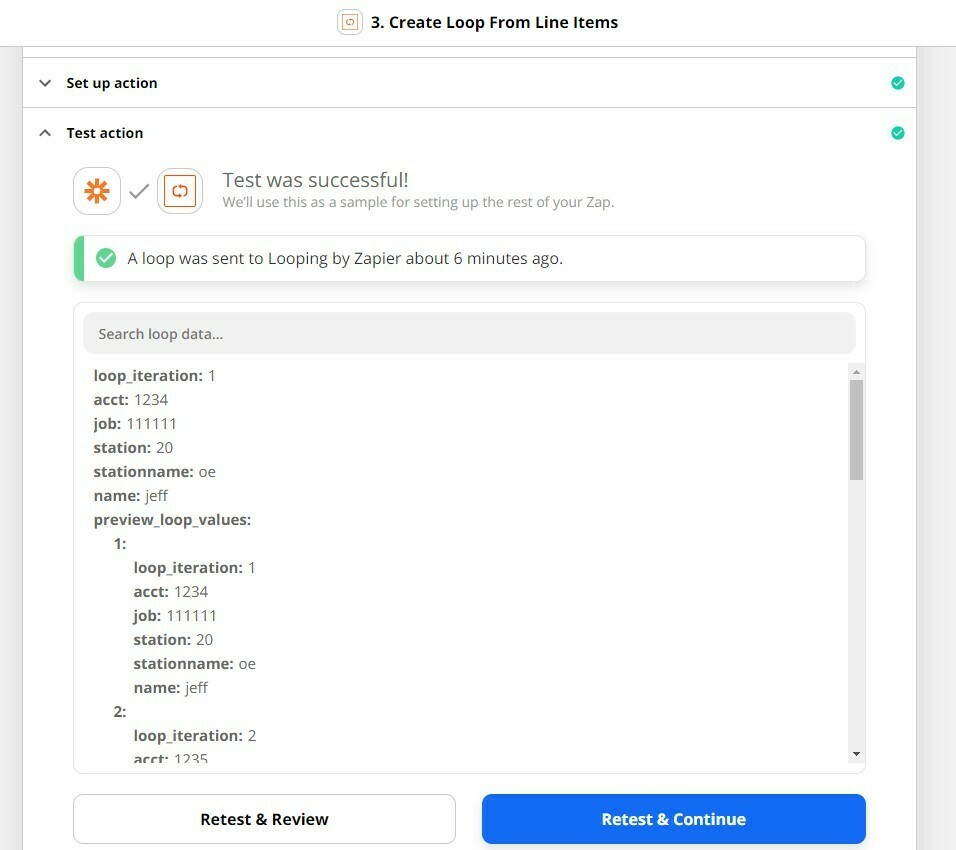
Thanks for the quick response Troy. I am using Parser. I set up the loop and it seems to be working fine. Still can’t get the info sent over to Webflow. From what I have read the items need to be separated by semicolons. I don’t see an option to change this anywhere. Below is what I have set up. Maybe I am missing something?


Hi @Jfff 

Good question.

What email app are you using? (e.g. Gmail)


Try using the Looping app to handle the line items: https://zapier.com/apps/looping/integrations


If using Zapier Email Parser, try these Zap steps...

  1. Trigger: Parer - New Email
  2. Action: Formatter > Utilities > Import CSV File
  3. Action: Looping - Line Items
  4. Action: Webflow - Create Item / Create Live Item


If using Gmail, try these Zap steps...

  1. Trigger: Gmail - New Attachment
  2. Action: Formatter > Utilities > Import CSV File
  3. Action: Looping - Line Items
  4. Action: Webflow - Create Item / Create Live Item


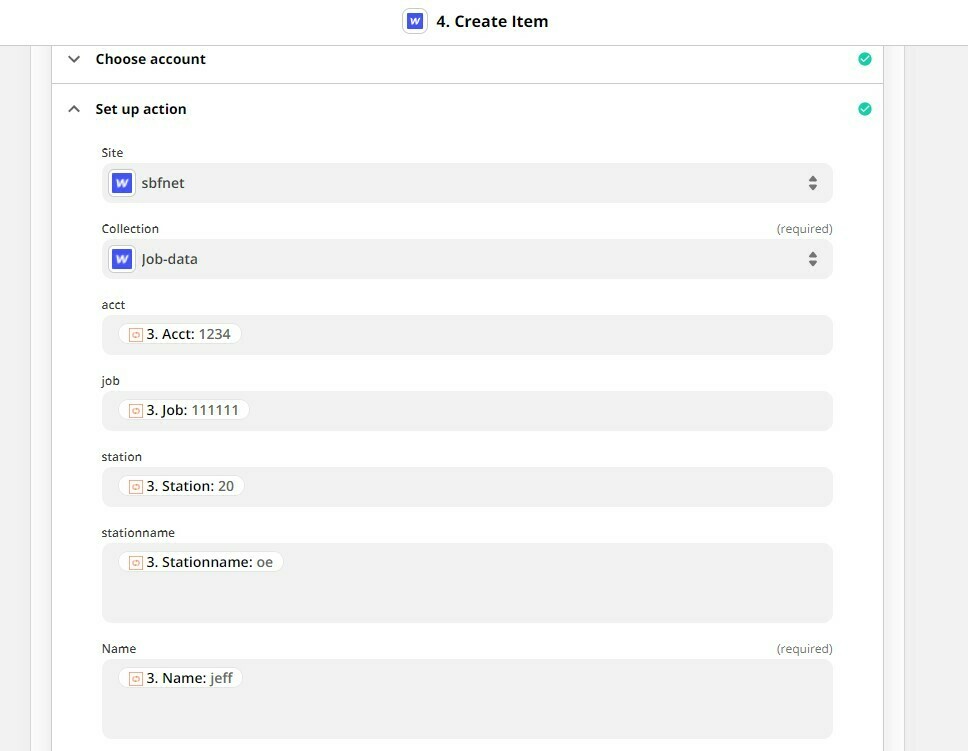
This is what I have set up for my create item in Webflow