Question

Image compression automation increasing the file size instead of reducing it.

  • February 3, 2026
  • 10 replies
  • 31 views

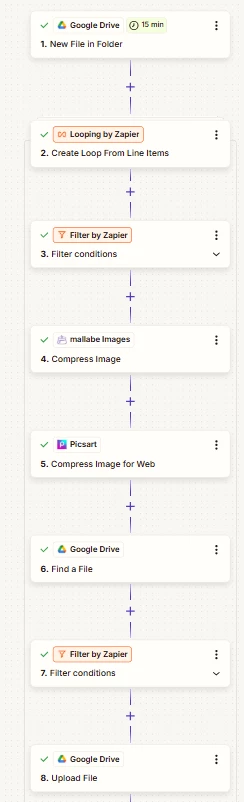
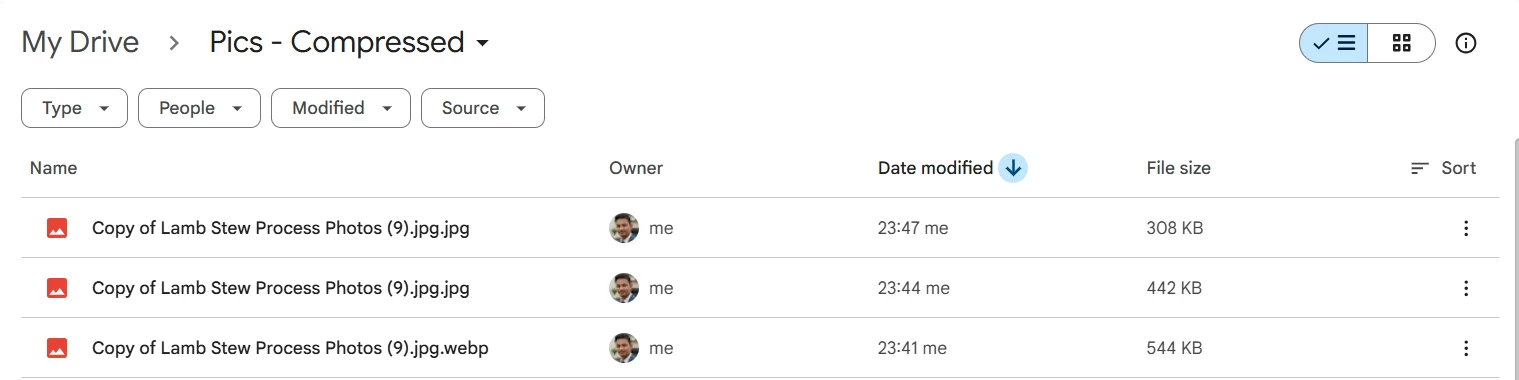
I’ve built an automation to compress images picked from a Raw Images folder and save them to a Compressed Images folder. The Zap works as expected for images around 200–300 KB but increases file size for images above ~300 KB, even at very low quality settings.

Goal:
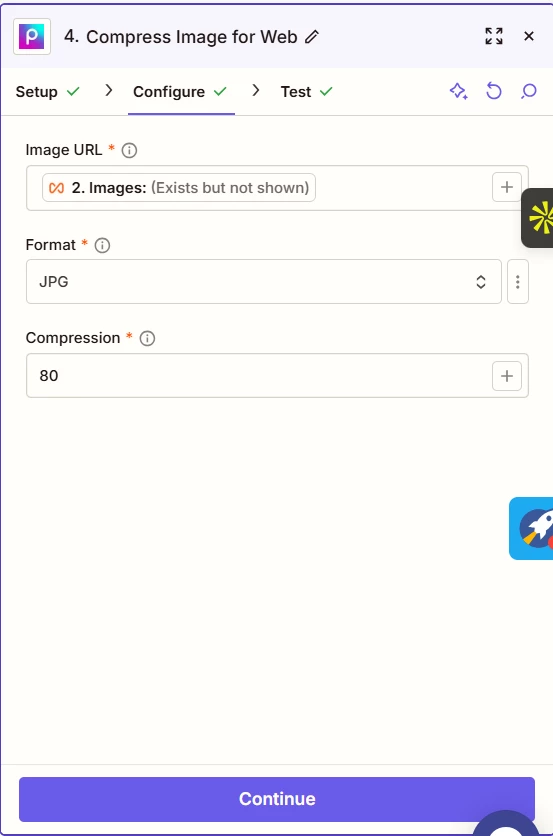
Compress images larger than 200 KB to below 200 KB at ~80% quality.

Expected Behavior:
Compressed image size should always be smaller than original.

Actual Behavior:

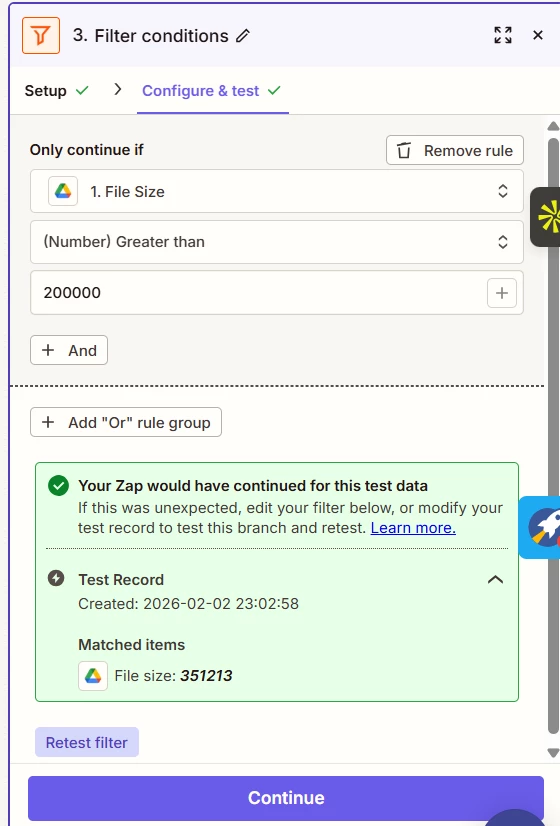
  • Images above ~300 KB increase in size after compression

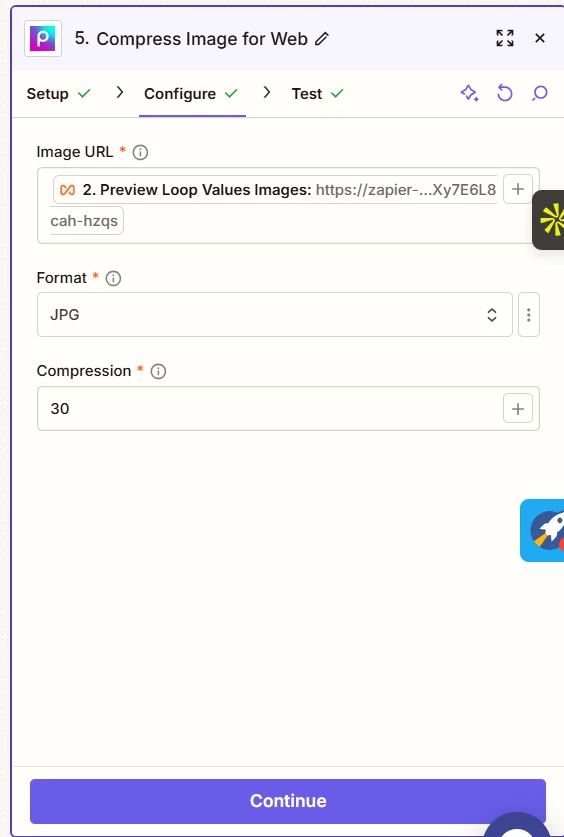
  • Same issue at 80% and 30% quality

  • Happens across multiple compression apps

Apps Used:

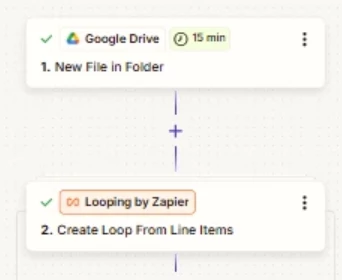
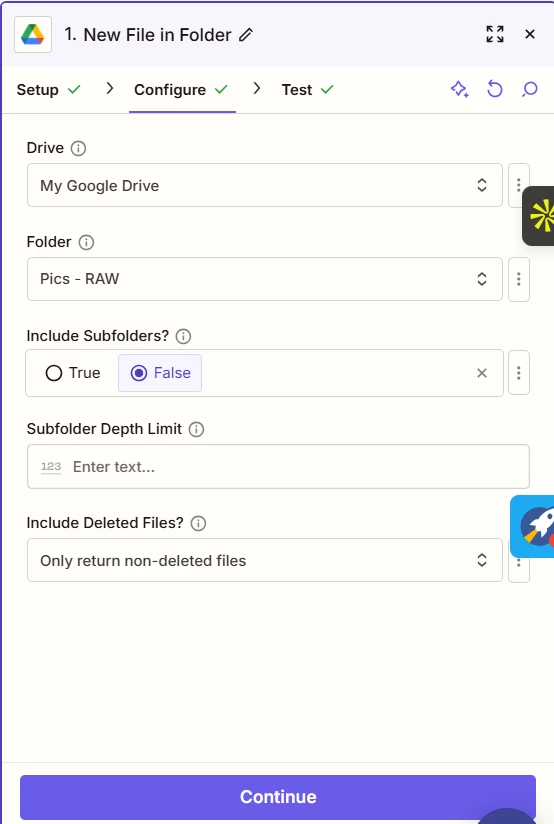
  • Trigger: Google Drive

  • Compression tools tested: Mallabe Images, Picsart

  • Destination: Compressed Images folder

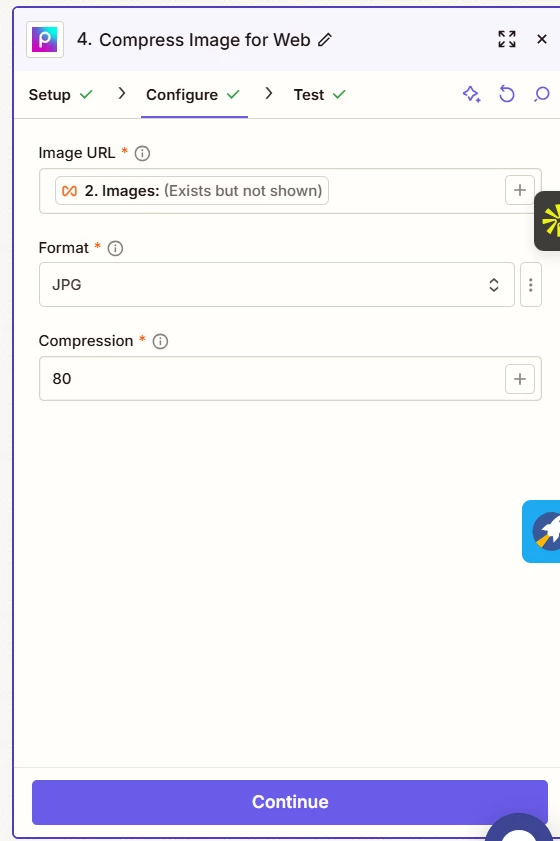
Compression Settings:

  • Quality: 80% (default), tested down to 30%

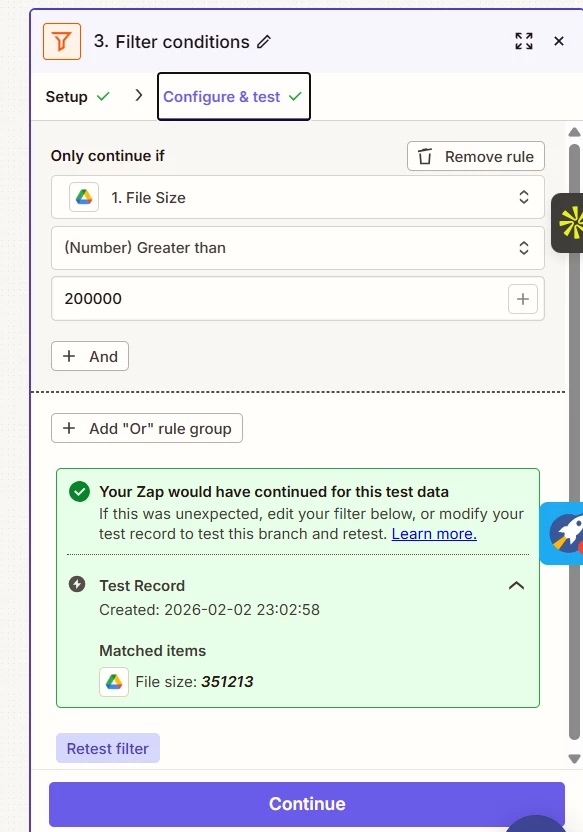
  • Condition: Only process images >200 KB

  • Output target: <200 KB

What I’ve Tried:

  • Multiple compression tools

  • Lower quality levels

  • File size filtering

  • Verified source file sizes

Question:
Why does image compression increase file size for larger images in Zapier, and is there a recommended way to reliably compress images below a fixed size threshold?


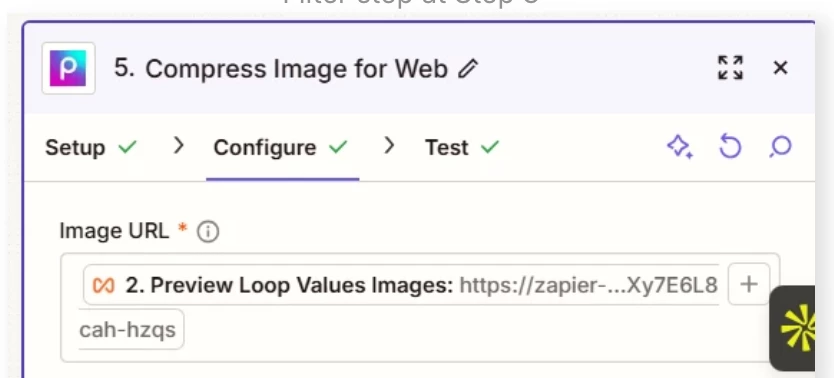
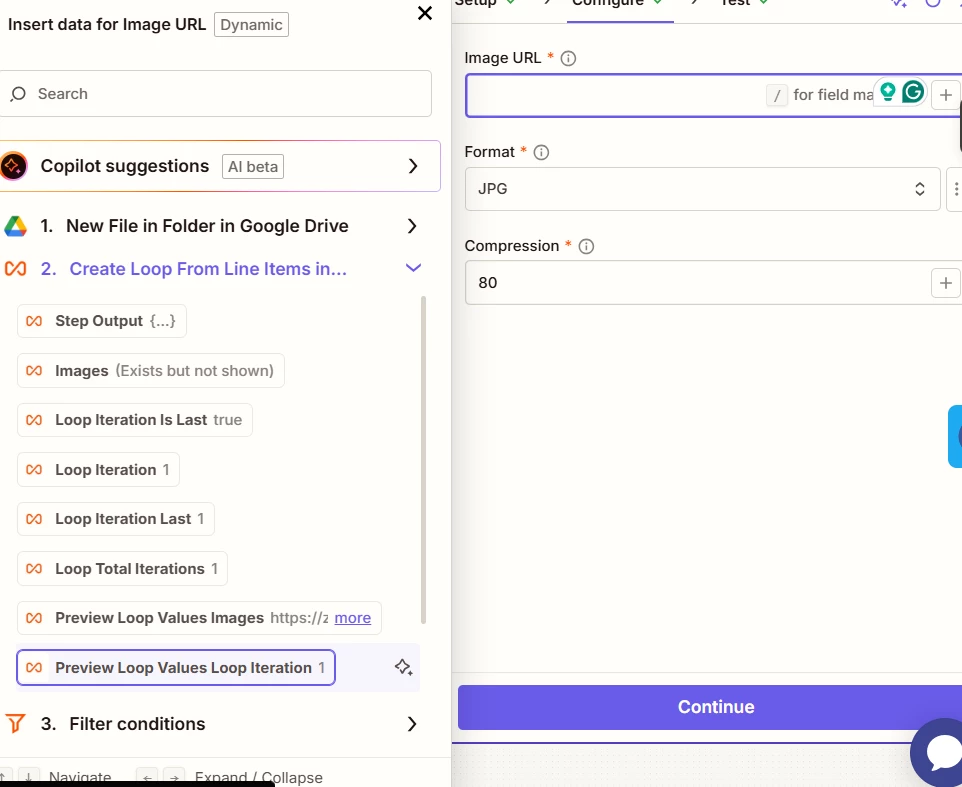
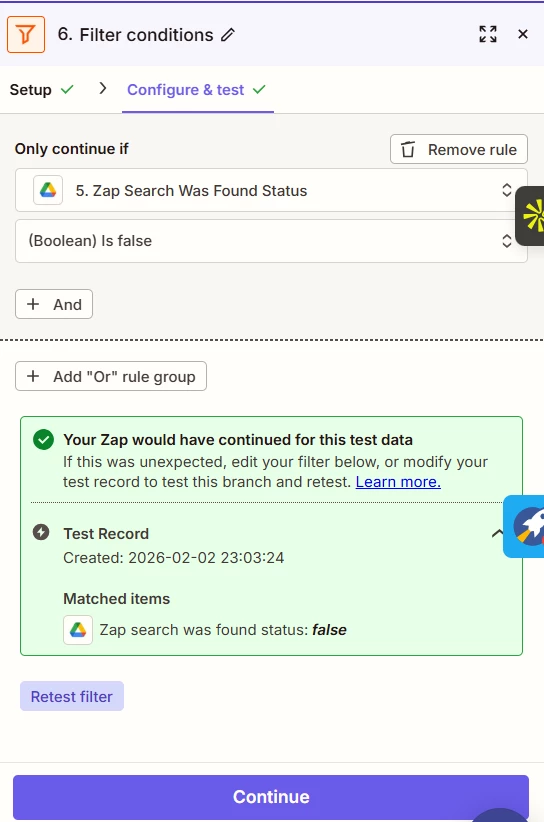
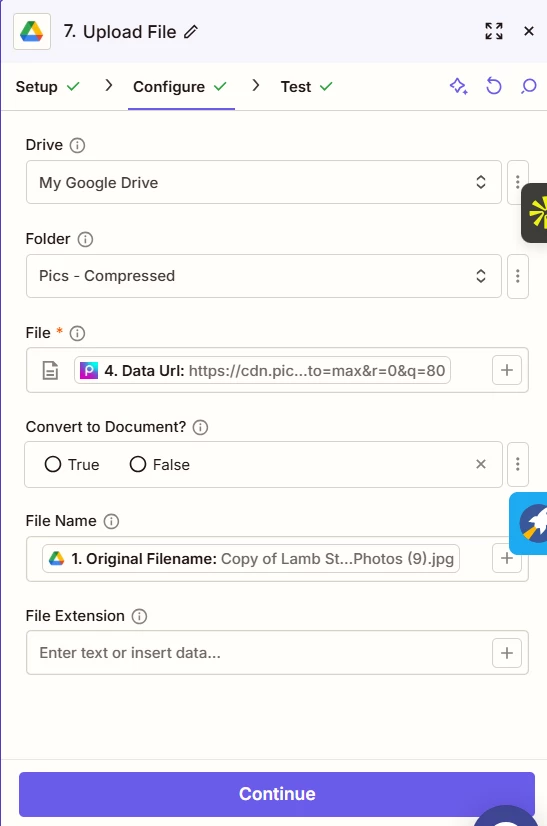
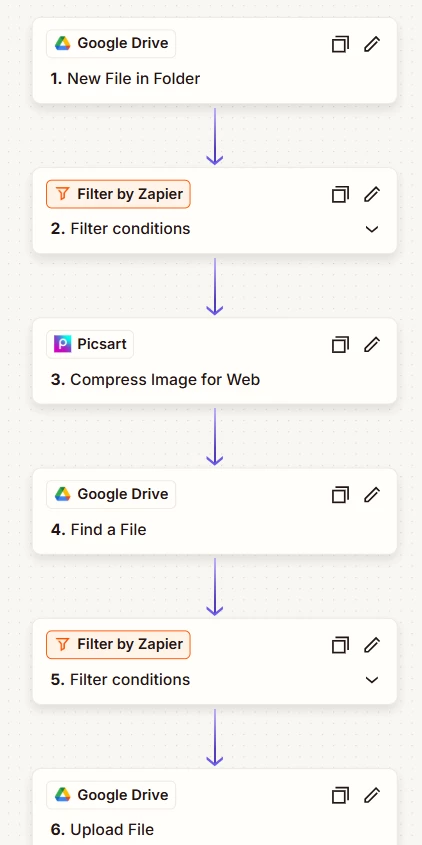
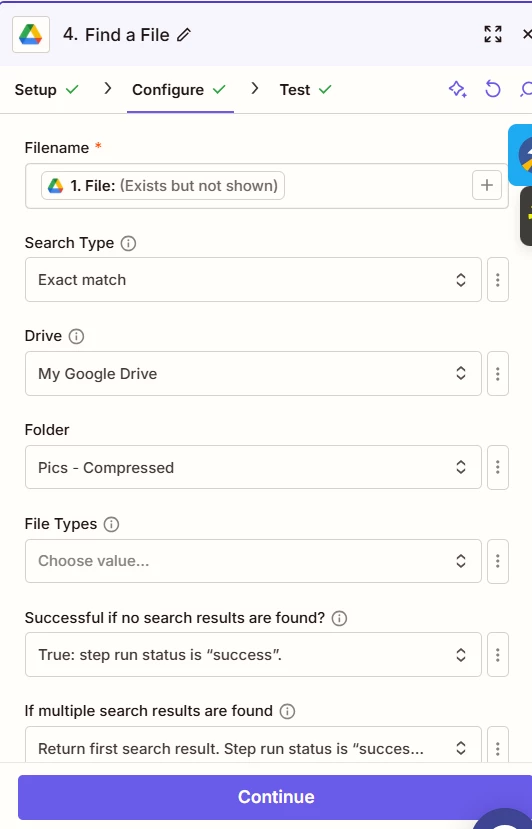
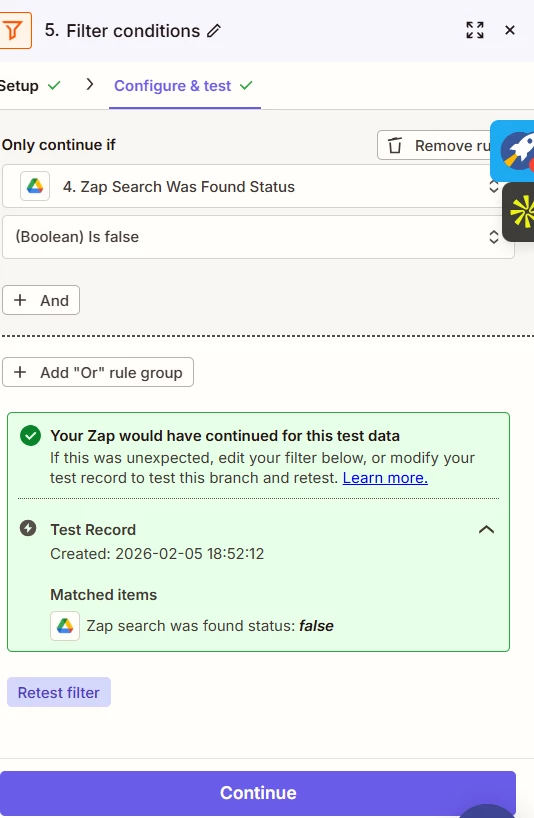
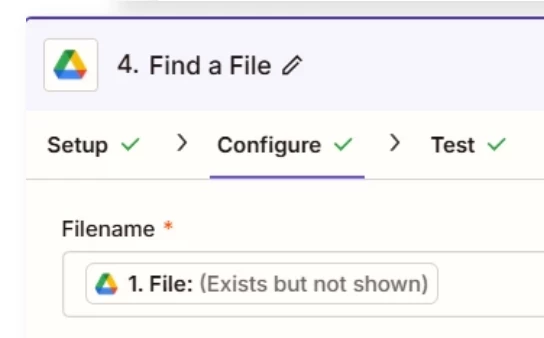
I’ve attached screenshots showing original vs compressed file sizes and also a screenshot of the ZAP.

ZAP
Filter step at Step 3
Compression at 30 I have tried 80 before
Original PIC Copy of Lamb Stew Process Photos (9) - 343 Kb
Compressed to 30% - 308 Kb
Compressed at 80% - 442 kb and 544 kb


10 replies

Troy Tessalone
Zapier Orchestrator & Solution Partner
Forum|alt.badge.img+14
  • Zapier Orchestrator & Solution Partner
  • February 3, 2026

Hi ​@AbhiSood 

You are using the wrong Looping variable in Zap step 5.

Do NOT use variables with “Preview”.

Help links for using Looping in Zaps: https://zapier.com/apps/looping/integrations#help


When you test a loop action, the test output includes a preview_loop_values field that shows all your loop values combined together. This field is for preview purposes only—it helps you verify your loop is set up correctly by displaying all the values that will run in each loop iteration.

Do not map preview_loop_values to fields in subsequent steps. This field is not available when your Zap runs live, which means your Zap will fail or produce unexpected results.

Common symptoms if you accidentally use preview_loop_values:

  • All data appears in a single row instead of creating multiple rows
  • Your Zap creates duplicate or concatenated data
  • Fields appear empty when the Zap runs live

What to use instead: Map the individual field names you defined in your loop configuration. For example, if you named your loop value "emails", use the emails field from your loop step—not preview_loop_values.


  • Author
  • New
  • February 4, 2026

Hi ​@Troy Tessalone Thanks for your feedback. I used images from the looping step in my compression step and still the compression increased the files size (screenshots attached). Any other reason why this could be happening?

Do you know of any other tool which can be integrated with zapier to built this compression automation.


Troy Tessalone
Zapier Orchestrator & Solution Partner
Forum|alt.badge.img+14
  • Zapier Orchestrator & Solution Partner
  • February 4, 2026

@AbhiSood 

If the Zap trigger is “GDrive - New File in Folder”, which returns 1 file, then why do you need “Looping - Create Loop from Line Items” as Zap step 2, since there won’t be multiple files unless you are trying to use file variations returned from GDrive.


For us to have more context, post screenshots showing how your Zap steps are configured in the CONFIGURE tab while in EDIT mode with the field mappings visible, as the issue may be related to how the Looping step is configured.


  • Author
  • New
  • February 4, 2026

Hi ​@Troy Tessalone I upload multiple image files and want the automation to run for file sizes only above 200 kb. I Have added “Looping - Create Loop from Line Items” as step 2 to keep looking for more such files and not halt at first instance. Screenshots below of each step configuration.


​​​​​


Troy Tessalone
Zapier Orchestrator & Solution Partner
Forum|alt.badge.img+14
  • Zapier Orchestrator & Solution Partner
  • February 4, 2026

@AbhiSood 

OBSERVATION

The file size may get larger than the original if you are changing file types. (e.g. PNG to JPG)


FEEDBACK

Zap will have a separate Zap Run for each new file in the GDrive Folder.

e.g. 5 new files in the folder results in 5 Zap Runs in the Zap Run history: https://zapier.com/app/history/

Therefore, you do not need to use Looping as it will always only be 1 loop iteration, which is unnecessary.

That means the Filter step becomes Zap step 2.


There was no screenshot for Zap step 5 action: GDrive - Find File.

But, I do not think you will need that Zap step.


STEPS

  1. Trigger: GDrive - New File in Folder
  2. Action: Filter
    1. Check for file size
    2. Check for file type (image)
  3. Action: [APP] - [EVENT]
    1. One of the apps that compresses the image file
  4. Action: GDrive - Upload File


  • Author
  • New
  • February 5, 2026

Hi ​@Troy Tessalone Thanks for your inputs. I have removed the looping step. The automation increased the file size from 253 kb to 327 kb on a live run, at 80% compression, which should ideally reduce the file size. File types were not changed. Input and output formats both were JPG. Screenshot of Zap below. I have also added the screenshot of Step 4 and Step 5 which are looking for existing files in the output folder with the same name and the zap continues only if no such file is present.


Troy Tessalone
Zapier Orchestrator & Solution Partner
Forum|alt.badge.img+14
  • Zapier Orchestrator & Solution Partner
  • February 5, 2026

@AbhiSood 

For Zap step 4, you have a file object mapped to the Filename field, which is the wrong variable to have mapped, so that will always evaluate to false.

See screenshot below.


Troy Tessalone
Zapier Orchestrator & Solution Partner
Forum|alt.badge.img+14
  • Zapier Orchestrator & Solution Partner
  • February 5, 2026

@AbhiSood 

You’ll want to use these Zap steps in this order to optimize the Zap Run Task usage.


STEPS

  1. Trigger: GDrive - New File in Folder

  2. Action: Filter

    1. Check file size, type, etc.

  3. Action: GDrive - Find a File

  4. Action: Filter

    1. Check if a file has already been compressed

  5. Action: Picsart - Compress Image for Web

  6. Action: GDrive - Upload File


Troy Tessalone
Zapier Orchestrator & Solution Partner
Forum|alt.badge.img+14
  • Zapier Orchestrator & Solution Partner
  • February 5, 2026

@AbhiSood 

We don’t have access to your Zap Runs, so for the Zap Run example you mentioned, you would need to post screenshots showing the DATA IN/OUT for each step for us to have full context.


Troy Tessalone
Zapier Orchestrator & Solution Partner
Forum|alt.badge.img+14
  • Zapier Orchestrator & Solution Partner
  • February 5, 2026

@AbhiSood 

Feedback about the compression size increasing…


If an “80% compression” step increases a JPG from 253 KB to 327 KB, it is almost always due to how the automation tool is re-encoding the image.

The most common causes are below.

1) “80%” Usually Means Quality, Not Size

Most automation tools interpret “80% compression” as:

Save at 80% JPEG quality

Not “reduce file size by 80%.”

If the original image was already saved at lower quality (for example, 60%–70%), re-saving it at 80% will increase the file size.

Result:
Original: Highly compressed
Output: Higher quality → Larger file

2) Re-Encoding With Different JPEG Settings

When the image passes through a compression step, it is fully decoded and re-encoded.

Different encoders use different defaults for:

  • Chroma subsampling (4:2:0 vs 4:4:4)

  • Quantization tables

  • Progressive vs baseline JPEG

  • Huffman tables

  • Metadata handling

If the tool uses higher-quality defaults than the source file, size goes up even if “compression” is enabled.

3) Metadata Being Added Back In

Some tools re-inject metadata on export:

  • EXIF

  • ICC color profile

  • Orientation data

  • Tool-specific tags

If the original file had stripped metadata and the new file restores it, that can easily add 20 KB to 80 KB.

This alone can explain your increase.

4) Color Profile Expansion

Some compressors normalize color profiles.

Example:
Original: No profile or sRGB stripped
Output: Embedded sRGB ICC profile (10 KB to 30 KB)

That increases size without changing pixels.

5) No Resizing = Limited Compression Headroom

If:

  • Dimensions stay the same

  • Quality is already low

  • No downscaling

Then there is very little “room” to reduce size.

Re-encoding at higher quality → size increase.

6) The Tool May Be Optimizing for Visual Quality

Many automation platforms prioritize:

“Minimum acceptable visual quality”

over:

“Minimum possible file size”

So they may ignore aggressive compression and default to safer settings.

Result:
Compression step ≠ aggressive optimization

7) Original File Was Already Optimized

If the original JPG was produced by:

  • ImageOptim

  • TinyJPG

  • Squoosh

  • Photoshop “Save for Web”

It may already be near-optimal.

Re-processing it with a generic encoder usually makes it worse.

8) Loop Removal Did Not Affect This Behavior

Removing the loop only removed duplication.

It does not change how the encoder works.

So your size increase is independent of looping.

9) Possible Internal Format Conversion (Hidden)

Some tools silently convert internally:

JPG → PNG → JPG

Or

JPG → bitmap → JPG

This loses original compression efficiencies and inflates size.

Even if input/output say “JPG.”

How to Verify the Cause (Fast Tests)

Test 1: Check Metadata

Download both files and inspect:

  • Original size vs new

  • EXIF / ICC presence

If new has more metadata → that’s your answer.

Test 2: Compare Dimensions

Confirm width/height did not change.

If dimensions increased even slightly, size will rise.

Test 3: Try Lower Quality

Set quality to:

60% or 50%

If size finally drops, original was lower-quality than 80%.

Test 4: Run Through a Real Optimizer

Upload both to:

  • TinyJPG

  • Squoosh

  • ImageOptim

If they shrink both significantly, your automation tool is not doing true optimization.

Best Practice for Automations (If Size Matters)

If your goal is guaranteed reduction:

Option A: Force Lower Quality

Set quality ≤ 60%

Most JPGs only reliably shrink below this.

Option B: Add Resizing

Downscale by even 10% to 20%.

Example:
4000px → 3200px

This guarantees size drop.

Option C: Use Dedicated Optimizer API

Use services like:

  • TinyPNG API

  • Cloudinary

  • Imgix

  • ShortPixel

Instead of generic “compress” steps.

They use advanced quantization and mozjpeg-style optimizers.

Option D: Strip Metadata

If supported, enable:

“Remove metadata / EXIF / profiles”

This alone can save 10%–25%.

Most Likely Explanation in Your Case

Given:

  • JPG → JPG

  • 253 KB → 327 KB

  • “80% compression”

  • No resizing

  • No looping

The most likely causes are:

  1. Original JPG was saved below 80% quality

  2. Tool re-encoded at higher quality

  3. Metadata / ICC was added

In combination.

That explains the increase perfectly.

Bottom Line

Your automation is not “compressing” in the sense of optimizing for smallest size.

It is re-exporting at 80% quality with added metadata.

That can easily increase file size.