

Last updated Nov 4, 2024: Updated images.
The lookup table is one of my favourite tools in the Zapier toolbox. With this function, we can easily take information that comes to us from one app and transform it into corresponding information that we can send to another app.
For example, let’s say you have an e-commerce store and you want to add each purchase to your accounting software. The problem you’re running into is that the SKUs you’ve set up in your store don’t match the product IDs in your accounting app. How do you make sure your purchases get recorded correctly?
This is where a lookup table comes in handy. By creating a table that matches each SKU with its corresponding product ID, we can send each purchase on to your accounting files without having to worry about missing information.
Think of the lookup table like the directory at your doctor’s office. You know your doctor’s name, but you don’t know which office they’re in. You head to the information desk and give your doctor’s name to the person there. They act like a lookup table, find your doctor, and give you their office number. Once you have that, you can head on to your appointment.
The anatomy of the lookup table
 cla
cla
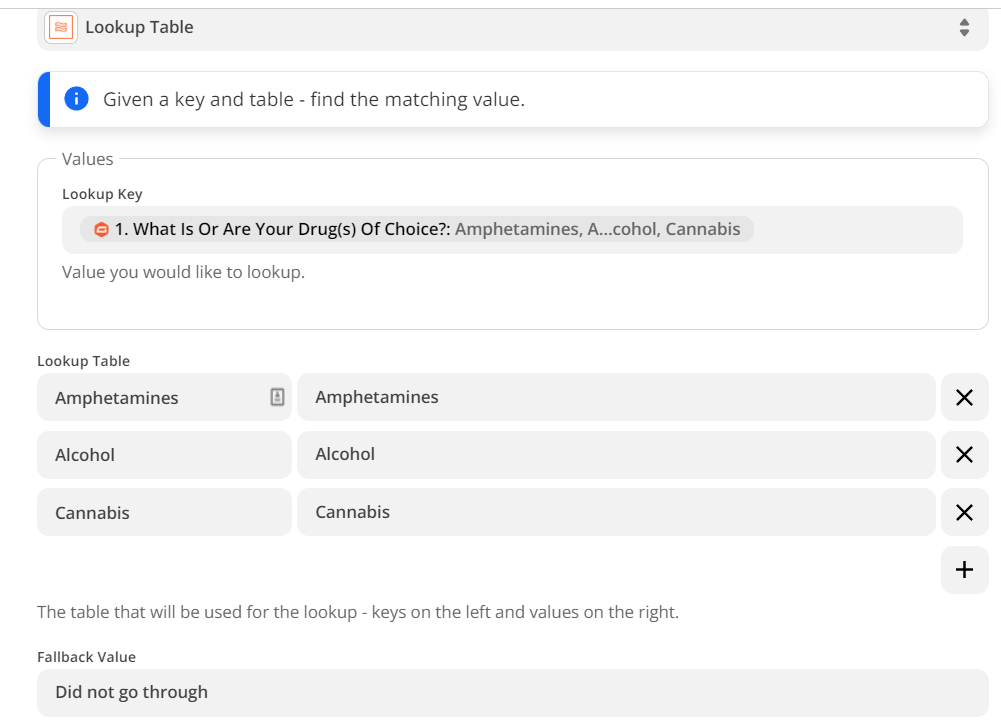
There are four pieces that make up a lookup table.
-
The Lookup key. This is the information we get from your previous step — usually, but not always, your trigger step.
-
The Key (left column) can be one or many rows of options that could come in the Lookup Key step. When this step runs, we’ll match the information in the lookup key with the options in this list. Please note that the information in the lookup key and the information in the key column must match exactly.
-
The Value (right column) is the corresponding information for each option in the key column. When we match one of those options, the table then outputs the information in the value column.
-
The Fallback Value allows you to add default information should none of the listed options match.
Using the Lookup Table
Let’s look at an example workflow. You run a blog, and use Asana as your editorial calendar. You create a task for each potential blog post, and to indicate the author of each post, you assign a member in your Asana organization.
Once the article is ready for publication, you complete the task on your publish list in your Asana project and a Zap posts it on your WordPress site.
But, when the details of that task come from Asana, each assignee has a long ID:

These IDs are unique to Asana, so they wouldn’t work if we tried to find the ID of the author in WordPress, which uses a completely different ID structure:

This is where the lookup table will come in handy. Asana will also supply a name for the assignee which could be used in a search action instead, but for the purposes of this example I’ll explain how to convert the IDs into the relevant ID for the author in wordPress.
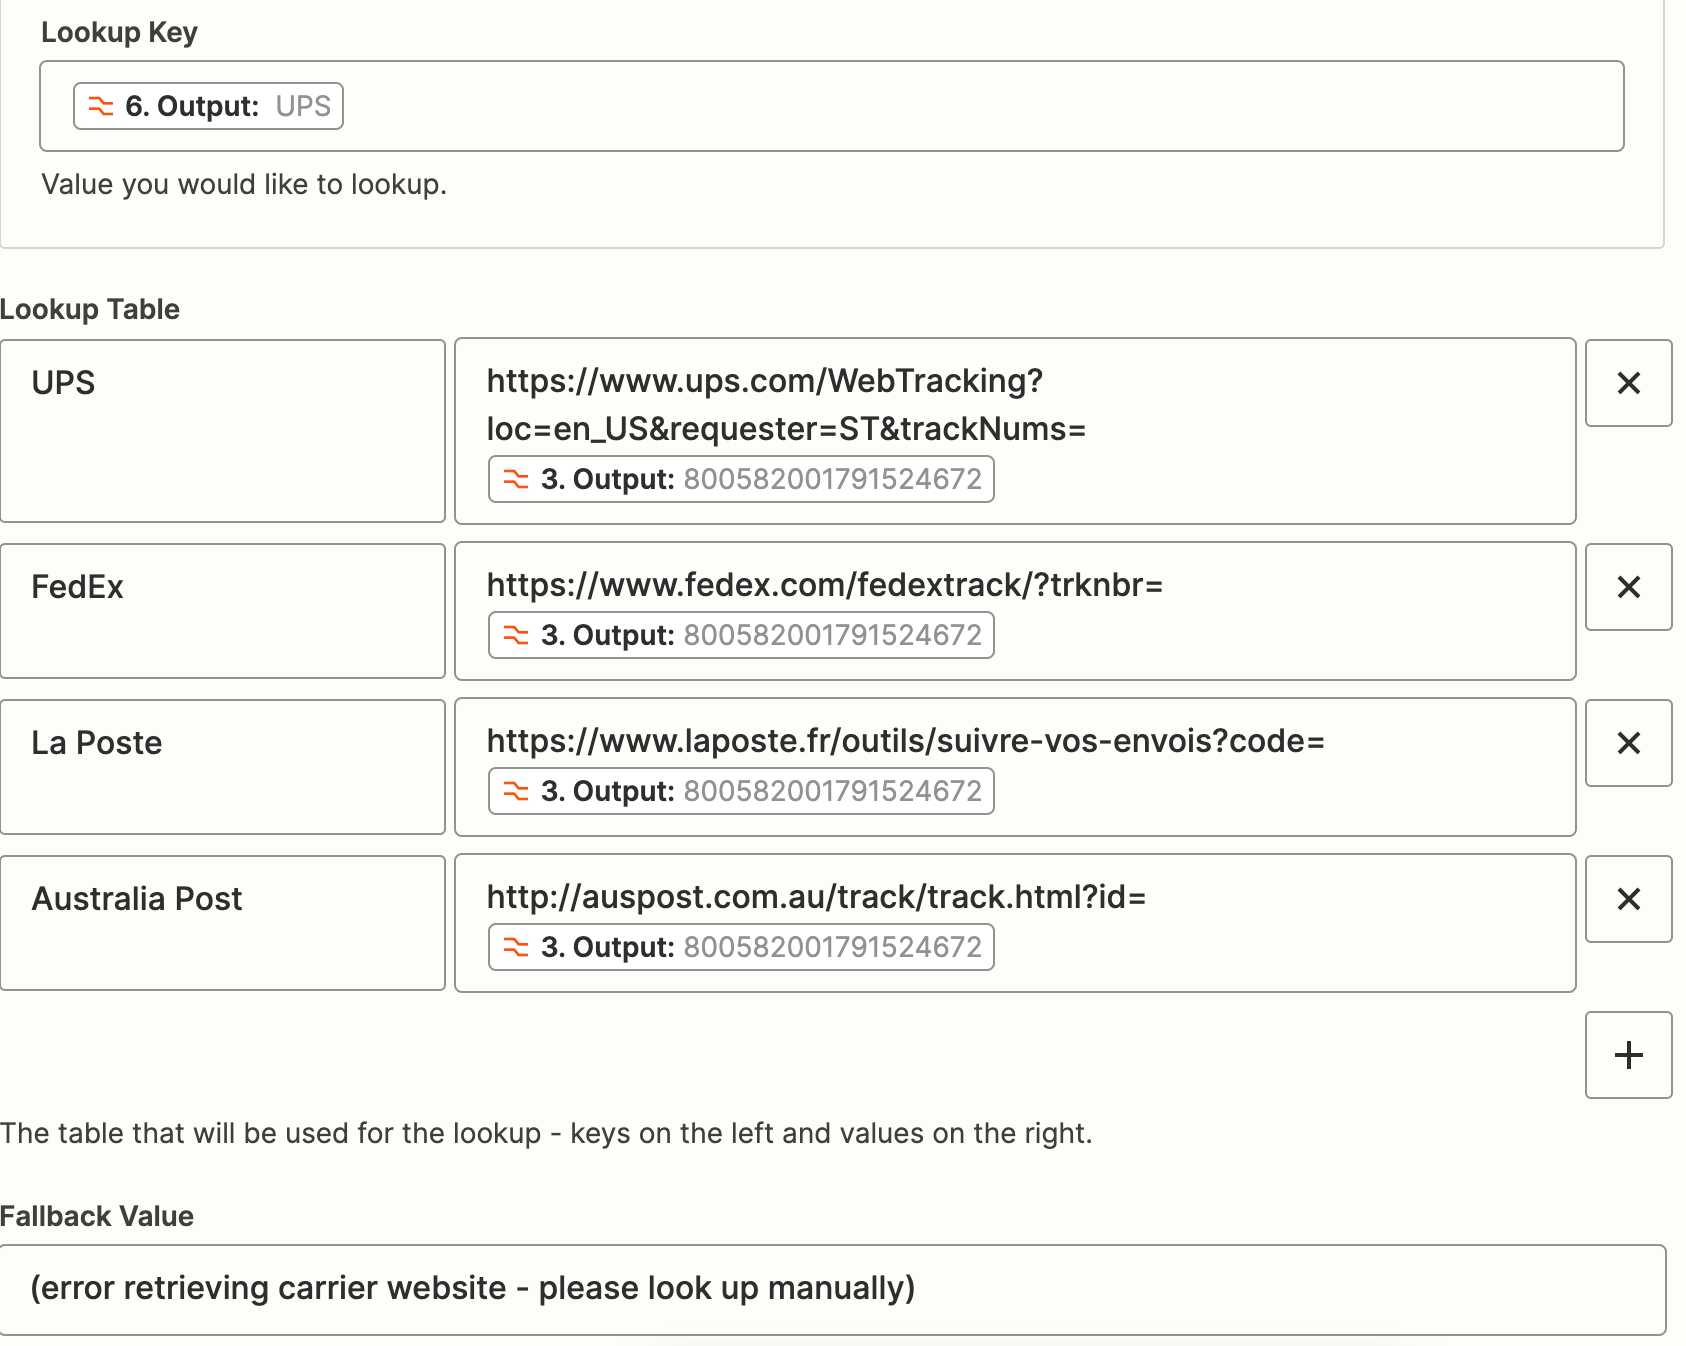
We can match the ID coming from Asana with the ID expected in WordPress:

When the Lookup table runs, it matches the key with the corresponding value and outputs the correct author ID in WordPress:

We can then use the output of the table in the author field in our WordPress step to make sure the correct author is assigned to the post:

Sending multiple items through the lookup table
Let’s make this a bit more complicated. If we take another look at our ecommerce example, what happens when your customers purchase more than one item in your store? This is definitely good for sales, but a bit more complicated when we want to send this through a Zap and on to your accounting software.
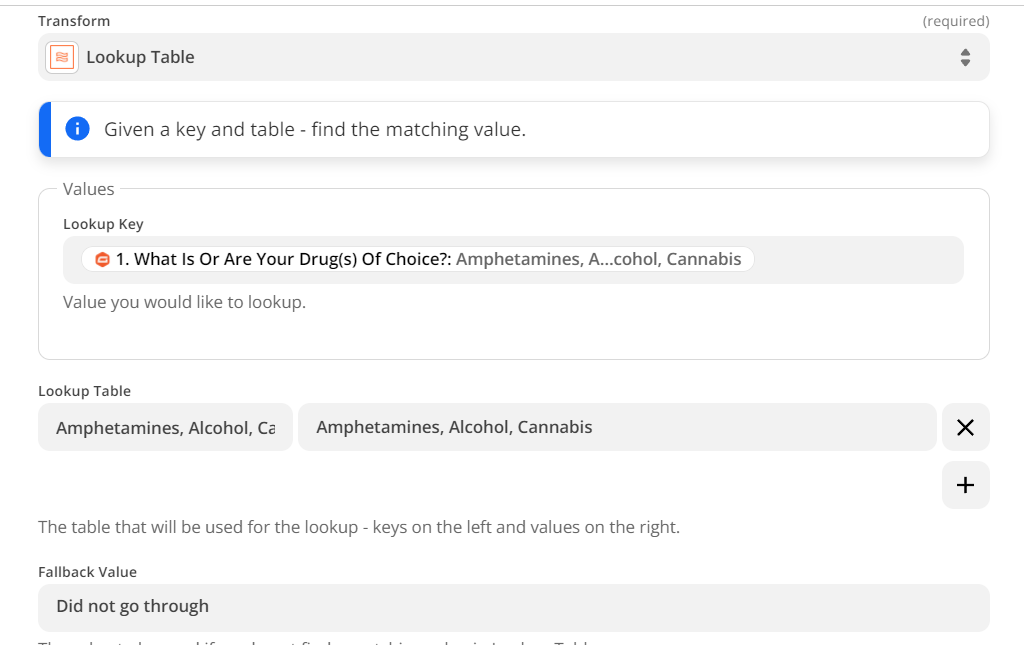
When an order comes through most ecommerce apps, Zapier receives the list of products as a line-item array. So instead of getting one product SKU, we get multiple in one list. Does this mean we need a separate Lookup Table for each product purchased? What if people buy fewer or more products than I added a lookup table step for?
The good news is the lookup table can work with that line-item array! So, no need for multiple steps and multiple tables. Just one that will give us everything.

When the Zap gets to this Formatter step, it will go through each item in that array and match it in the table. Once it’s done, it will create a brand new line-item array with the corresponding information on the table.

Most accounting programs also have line-item support, so when we send that outputted array from the lookup table, you won’t need to add any extra steps, they’ll be able to read it and add each of those items.

This means that all of your information moves through the Zap and on to the right places in the way each app needs it, without a lot of extra work on your part.
More things you can do with the Lookup Table
Matching a selection in a form with a specific tag or list
In this scenario, you have a form for your new leads where you ask them to choose which of your products they’re interested in so you can segment them further in your newsletter service. It would not necessarily make sense to ask them to choose your segment name, you want them to choose the product. By adding in a lookup table, you can match the chosen product with your segment name, making sure they’re added to the correct place in your list.
Delay for a specific number of days based on the day the Zap runs
Let’s say you want to send a message two business days after the Zap triggers. While you can add a Delay step to delay for two days, this will only work well if the Zap runs on Monday, Tuesday, or Wednesday. The rest of the week, adding two days will have the Zap completing on the weekend. With a lookup table you can match the day of the week the Zap starts with the number of days you need to delay for to make sure you get that two-business-day delay.
Outputting different information based on the time of day the Zap runs
To really personalize the email that is sent to your new leads, you want to include a greeting such as good morning, good afternoon, or good evening. With the lookup table, you can set the appropriate greeting to appear depending on the time of day the Zap runs.
Creating an IF/THEN statement
With this option, you can have the lookup table send out different information depending on a result in a previous step. For example, let’s say you create a Zap that sends you a list of the meetings on your calendar for the day. But, if you don’t have any meetings, you want to send a message that your day is clear. With the lookup table, we can run the all clear message when there are no meetings, and then if there’s at least one on the list, send the list by including it in the fallback value field.
Have you used the lookup table in your workflows? Do you have a creative use for it that you’d like to share with us? We’d love to hear it!