Does anyone know if Zaiper supports Update Agent in Zendesk when a new agent is created? I see “Update User in Zendesk” but not agent. When a new agent is created in Zendesk through our SSO integration, I would like to run a Zaiper job to set their alias to “OurCompanyName Support”. This ensures that our agents full name and personal work email is not exposed to the customer when replying to tickets in Zendesk.
We can have our agents set the alias manually during the on-boarding process but I would like to remove this unnecessary step and fix it through automation.
Thanks
Best answer by rly
Hi Zapier Community
After spending sometime with Zapier Support (they were fantastic btw!), we were able to come up with a solution to automatically set an alias in Zendesk when a new user is created. The process was slightly complicated but I am going to outline the steps here. Once you know how to set one attribute on new user creation in Zendesk, you can find many other use cases for this method.
Pre-Requisite
Before you start the process of creating a new Zap, you will need a few things.
URL of your Zendesk Instance
Administrative Privileges in your Zendesk Instance (admin role in Zendesk)
Once you have the Zendesk API token, you need to base64 encode it. (You can read more about why we use Base64 here).
Open Terminal/Command Prompt on your Mac/Windows machine.
Type the following in the prompt echo -n ‘zendesk_email_address/token:api_token’ | base64
In the command above
Where it’s red, replace with the email address associated with your Zendesk account when you login.
Where it’s blue, replace the api token you got from following the Zendesk Help Resource linked earlier.
You should get a long string of letters and characters that don’t make any sense. Copy this down somewhere because you will need it later to connect Zapier to your Zendesk Instance.
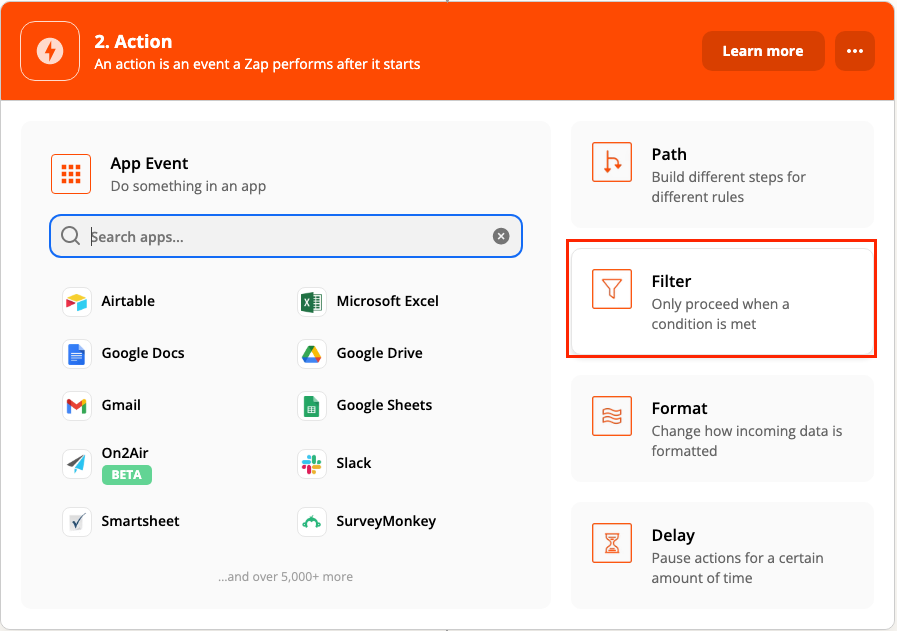
Creating a Zap
Start by creating a new Zap
First step for the Trigger
Search for the app Zendesk and select it.
Under Trigger Event select New User and click Continue
Under Zendesk account, select your Zendesk Instance.
If you have not connected your instance to Zapier yet, select +Connect a new account.
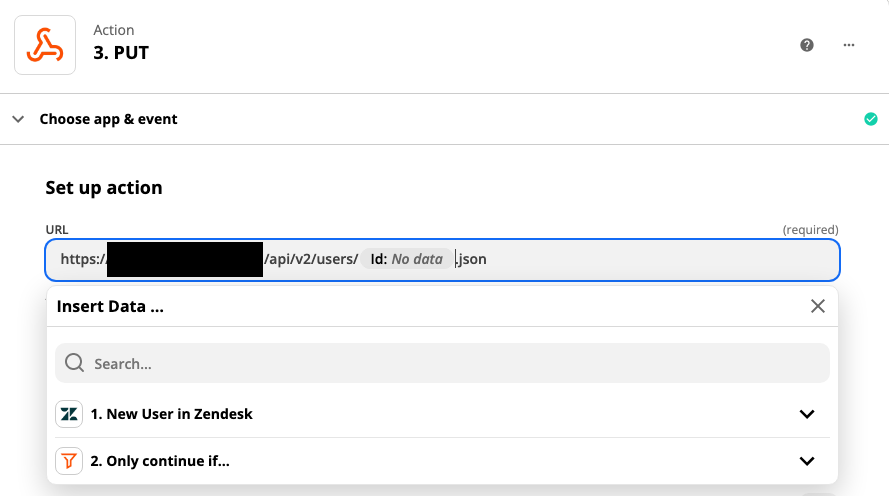
Where it says yourZendeskURL, replace with your Zendesk Instance
Where it says map_user_id, click on that portion of the URL and you should see a drop down in Zapier, choose 1. New User in Zendesk > 1. ID
Under the Data box, enter the following: { "user": { "user": "map_user_id", "alias": "YourCompany Support" } }
Where it says map_user_id, follow similar steps before, choose 1. New User in Zendesk > 1. ID
End result should look something like this.
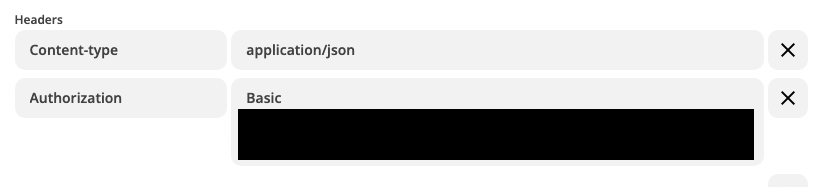
Next under headers set it to the following:
Under the box to the right of Authorization, enter Basic followed by the base64 encoded API key from earlier.
When your done click Continue to proceed to the next step.
Click Test & Review. If everything was setup properly you should get a message that says Test was successful. If you don’t see this message, review the steps again to see where you went wrong.
Click Turn on Zap.
Now when a new user is created in Zendesk, their alias should be set to your company’s name.
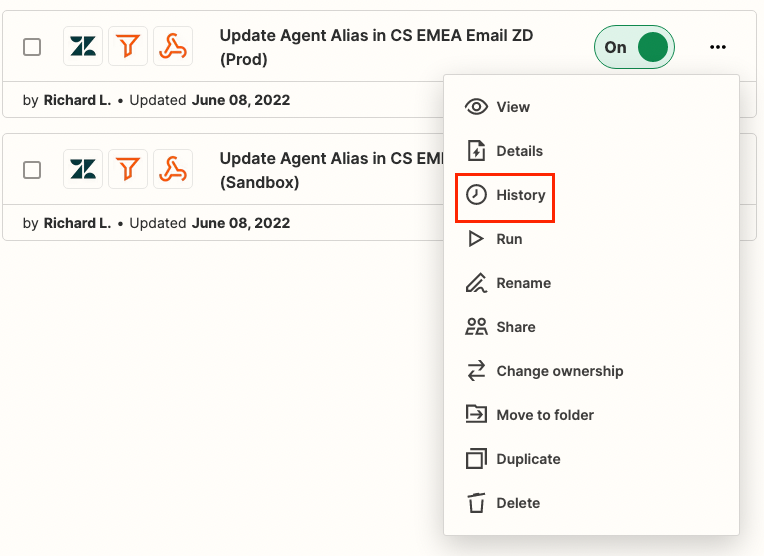
You can review the run job by clicking on the 3 dots > History.
From what I can tell, the job can take a few minutes to run. If you are on-boarding a new set of users and need this to execute faster, you can manually run the Zap to set the alias.
Hope this helps with your use case. Let me know if you have any questions or feedback on the guide.
Richard
This post has been closed for comments. Please create a new post if you need help or have a question about this topic.
Hey there, @rly! Thanks so much for reaching out! As Troy mentioned, “Update Agent” isn’t an available action at the moment. I could totally see how valuable this would be though!
I might recommend reaching out to our friends in support to see about opening up a new feature request for this! This way we can track interest and keep you in the loop if in the event it gets implemented. 🙂
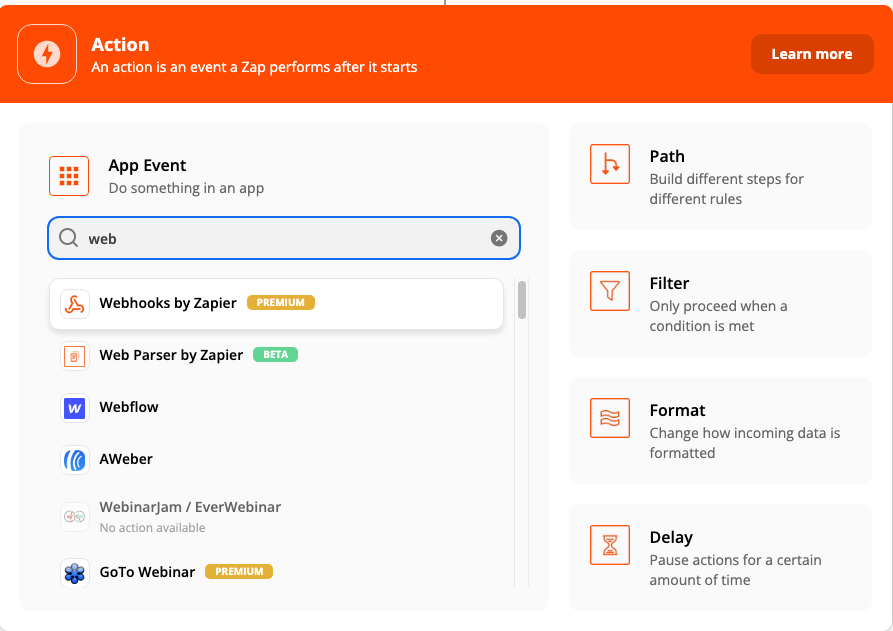
In the meantime, a potential workaround, as ya’ll discovered could be to use the Zendesk API with Webhooks by Zapier.
This is a great suggestion. I just reached out to Zaiper support with the details. Hope they are able to get this feature in place soon as there are likely other people out there who would benefit from such a feature. There is an extensive list of user attributes from Zendesk API documentation that’s not supported through their SSO integration and require coding a solution. It would be great to be able to accomplish this through Zaiper without writing code.
On the Zendesk SSO help center resource, there is a table under the section called Obtaining additional user data and if you compare it to the list of user attributes, it’s much shorter. Not sure why the SSO supported attributes is much smaller but I raised this issue with Zendesk as well.
After spending sometime with Zapier Support (they were fantastic btw!), we were able to come up with a solution to automatically set an alias in Zendesk when a new user is created. The process was slightly complicated but I am going to outline the steps here. Once you know how to set one attribute on new user creation in Zendesk, you can find many other use cases for this method.
Pre-Requisite
Before you start the process of creating a new Zap, you will need a few things.
URL of your Zendesk Instance
Administrative Privileges in your Zendesk Instance (admin role in Zendesk)
Once you have the Zendesk API token, you need to base64 encode it. (You can read more about why we use Base64 here).
Open Terminal/Command Prompt on your Mac/Windows machine.
Type the following in the prompt echo -n ‘zendesk_email_address/token:api_token’ | base64
In the command above
Where it’s red, replace with the email address associated with your Zendesk account when you login.
Where it’s blue, replace the api token you got from following the Zendesk Help Resource linked earlier.
You should get a long string of letters and characters that don’t make any sense. Copy this down somewhere because you will need it later to connect Zapier to your Zendesk Instance.
Creating a Zap
Start by creating a new Zap
First step for the Trigger
Search for the app Zendesk and select it.
Under Trigger Event select New User and click Continue
Under Zendesk account, select your Zendesk Instance.
If you have not connected your instance to Zapier yet, select +Connect a new account.
Where it says yourZendeskURL, replace with your Zendesk Instance
Where it says map_user_id, click on that portion of the URL and you should see a drop down in Zapier, choose 1. New User in Zendesk > 1. ID
Under the Data box, enter the following: { "user": { "user": "map_user_id", "alias": "YourCompany Support" } }
Where it says map_user_id, follow similar steps before, choose 1. New User in Zendesk > 1. ID
End result should look something like this.
Next under headers set it to the following:
Under the box to the right of Authorization, enter Basic followed by the base64 encoded API key from earlier.
When your done click Continue to proceed to the next step.
Click Test & Review. If everything was setup properly you should get a message that says Test was successful. If you don’t see this message, review the steps again to see where you went wrong.
Click Turn on Zap.
Now when a new user is created in Zendesk, their alias should be set to your company’s name.
You can review the run job by clicking on the 3 dots > History.
From what I can tell, the job can take a few minutes to run. If you are on-boarding a new set of users and need this to execute faster, you can manually run the Zap to set the alias.
Hope this helps with your use case. Let me know if you have any questions or feedback on the guide.
I’m stoked to hear you and the team were able to combine brain power and come up with this amazing solution.
Thank you so much for sharing your success with the Community and putting together this guide! I know it’s going to prove super valuable for others looking to achieve the same thing. 🥳
Build beyond no-code with the Zapier SDK
Join us on Friday, June 19, 11:30 a.m. ET for a hands-on community build-along where you'll learn the Zapier SDK, follow a live walkthrough, then build your own use case with a Zapier team member in your corner.