I have a file coming from a EDI system daily in the form of a csv file. I want to use it in Power BI Services. This works locally and personally however when I publish the Power BI report online in Power BI Services and attempt to refresh the report that has both SQL and this CSV file I get sync (refresh errors) just for the CSV. So I want to send the file to a SQL Server Database Table daily (once at about 7am) from the MS OneDrive for Business csv file. the file is new every day and always the same name: HCOInv.csv. So does Zapier support this and how difficult is it to setup?
Sync a Onedrive for Business CSV file to Microsoft SQL DB table
Best answer by PaulKortman
The hack basically is a code step that receives the URL (publically accessible) of a CSV and then breaks it into line items (Zapier’s terminology for row by row processing) And then the rest of the zap runs for each row. (so you can add it to a SQL database. )
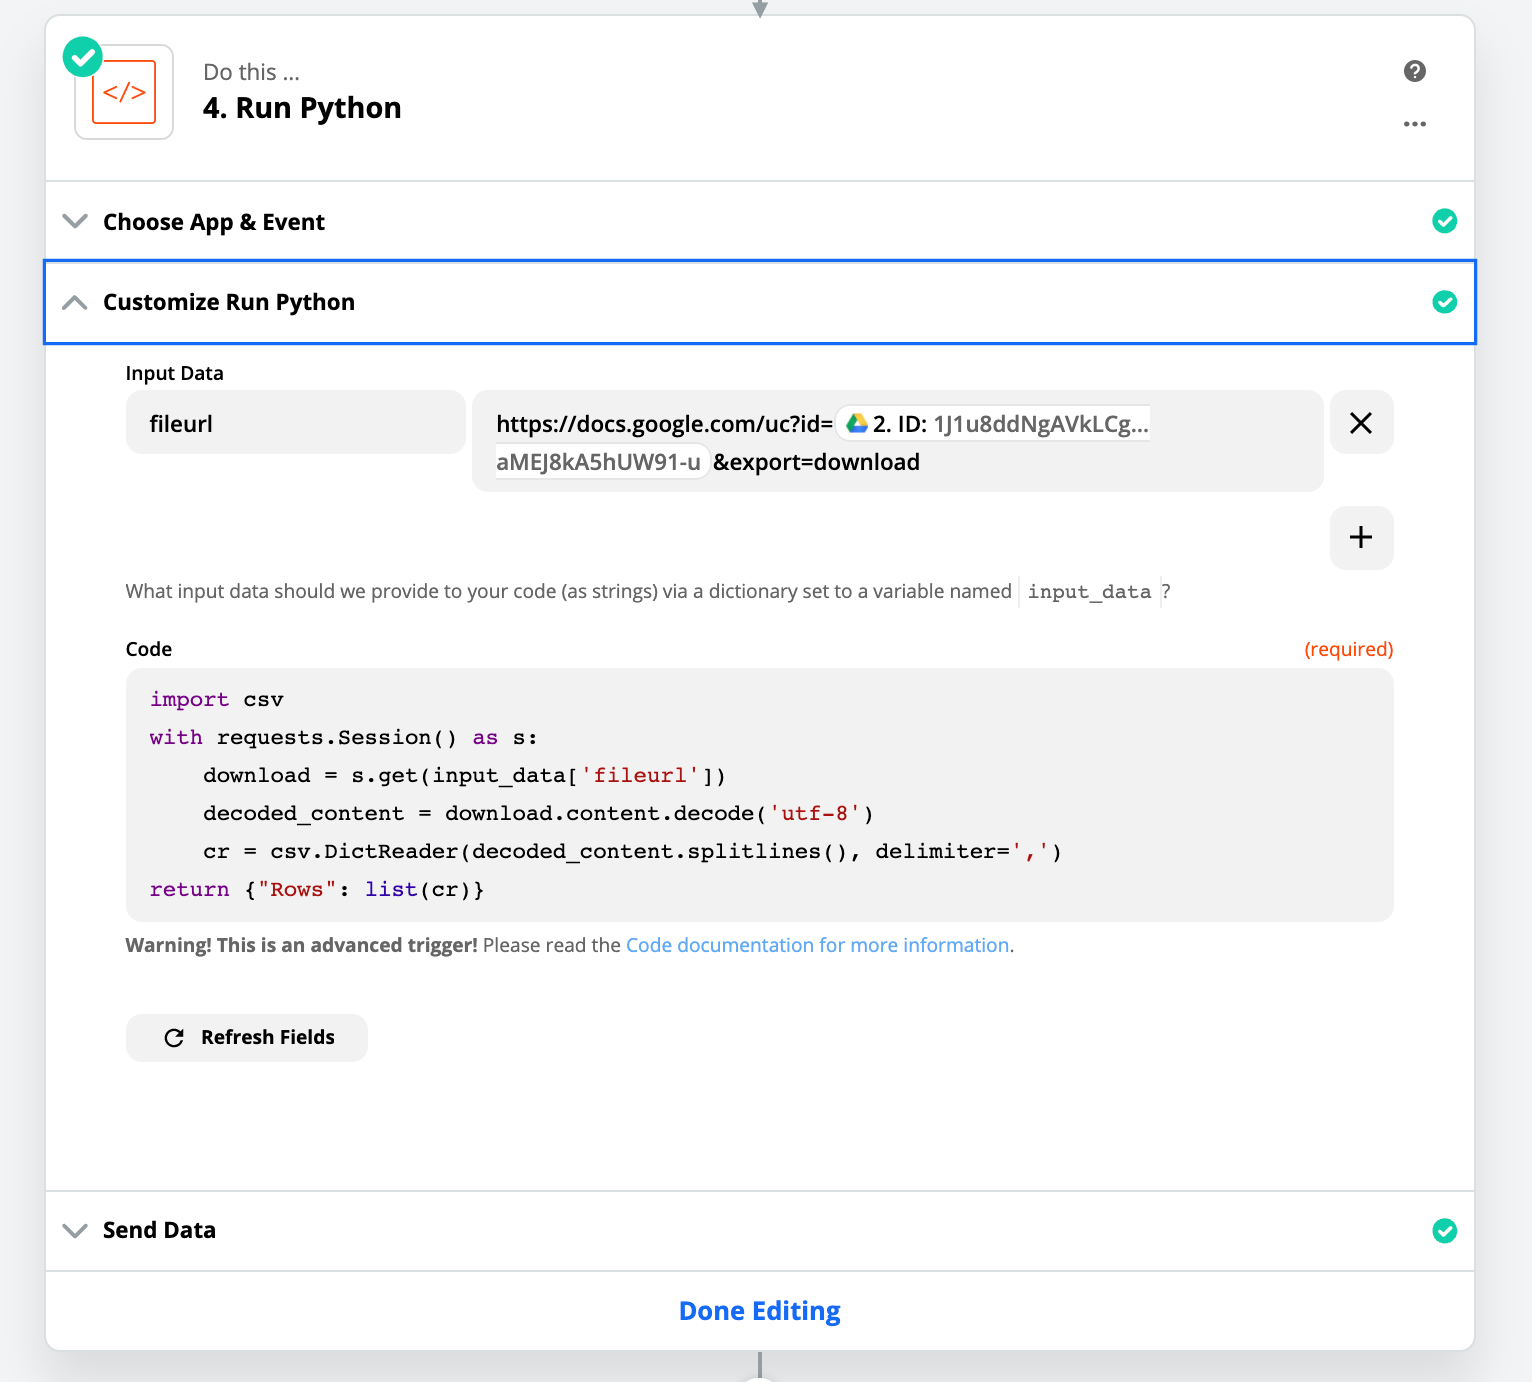
The key is in the python code step. here’s a screenshot of how I do this using Code by Zapier > Python

The specific code block is:
import csv
with requests.Session() as s:
    download = s.get(input_data['fileurl'])
    decoded_content = download.content.decode('utf-8')
    cr = csv.DictReader(decoded_content.splitlines(), delimiter=',')
return {"Rows": list(cr)}
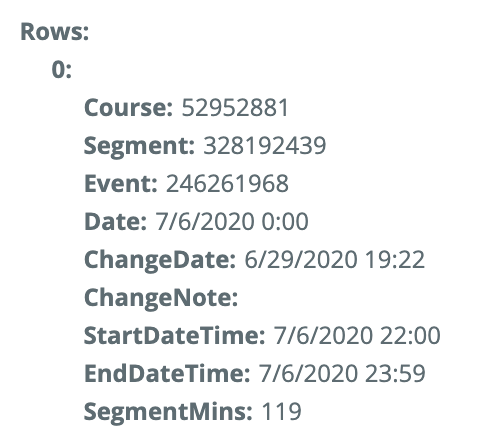
This will return a key of “Rows” where the first line item in Rows is the first row of the spreadsheet. here’s an example output:

So using that step in a zap for you I would do the following:
Step 1: Trigger: Schedule by Zapier, Daily at 7:15am
Step 2: Code by Zapier > Python -- copy the code from above, use the URL of the HCOInv.csv file
Step 3. SQL Server > New Row use the output of step 2 to populate the row values in your database
Let me know if that works for you.
Enter your E-mail address. We'll send you an e-mail with instructions to reset your password.


