Hi @beelian_aba Thanks for your question and I’m sorry you’re having some trouble here.
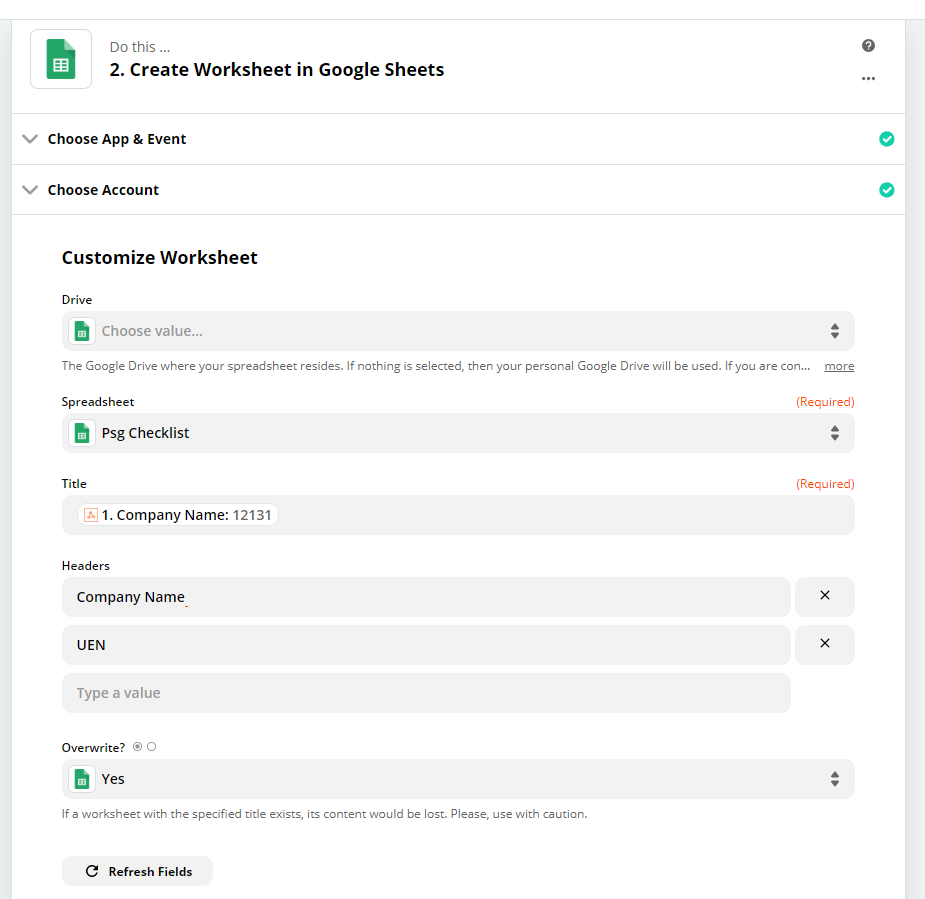
It would create the worksheet with the right name but without any header
Could you confirm something for me here? Do you mean that the header row doesn’t exist in the Sheet, or that you can’t see the header row fields in the Zap?
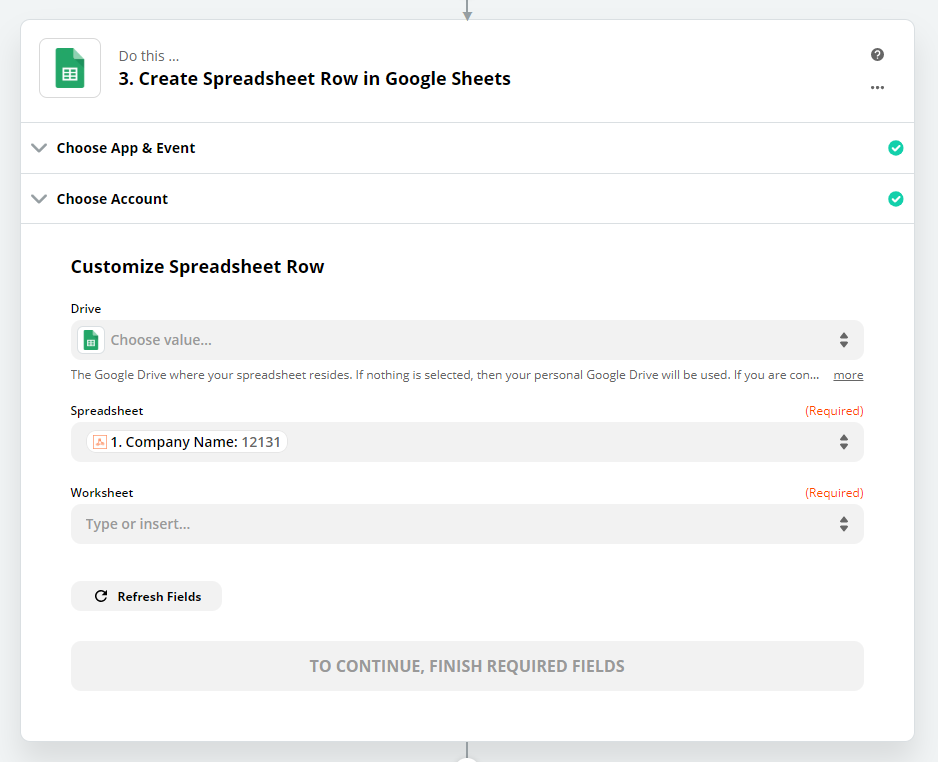
What is the id of the new worksheet as it dynamically changes?
You’ll be able to get the ID of the Worksheet from the Create Worksheet step. To do that, for Worksheet choose the ‘custom’ option and select the ID of the worksheet created in the previous step.
When you use a custom value for a spreadsheet or worksheet in a Google Sheets step, it wont show you the fields from the header rows. This is a limitation of the way that the integration works and isn’t one that we’re able to fix right now, but there is a workaround!
If all of your sheets have the same columns, then you can set up the Zap using an existing worksheet and then switch it to the custom value. To do that:
- When you first set up the Zap, choose another Worksheet that already exists
- Map the values that you need from your previous step (in this case from the webhook) into the fields in the Zap editor
- Change the Worksheet to use a custom value and select the worksheet ID from the Create Worksheet step
This will make all of your existing fields disappear, don’t worry they’re still there! Test the step in your Zap to make sure that everything is set up as you need but you should be good to go!