Best answer

How do I transfer data only from the Live URL custom field in ClickUp to Google Docs?

  • 31 October 2022
  • 9 replies
  • 132 views

Hi there,


I’m trying to have data from my ClickUp cards do into a Google Doc. Each ClickUp card is an article our team has published, and I am looking to transfer that data to a dedicated Google Doc.


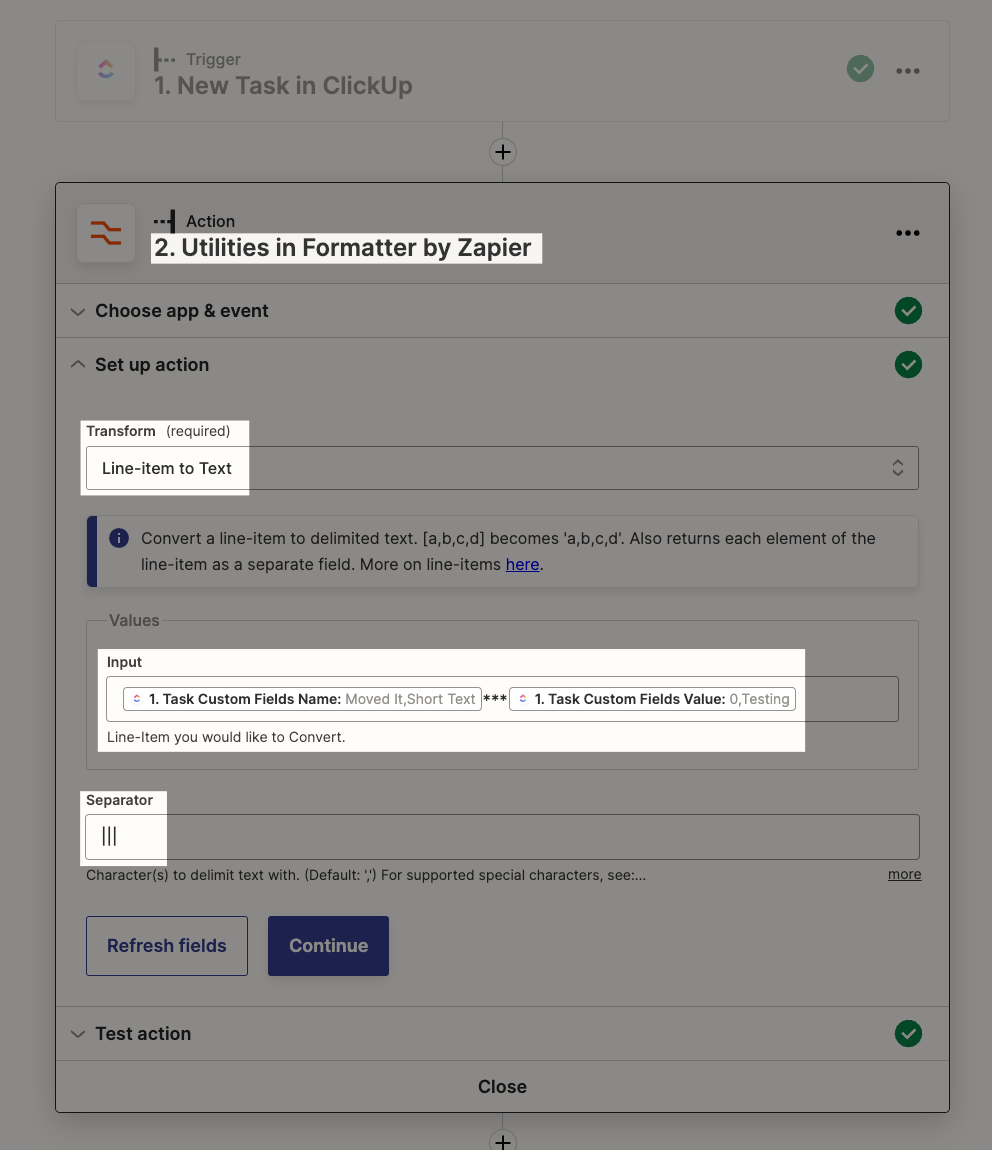
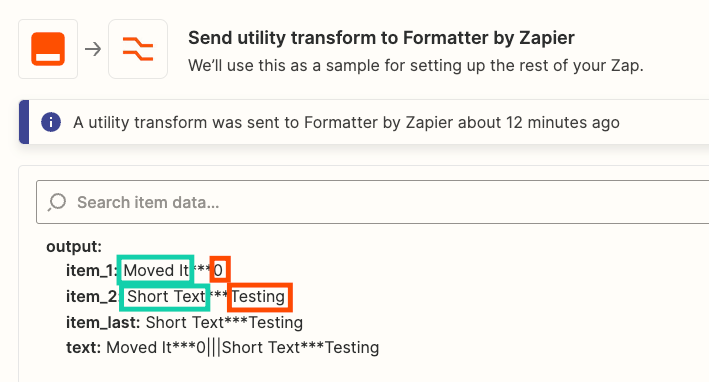
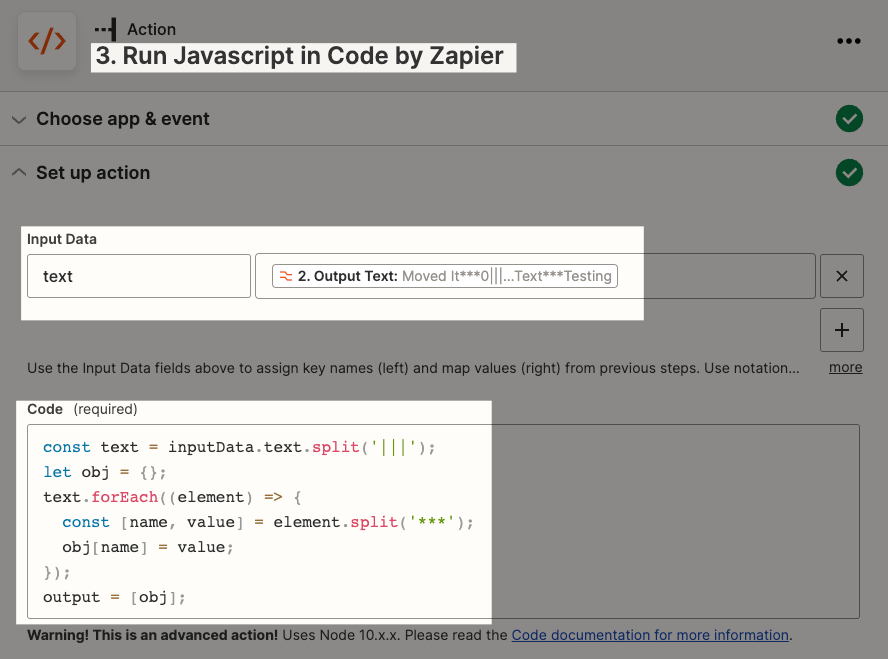
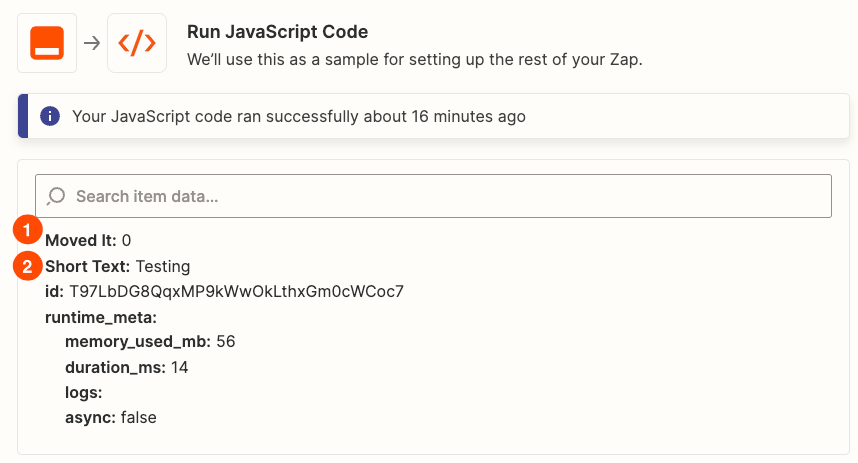
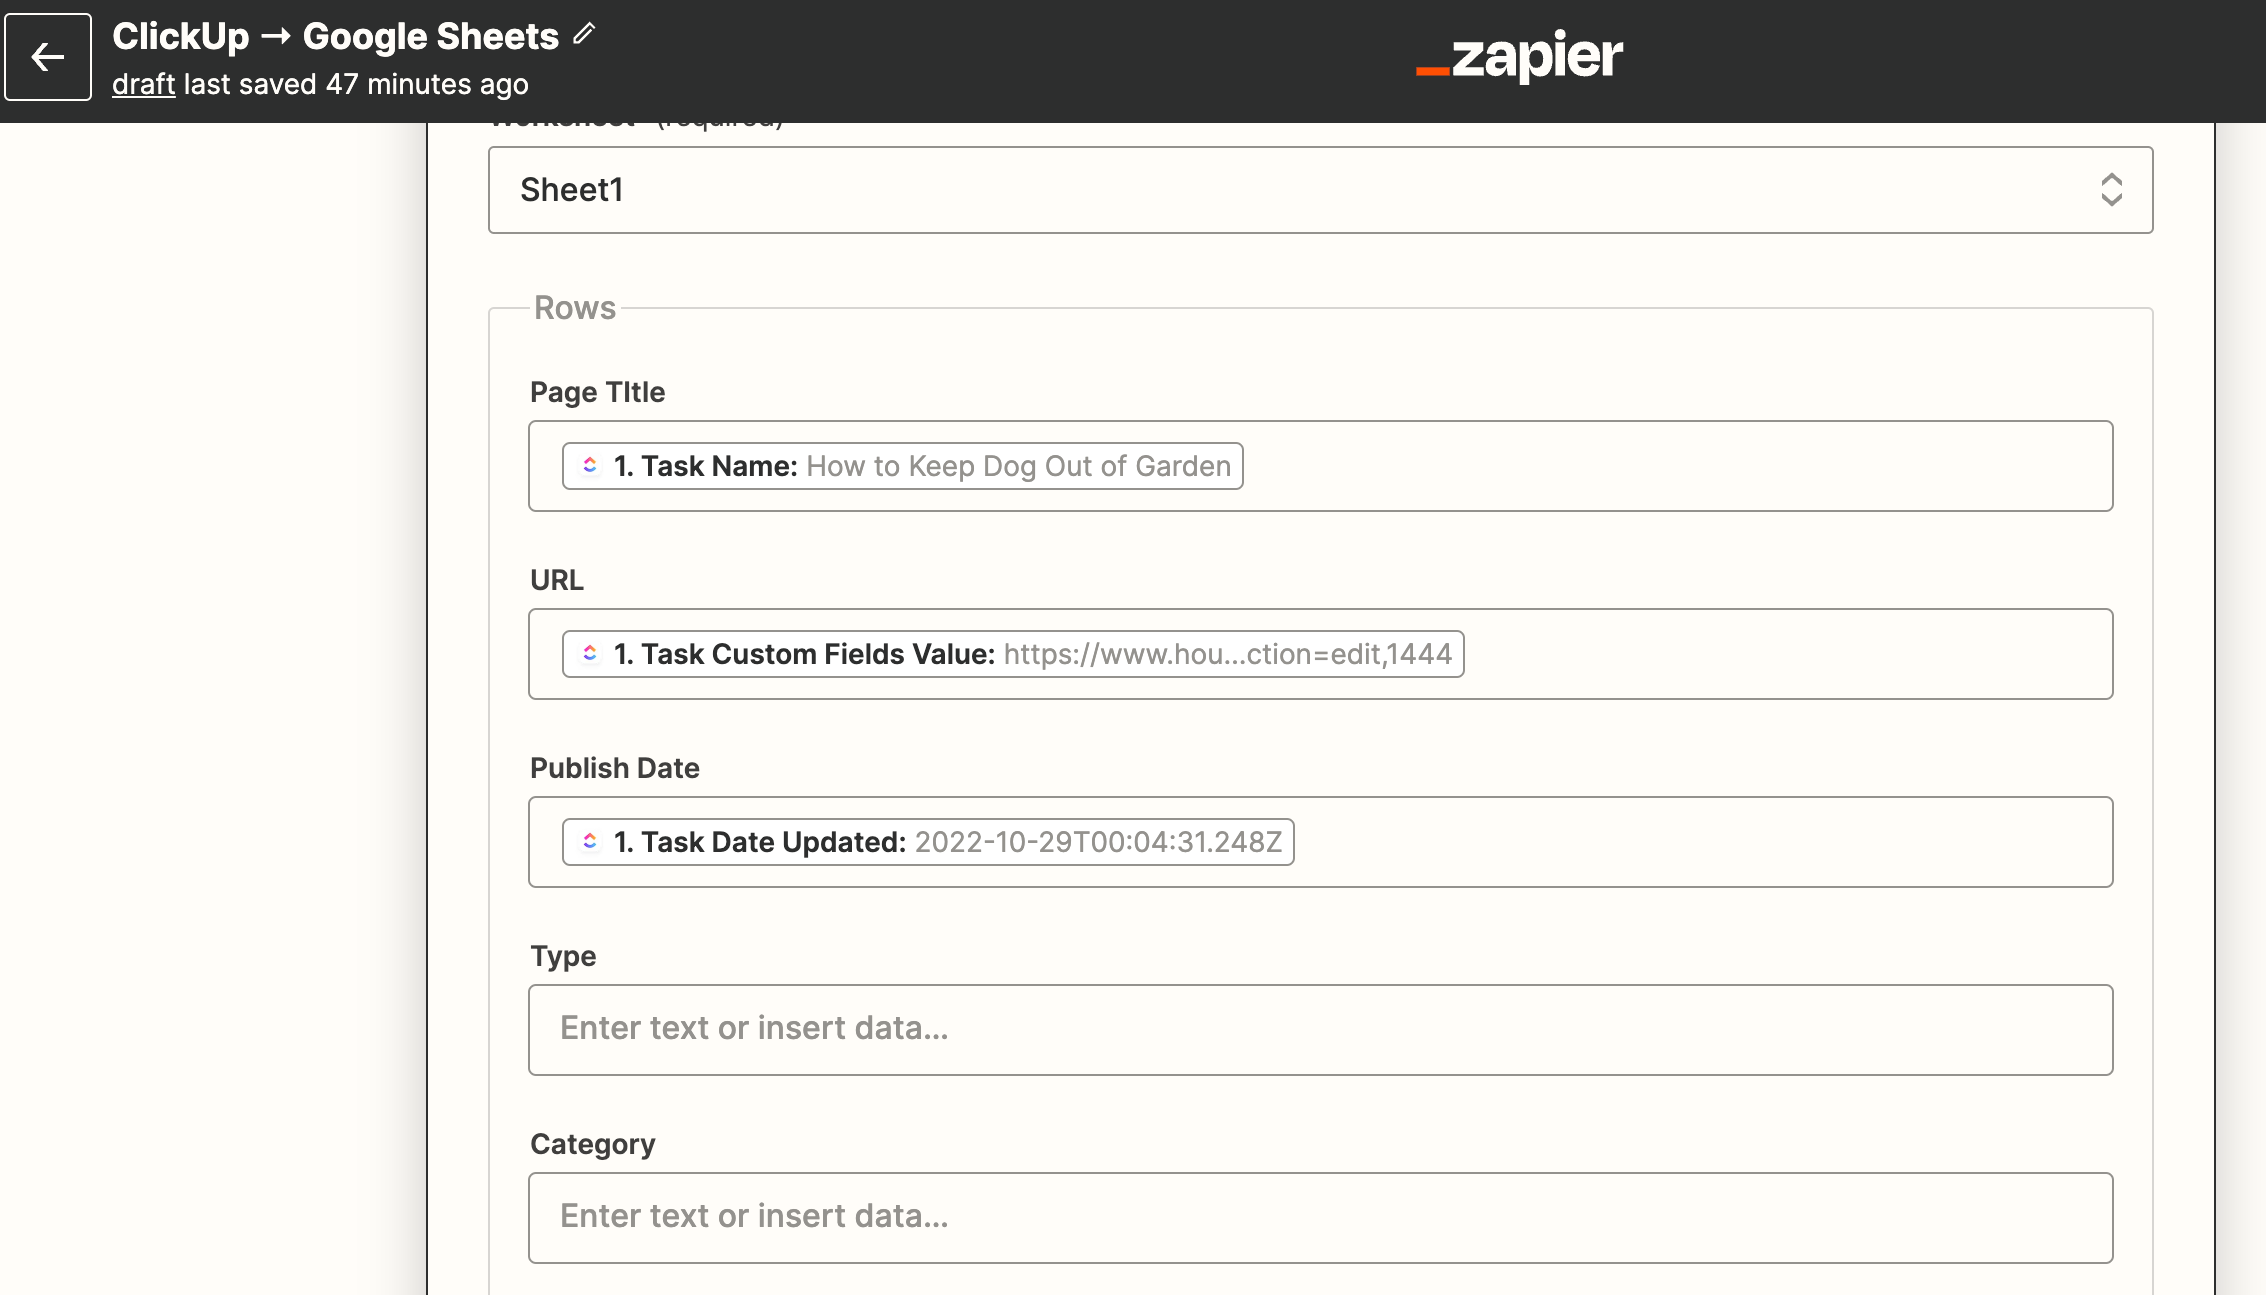
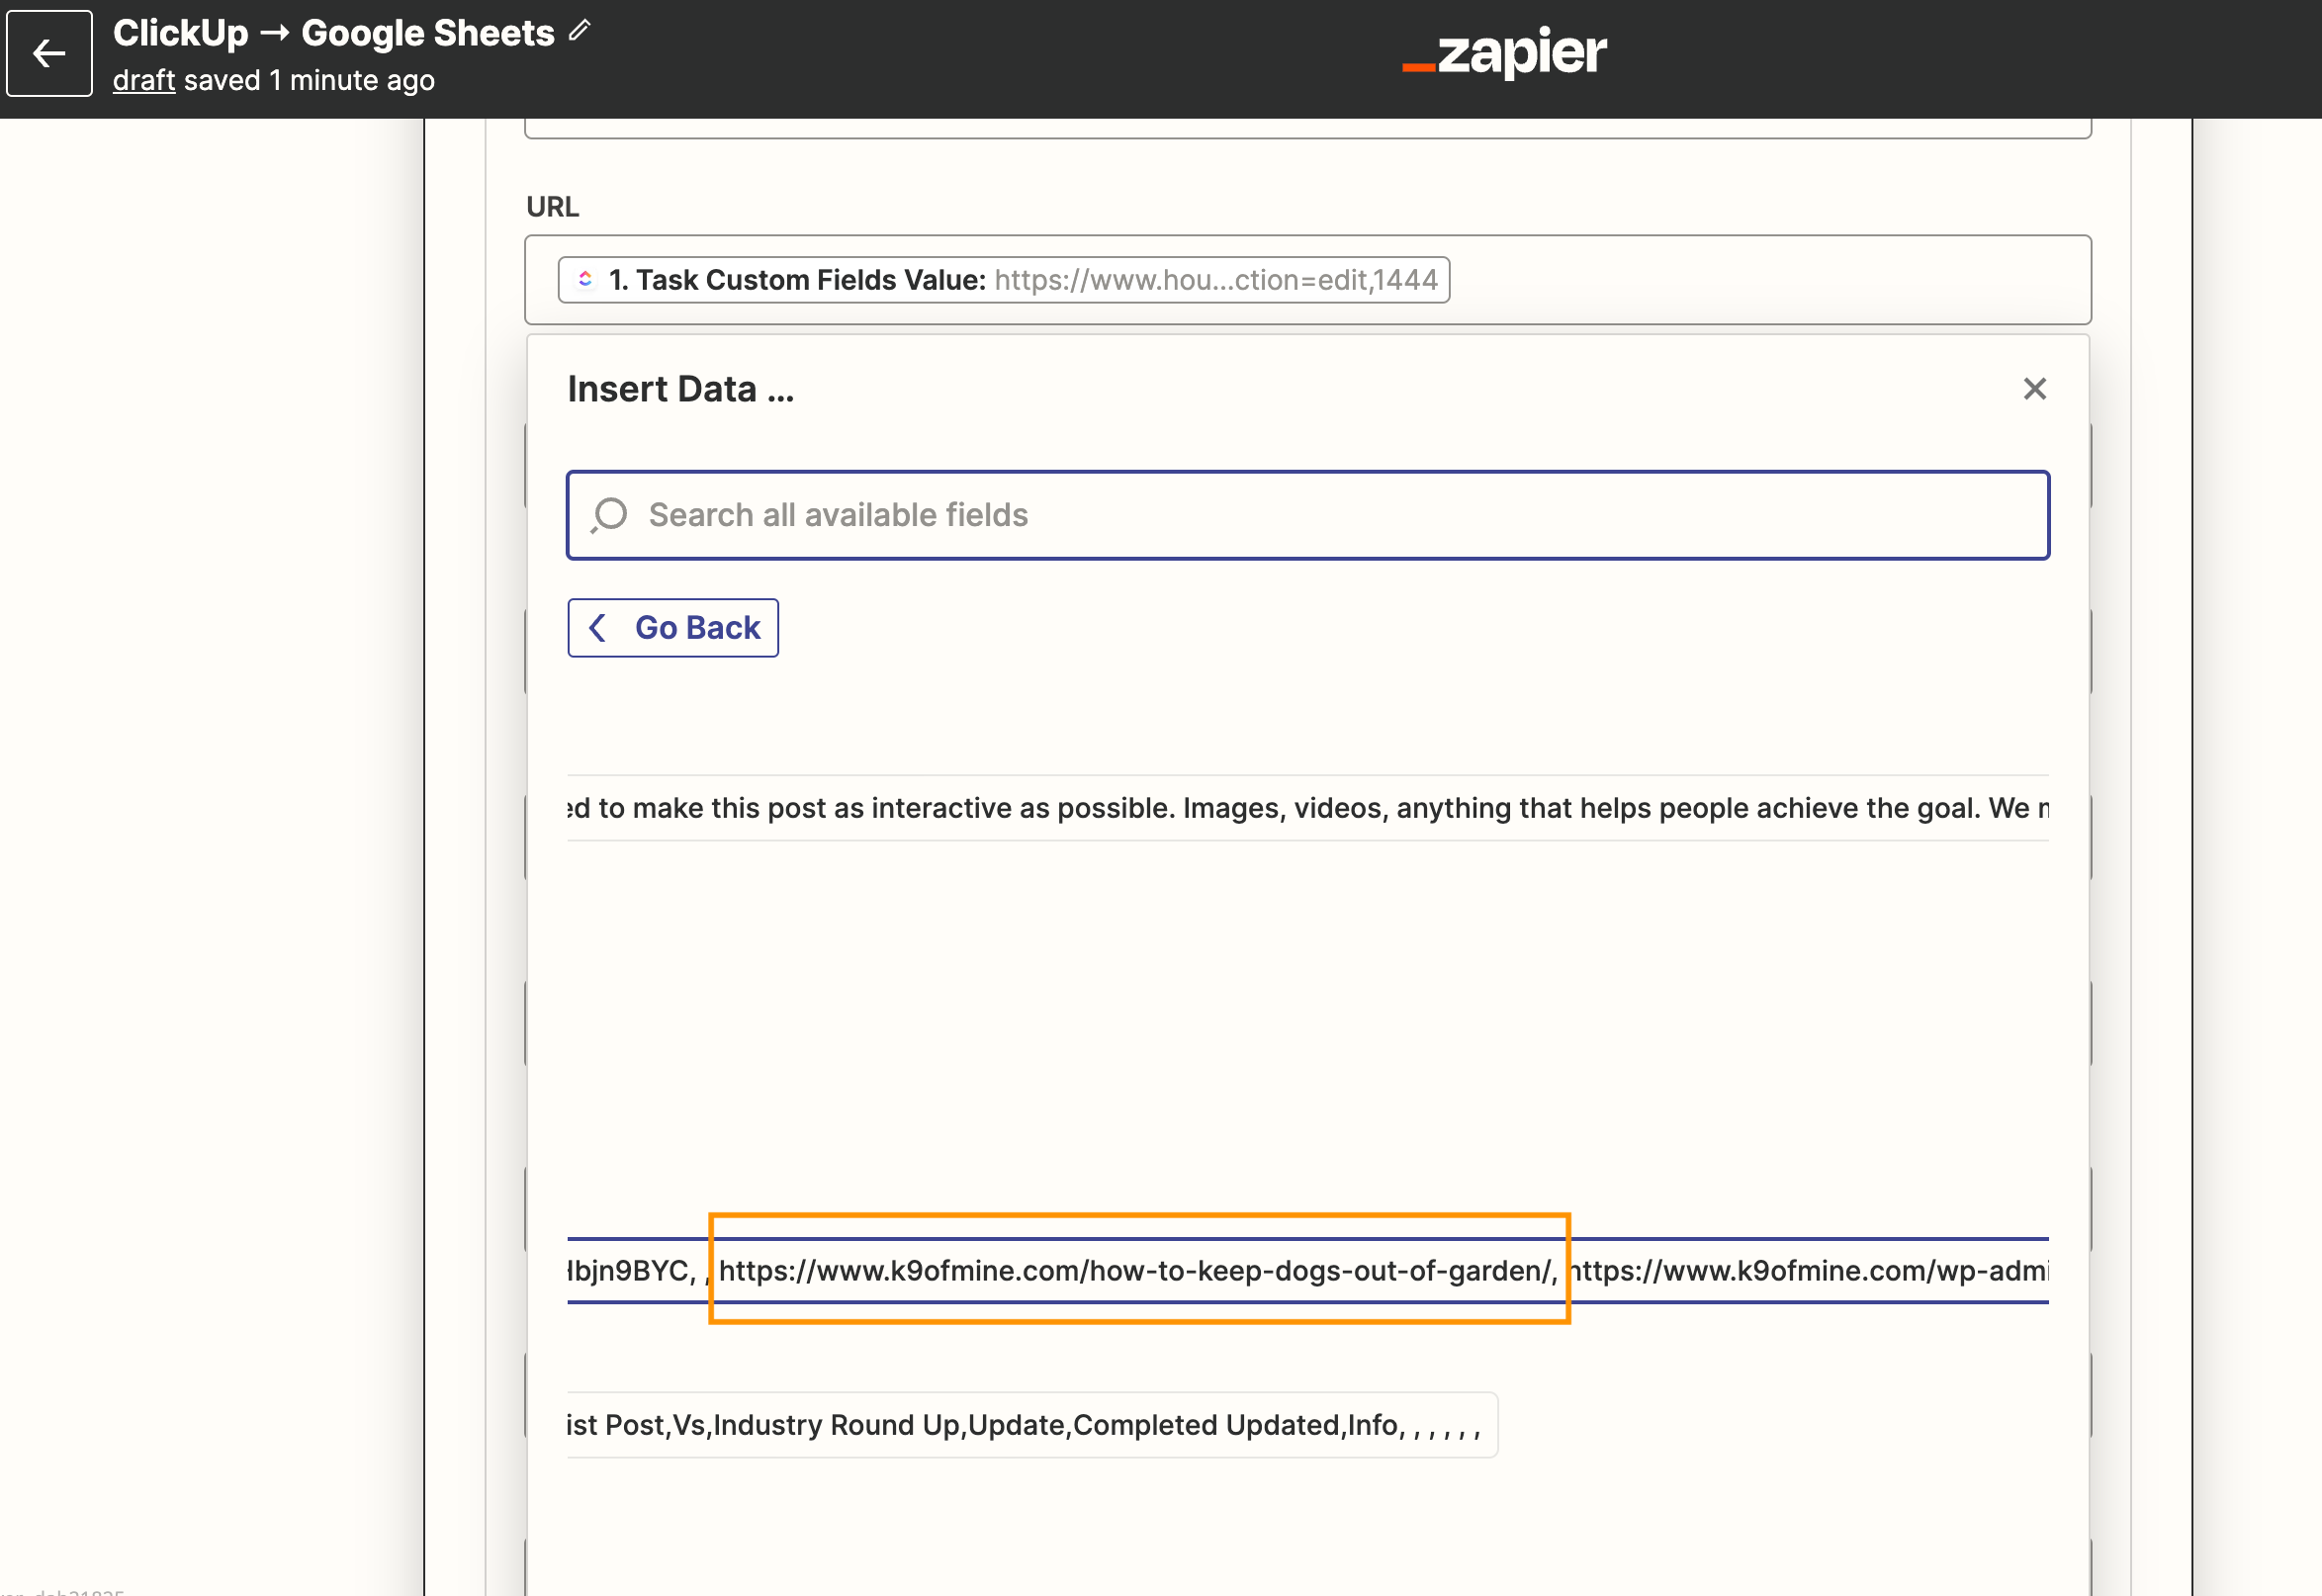
The issue is when I choose “Task Custom Field Value” I get a string of data related to ALL the custom fields I use. The only custom field I want to transfer to the Google Doc is the “Live URL”. Is there any way to set this up?

As it stands, the zap generates several rows in Google Docs, with each row using a different custom field from the string generated.

Thanks! 

icon

Best answer by nicksimard 3 November 2022, 00:11

View original

This post has been closed for comments. Please create a new post if you need help or have a question about this topic.

9 replies

Userlevel 7
Badge +14

Hi @nutmeg 

Good question.

Please post screenshot with how your Zap steps are configured in order for us to have more context.

Perhaps you need to use a Filter step in the Zap to isolate the desired custom field.

Sure!

So here is what the Google Sheets part of the zap looks like:

If I click to get more options, I get this:

The “Task Custom Fields Value” has tons of values separated by commas. And if I scroll over to the right, I can eventually find the value I want to import.


Userlevel 6
Badge +8

My favorite method for parsing CU custom fields is to use a Code by Zapier step to:

  1. Use fetch() to grab the the task’s custom fields from CU (yes, you already have them from the trigger step, but by the time you get to the Code by Zapier step, they’ve been converted into a string, so I find it’s best to get them straight from the source in this step).
  2. Iterate through the “custom_fields” object array assigning keys and values to their own variables from Object.name and Object.value.
  3. Output your new array and select only the items you need for subsequent steps.

I have done this for dozens of Zaps and it works like a charm :)

Userlevel 7
Badge +14

@nutmeg 

Code would be the most efficient to isolate the desired ClickUp Custom Field.

Or you can do Looping followed by a Filter step to only get the desired ClickUp Custom Field.

My favorite method for parsing CU custom fields is to use a Code by Zapier step to:

  1. Use fetch() to grab the the task’s custom fields from CU (yes, you already have them from the trigger step, but by the time you get to the Code by Zapier step, they’ve been converted into a string, so I find it’s best to get them straight from the source in this step).
  2. Iterate through the “custom_fields” object array assigning keys and values to their own variables from Object.name and Object.value.
  3. Output your new array and select only the items you need for subsequent steps.

I have done this for dozens of Zaps and it works like a charm :)

Sounds like a great strategy, but I don’t know anything about code :/

I’m assuming for the “Event” I choose Javascript. Not sure what to put for the “Input Data” and “Code” sections.

Userlevel 6
Badge +8

Gotcha!

Yah, writing code definitely requires some advanced knowledge.

I recommend reaching out to and working with a certified Zapier Expert on this one.

Userlevel 7
Badge +11

Hey Nutmeg!

I’ve got some great news for you :) One of our code-savvy teammates wrote a Community article about how to do this:

It’s well-explained but to make it easier, I’ve done this in a Zap that mimics your exact trigger step.

Check it out:

Add a Formatter — Utilities — Line-Item to Text Step

After your trigger step, add the following. I’m using the same tips that are shown in the article, where I add *** between the custom fields name field and the custom fields value field.

Then I used ||| for the separator.


The Output

In green, we have the name. And in orange we have the value.


But we can take this one step further, to make it more useable.

Code by Zapier to Make New Fields

Now we use the following code:


Here’s the code:

const text = inputData.text.split('|||');
let obj = {};
text.forEach((element) => {
const [name, value] = element.split('***');
obj[name] = value;
});
output = [obj];

The Output

Now we have a mappable field for each of the custom fields from ClickUp:


Hope that helps!

This is fantastic, thank you so much! I’m so excited I got this to work with your guidance!

The only issue I am having is that all the subtasks connected to the main task are imported as separate line items. Any idea on how to stop that?

Oh and also, my custom field that is a calendar date that is “date competed” is being imported as a string of seemingly random numbers.

Userlevel 7
Badge +11

Hmmm...I hadn’t experimented with subtasks. You could probably use Formatter’s Line Item to Text functionality to access those, perhaps similar to what we originally did. I tried to test it but for some reason I’m not seeing the subtasks when I pull in a sample.

The date format you’re seeing is likely Unix time, which is a string of numbers. You can use the Formatter to convert that :)