Best answer

Create Excel spreadsheet, column headers, and add row all at once?

  • 6 November 2020
  • 11 replies
  • 1872 views

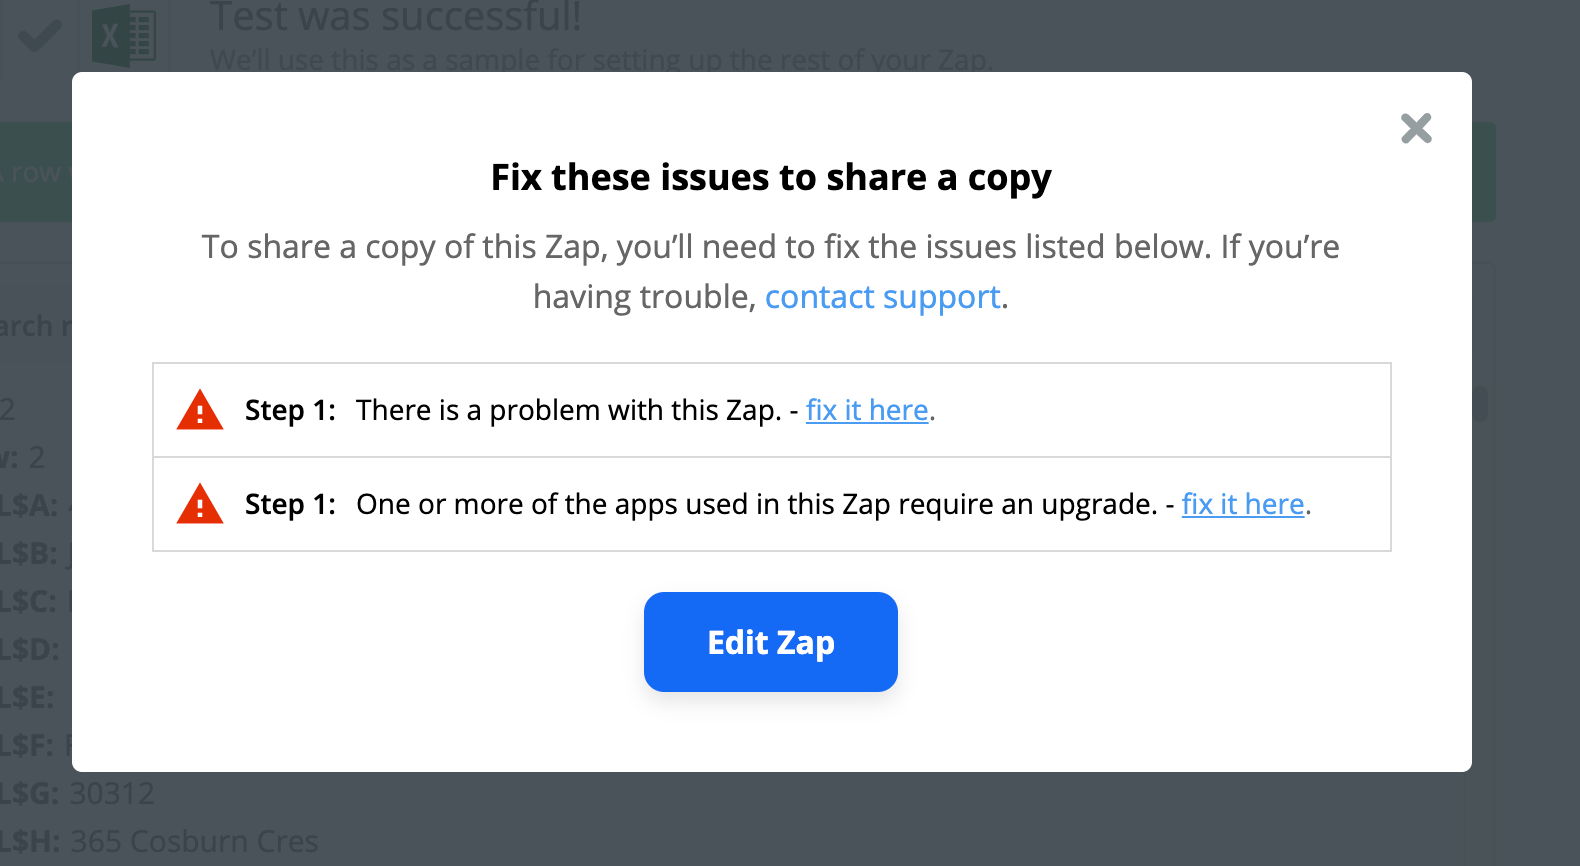
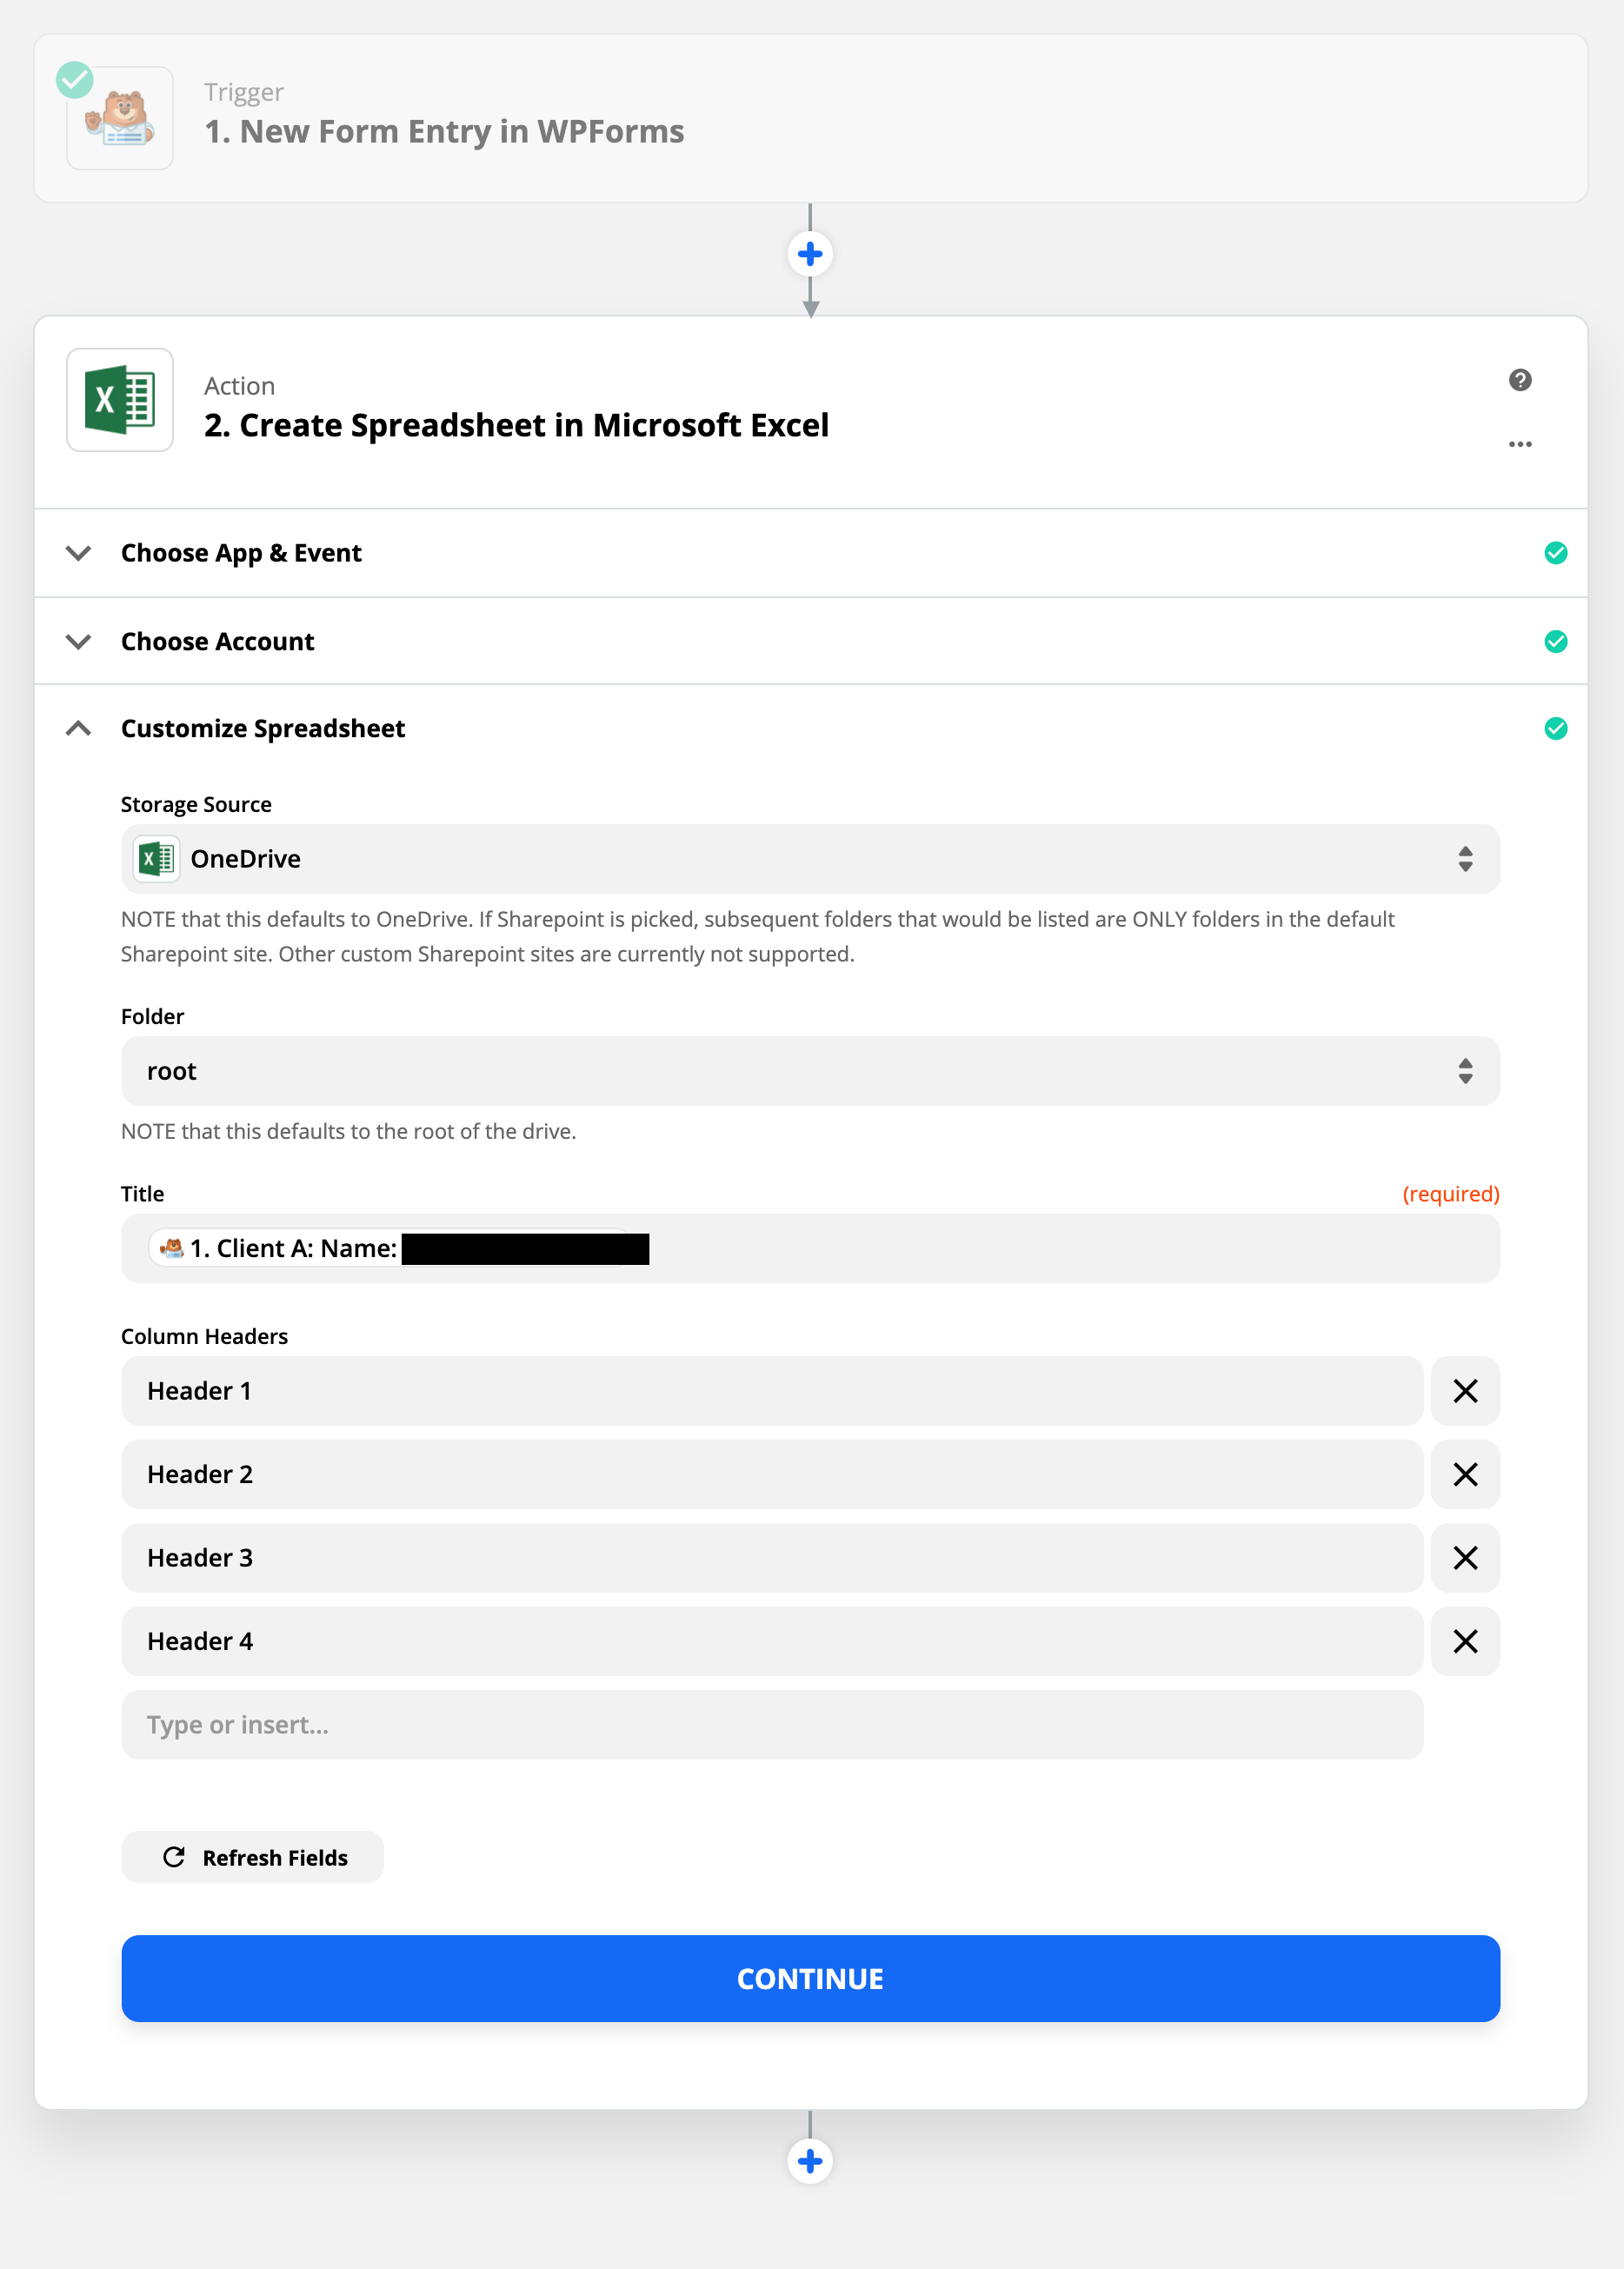
This seems like it should be obvious, but I’m missing something. My trigger is WPForms. My action event is Create Spreadsheet in Microsoft Excel. I need each WPForms entry to create a new spreadsheet with column headers and a single row containing all the data.

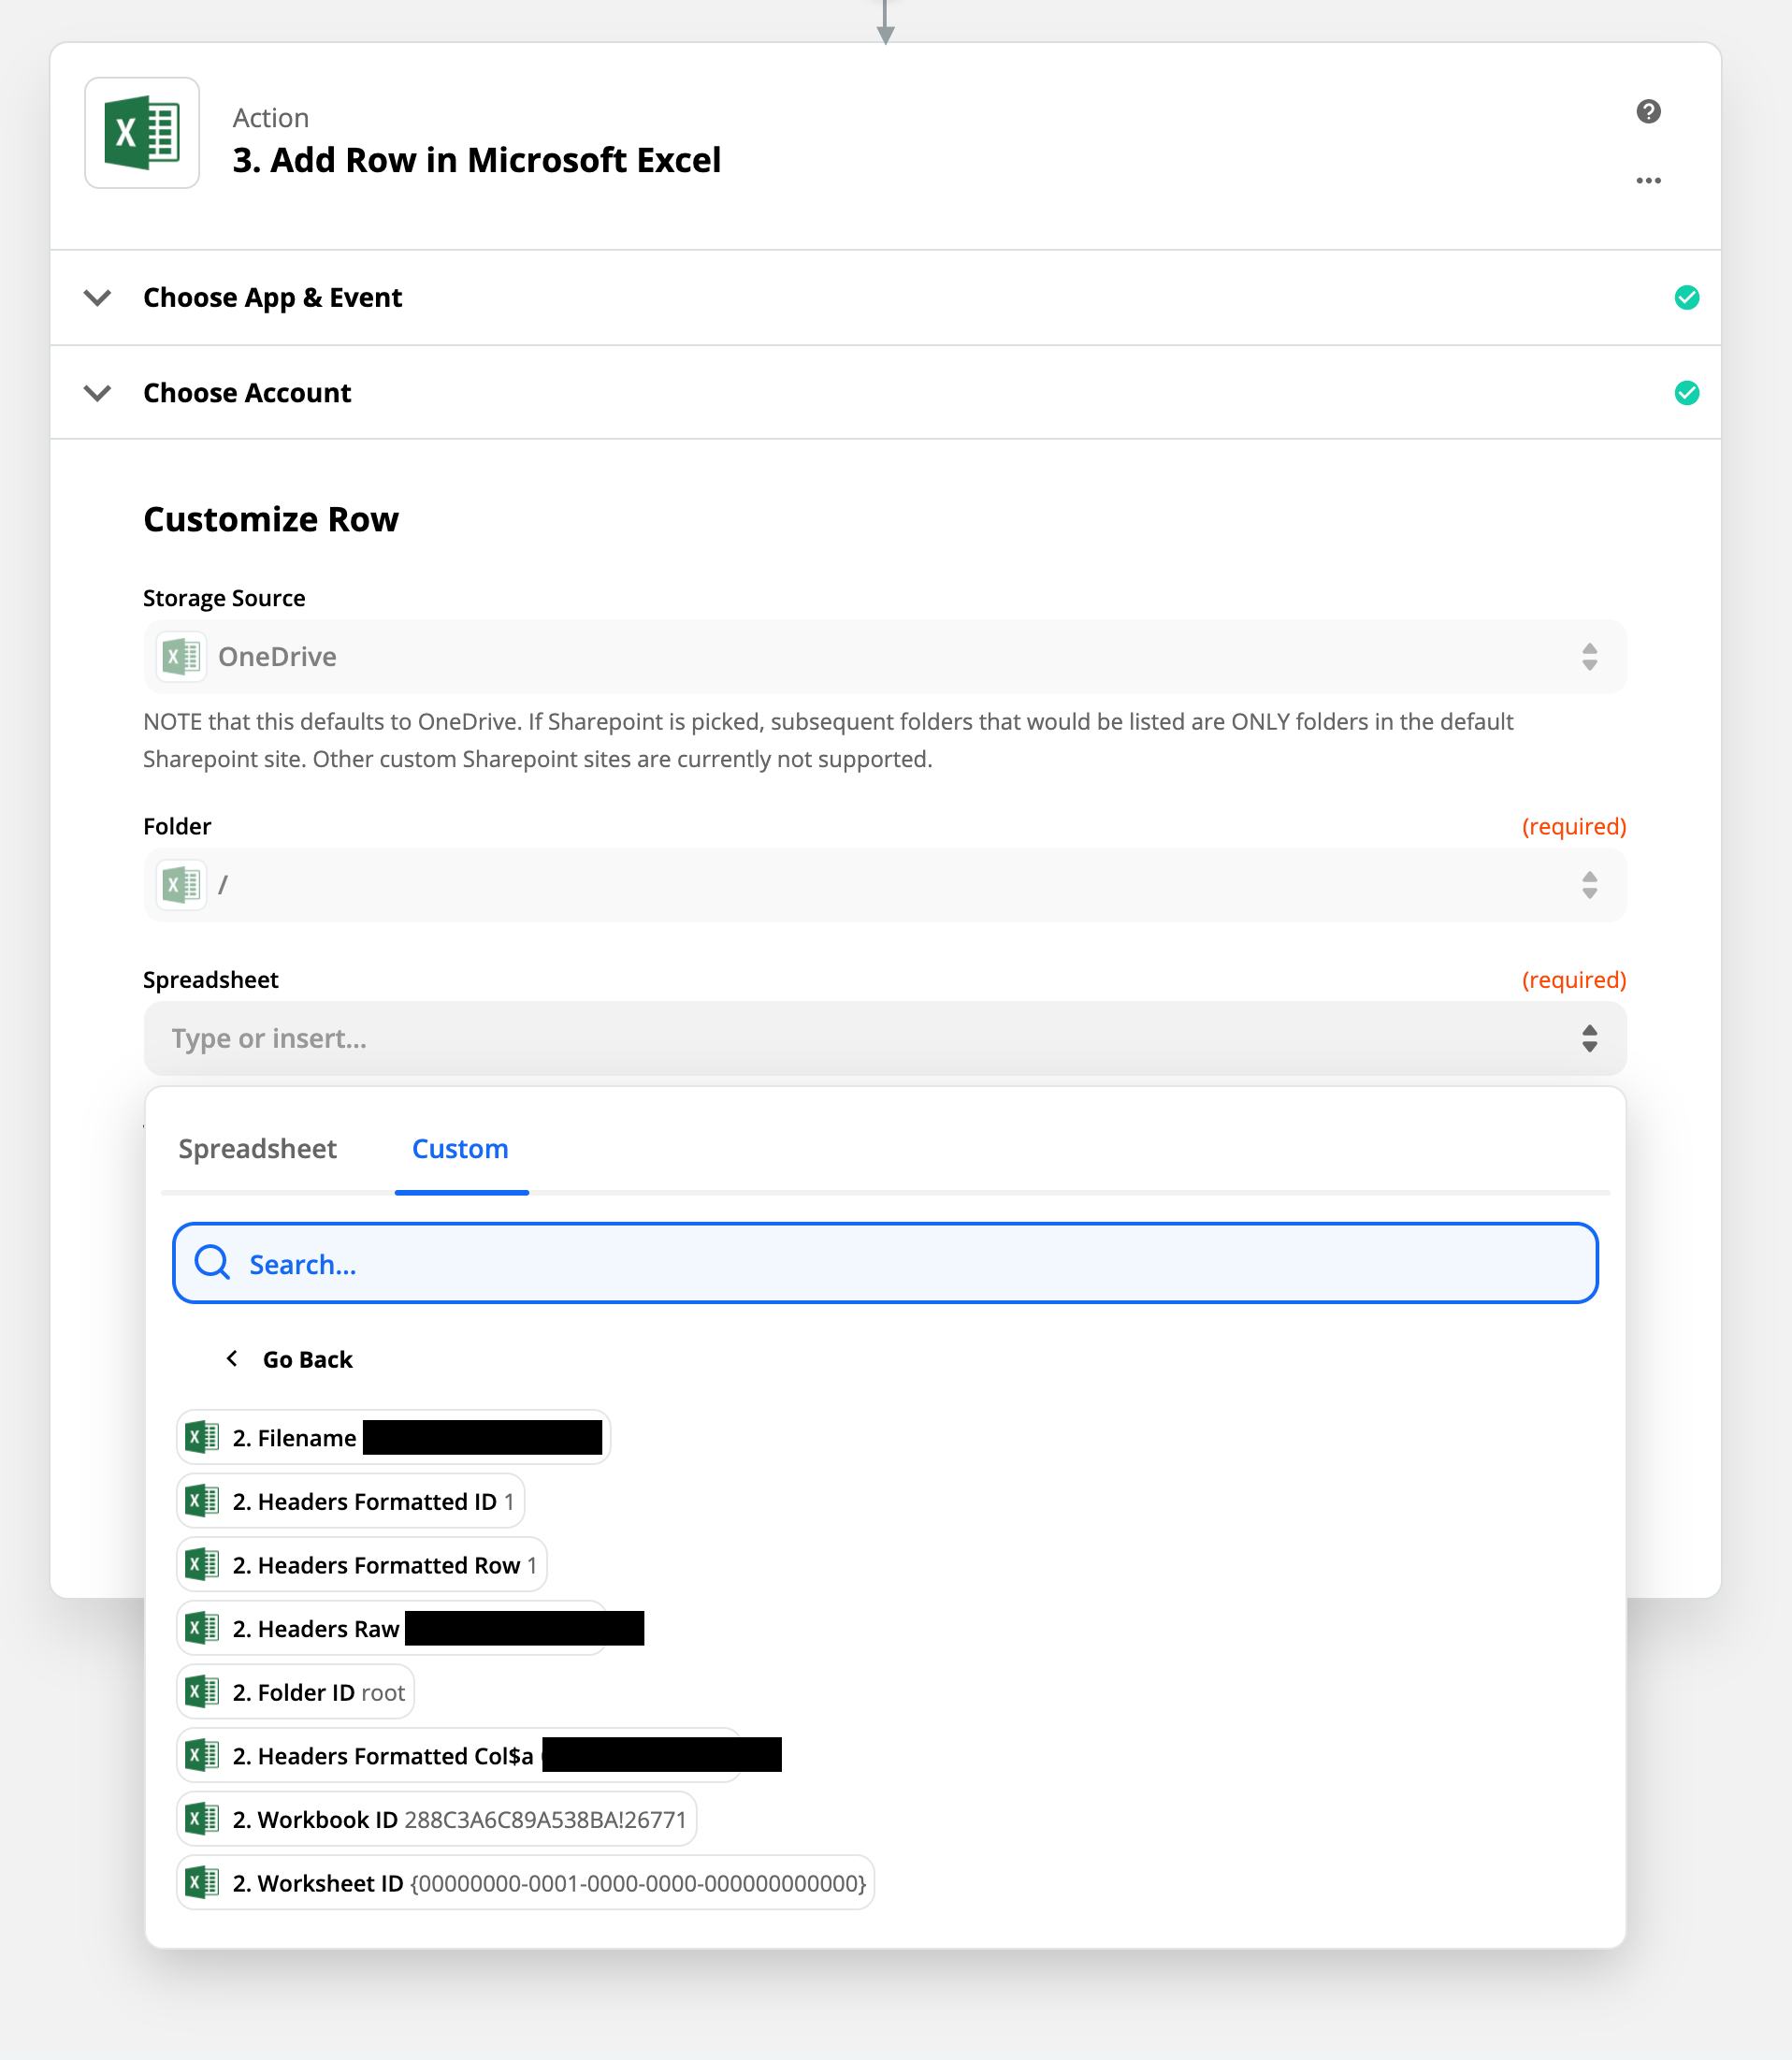
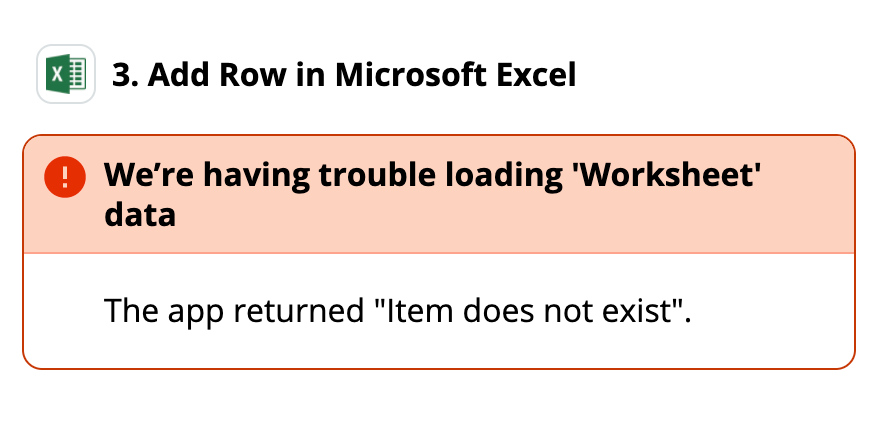
I’m given options to define the Storage Source, Folder, Title, and Column Headers, but evidently no option to actually add the data from WPForms into rows. How do I enable this? I can, of course, use a different action event like Add Row, but that relies on a spreadsheet already existing (and it won’t exist until the WPForm entry is created).

Additionally, for Column Headers, I only have the option to select the data entered by the user into WPForms instead of the title of the field — I need it to be the title of the field only.

To recap, I need:

New Excel spreadsheet > Column headers created from field titles from WPForms > Row added with data submitted by user from WPForms

Any ideas? Thanks in advance for any assistance.

icon

Best answer by AndrewJDavison_Luhhu 30 November 2020, 18:57

View original

This post has been closed for comments. Please create a new post if you need help or have a question about this topic.

11 replies

Userlevel 7
Badge +10

Hi @ryan-ams 

After creating the spreadsheet in one step, you need an additional “Create Row” step - when selecting the spreadsheet to write the row to, you’d map the ID of the spreadsheet you created.

This does not work as described.

Above is my second step. The title of the Excel sheet is derived from one of the WPForms fields. There is no option to “Create Row”.

If I use the plus button to add a third step, there is still no “Create Row” option but there is an “Add Row” option:

I am being prompted to select a spreadsheet. If I choose Filename or Workbook ID, I get the same error message that the worksheet doesn’t exist, because of course it doesn’t. Step 2 hasn’t been run yet, so how could a file exist with a worksheet inside it?

Further, the filename and Workbook ID are unique each time the Zap is run, so selecting a specific one in step 3 will always make the data go into that same file over and over again (not what I want) instead of creating a new file with a unique name and ID each time (this is what I want).

Further clarification would be appreciated.

Userlevel 3
Badge +2

Hi @ryan-ams 


So you have a trigger (New Entry in WPForms)


Then Step 2 is the create the Spreadsheet.  [Not create and add row]

It seems you have done that.


Then you need to now click the “+” button at the bottom of the track and add another steps.

This steps #3 is to Create a Row.


It will ask you in which Spreadsheet so point it to the result of step #2.

Then map the headers created in step to to the data from step #1.


So your end resulting Zap has 3 steps.

Userlevel 7
Badge +10

Yep @ryan-ams, as @Davidh88 says, within this edit view, you’re simularing a single run of this zap.

So, make sure you click to test step 2 and it will create a workbook, you’ll then have a workbook ID to map in step 3, which when you test, will add a row.

Those mappings are variable, so then when you switch the zap on and it runs live it will be unique for each run.

I’m running into the same problem (although from a different starting point). By step:

  1. My trigger data coming in
  2. Create the Excel sheet with headers (I did run a test and verified it exists in my OneDrive)
  3. Create a row. I’m getting the same The app returned "Item not found". error. I tried the Worksheet ID from step 2 and I tried “Sheet1” which is what step two creates, but still no luck.

It can’t retrieve the created excel sheet’s headers so I can’t do anything. Anyone solve this yet?

I’m having the same problem. I’m new to this so it’s quite likely I’m doing something wrong. The error that I’m getting is :

We’re having trouble loading 'Worksheet' data

The app returned "Invalid request".

I’ve tried replacing the variable file name with the text, same with the worksheet name. Still not working.


@Davidh88 @AndrewJDavison_Luhhu Thank you for your help. I’ve successfully added IDs for the Workbook and Worksheet, however I cannot map data to the column headers created in step 2. After selecting the Workbook and Worksheet IDs, this error results: “Zapier had trouble retrieving custom fields from Microsoft Excel.” There is no option to select any data from the trigger. Any ideas?

Userlevel 7
Badge +10

Hi @ryan-ams 

What you’ll want to do is select a workbook and worksheet that already exist from the dropdown.

Then, map the fields as you need them.

Then, before proceeding to test the step, switch the workbook and worksheet selection for the custom IDs.

Userlevel 2
Badge

@ryan-ams  why would you need your spreadsheet to get create you could save yourself so much trouble just setting up one spreadsheet with several sheets for each of yourforms


so then since the spreadsheet is already create you d only need to create the headers then the rows


I think I could help you


Also in the 3rd step ‘add row’ don’t use the custom values to select a spreadsheet use the spreadsheet column to look for your spreadsheet

Hi @ryan-ams 

What you’ll want to do is select a workbook and worksheet that already exist from the dropdown.

Then, map the fields as you need them.

Then, before proceeding to test the step, switch the workbook and worksheet selection for the custom IDs.

@ryan-ams I am curious if you are able to get this to work for you, because i haven’t been successful.

Is there any offical support available from Zapier or do we have to rely on the experience and generosity of community volunteers only?

@HeyRael I did eventually get this kinda working, but it was an enormous pain.

Although I can successfully test run the zap, I can’t share it to my client with the “Share” option.

Clicking the “fix it here” options or “Edit Zap” option provides no further details on what’s wrong, and the Errors panel shows no errors.

If the error message means I need to upgrade my plan to a paid plan, I can’t find that anywhere in the help documents about sharing (https://zapier.com/help/manage/collaborate/share-a-copy-of-your-zap). It also seems ridiculous that I have to pay just to share a link with someone.