We can now have up to five Paths in a Zap but, there are cases where five isn’t enough. And the thought of having to set up duplicated Zaps to handle more than five Paths isn’t ideal. It would be much easier to handle everything in a single Zap, right? That’s where the magic ![]() of using nested Paths comes in.
of using nested Paths comes in.
Why use Paths and not a lookup table or Filter?
Well, let's say we want to trigger whenever someone enters a different stage in HubSpot. And we want to carry out different actions depending on the stage they're in. It's a simple enough workflow, but we’ve got a custom Lifecycle Stage set up with 10 different stages. Using a lookup table wouldn’t work here as different actions need to run for each stage. And we don’t want to use Filters as we'd have to set up 10 Zaps, one for each stage. We want a single Zap to handle it all.
Paths is great for handling the sort of conditional logic that's needed here. And as some of you may have already discovered, it’s possible to add Paths inside of existing Paths. We call these nested Paths. And they allow you to carry out different actions for more than five different Path rules.
Paths is only available on Professional plans and higher. If you're on a Free or Starter plan you can get a free 7-day trial of Paths if you'd like. All you'd need to do is add a Paths step to your Zap to try it out. 🙂
Creating the Main Paths
Let’s split the Zap up into two main Paths. Stick with me, I know it may seem odd to have two. But what we're doing by using two is dividing the 10 stages into two lots of five Paths.
Path A will check the LifeCycle Stage field. And only continue for the first five Harry Potter fan related stages (Muggle, Wizard, Seeker, Professor, Unicorn) like so:
Make sure to create each new Path rule using the + Or button, not the + And button.

This will allow the Path to run if any of those five Path rule conditions are met. Using the + And button to add each condition would only allow that Path to run if all five Path rule conditions are met and that’s not what we want here.
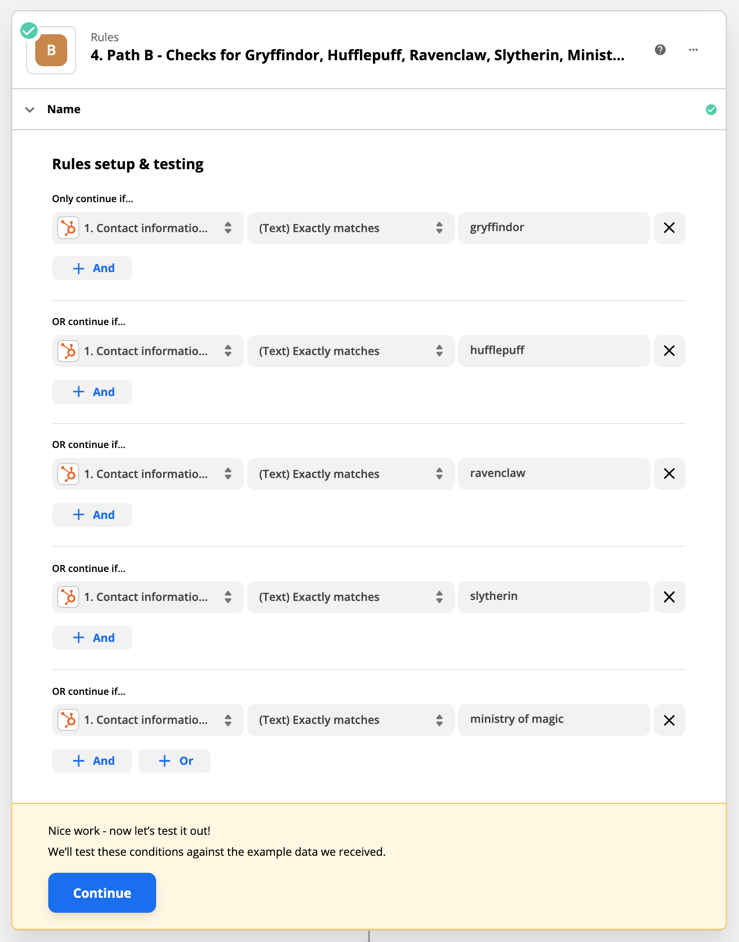
Path B will also check the LifeCycle Stage field. But it will only continue for the last five stages (Gryffindor, Hufflepuff, Ravenclaw, Slytherin, Ministry of Magic):

Adding the Nested Paths
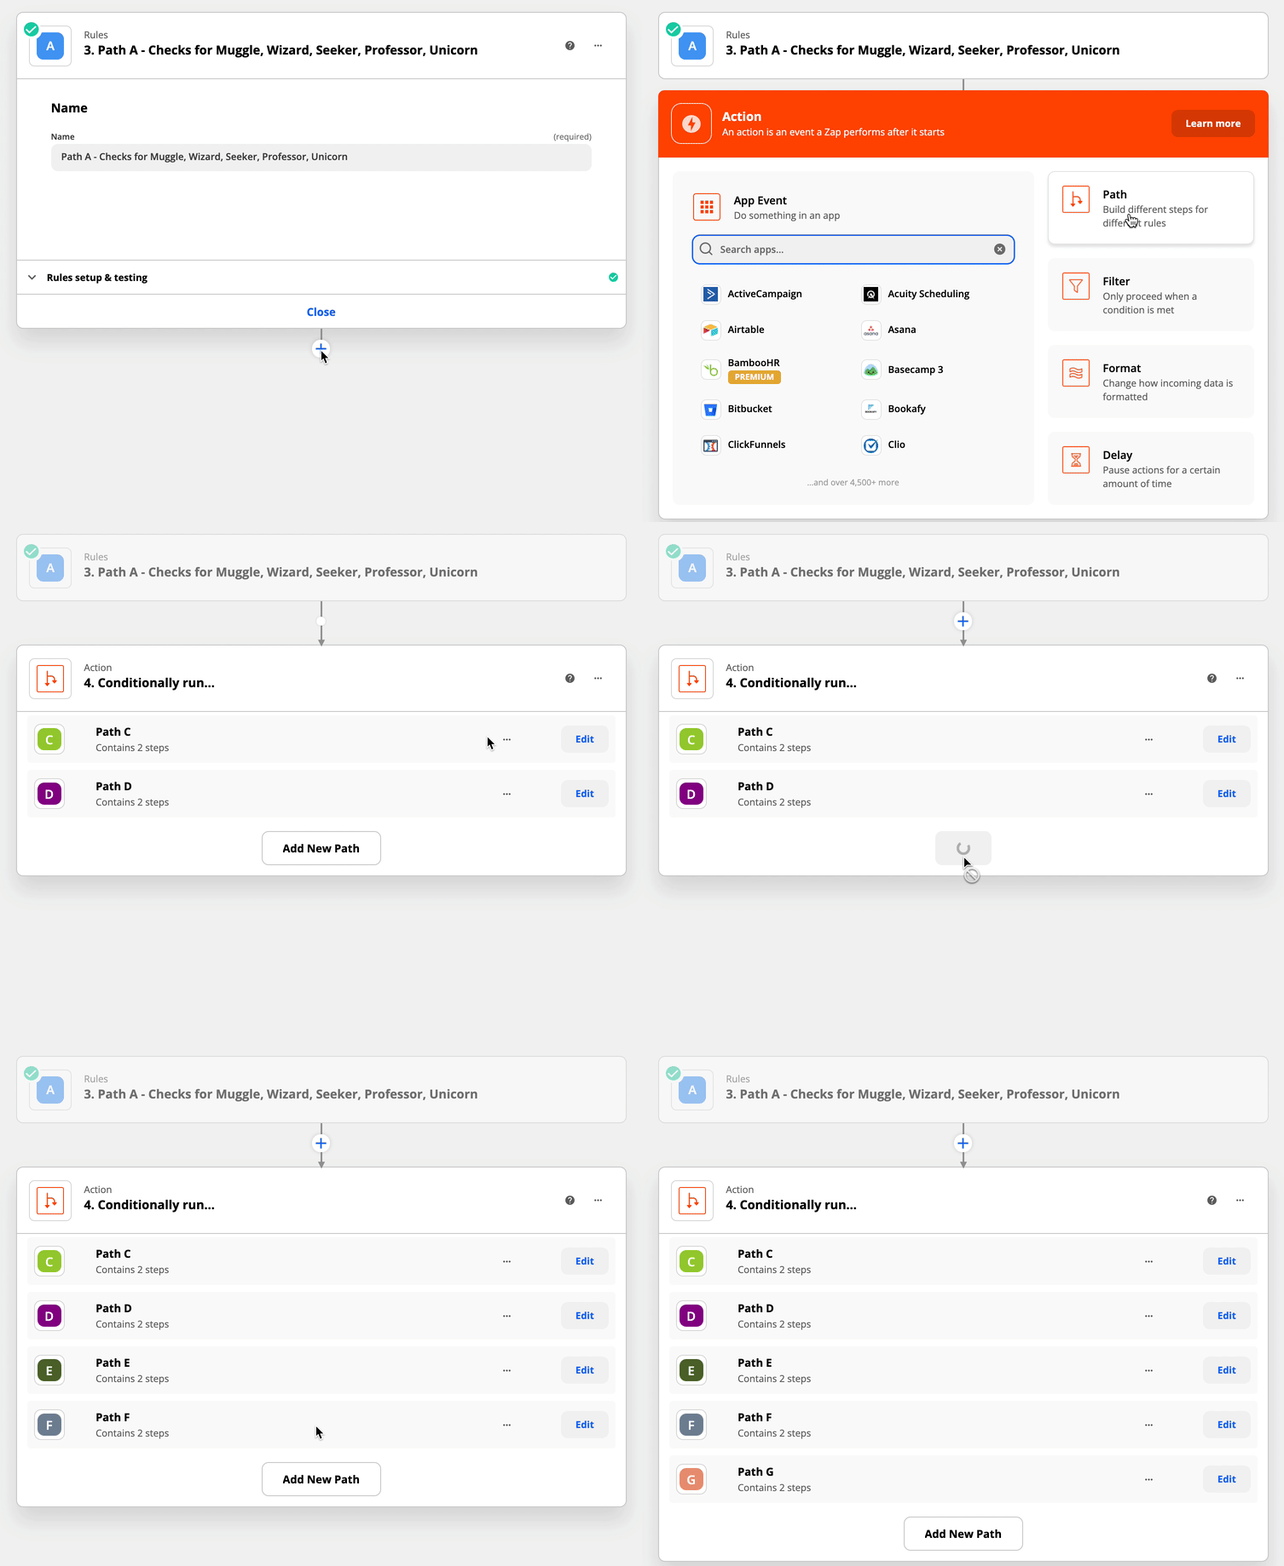
Then within Path A and Path B we’ll create five nested Paths to handle each possible stage:

Once those are set up you can configure the individual Path rules for each possible stage. Adding any desired actions to that Path as necessary.
For example, if they where in the Wizard stage we might send an email to them. If they were in the Professor stage we might add them to a Google Sheet. And if they were in the Muggle stage we may want the Zap to send a message in Slack to let us know.

You’d repeat this process of setting up the Path rules for each for the 10 nested Paths. Adding the desired actions for each of the 10 nested Paths.
Name your Paths
Nested Paths are great, but it can get a bit confusing if Paths aren’t given appropriate names. So make sure you rename your Paths from Path A, Path B etc. to something more descriptive. You want to be able to tell from a quick glance what each path is for:

Otherwise, if you need to make an edit in future, you’ll end up having to click into each Path to find the one you’re after. Which is a waste of time and no one wants that!
Further Reading
- Add branching logic to Zaps with paths
- What's the difference between AND and OR logic in filters and paths?
Wrapping up!
So, at the end of setting that up you should have a Zap that is able to run 10 different paths instead of only five. Now, that’s not to say that you can only run 10 different Paths. No, you could actually have five main Paths that are then split up into a further five nested Paths each. And then of course, you can add further Paths within those nested Paths, should you want to.
Happy Zapping! ![]()


