Quick guide on how to easily setup skill based routing in Zapier with Advanced Round Robin action of EnforcedFlow.
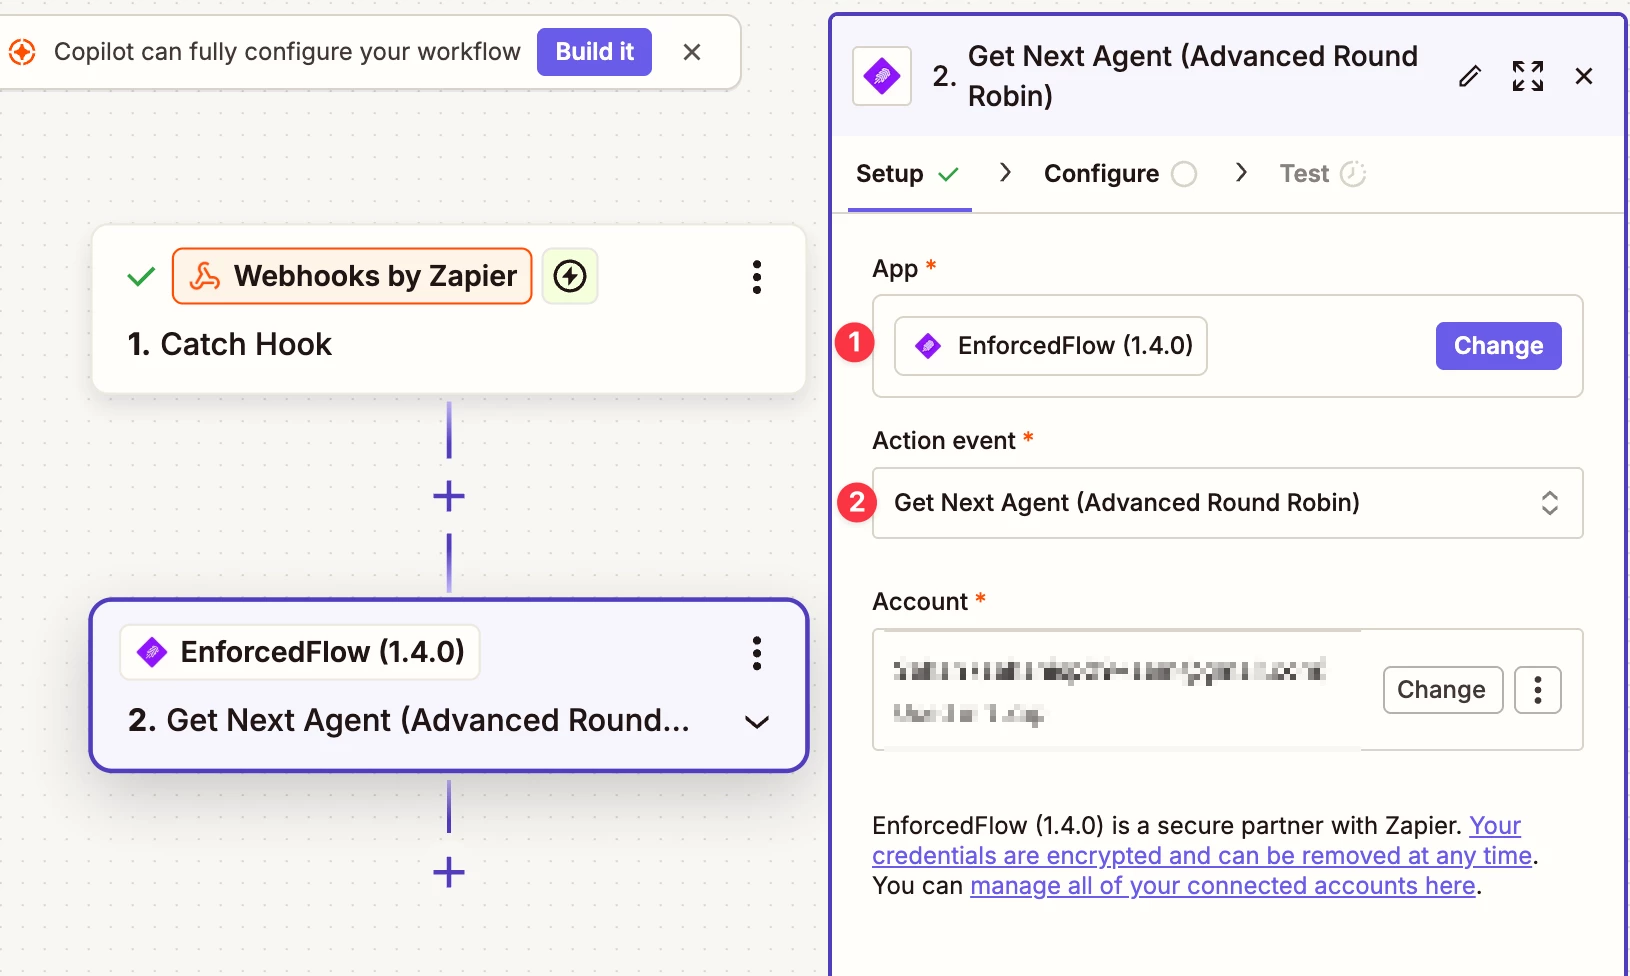
Step 1: Set Up Get Next Agent action
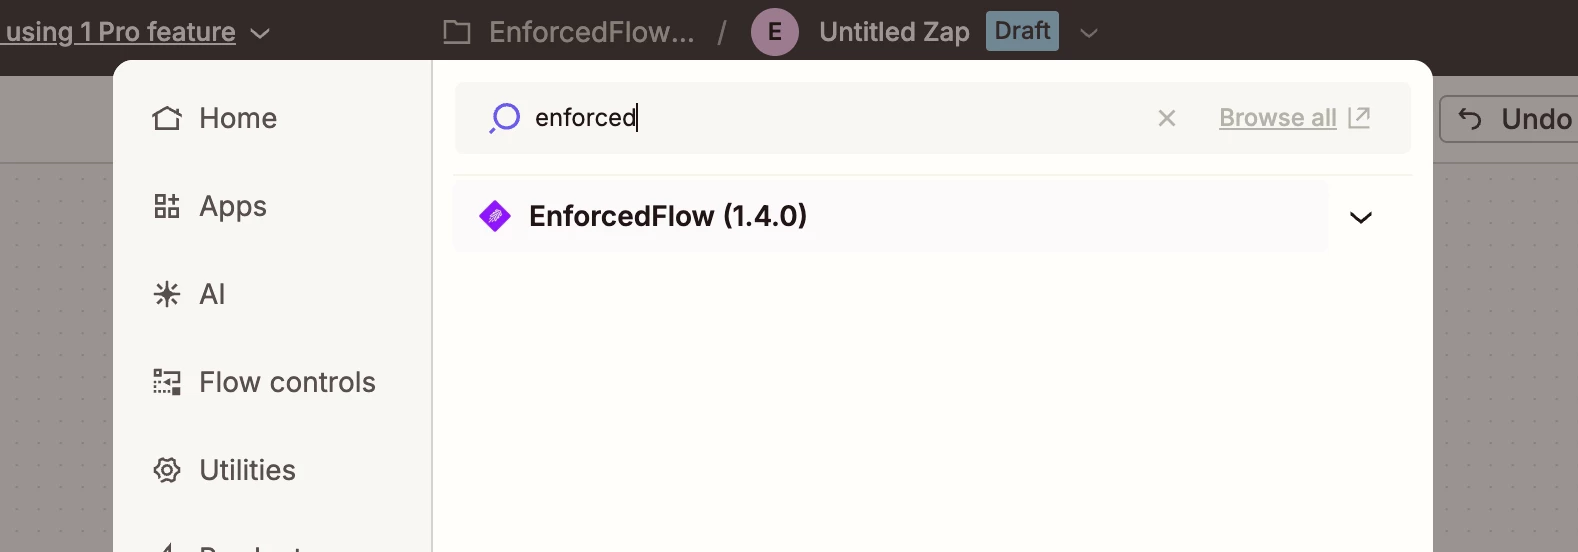
This action is available under EnforcedFlow
To setup a connection you can get a free API key from enforcedflow (follow the connection guide)
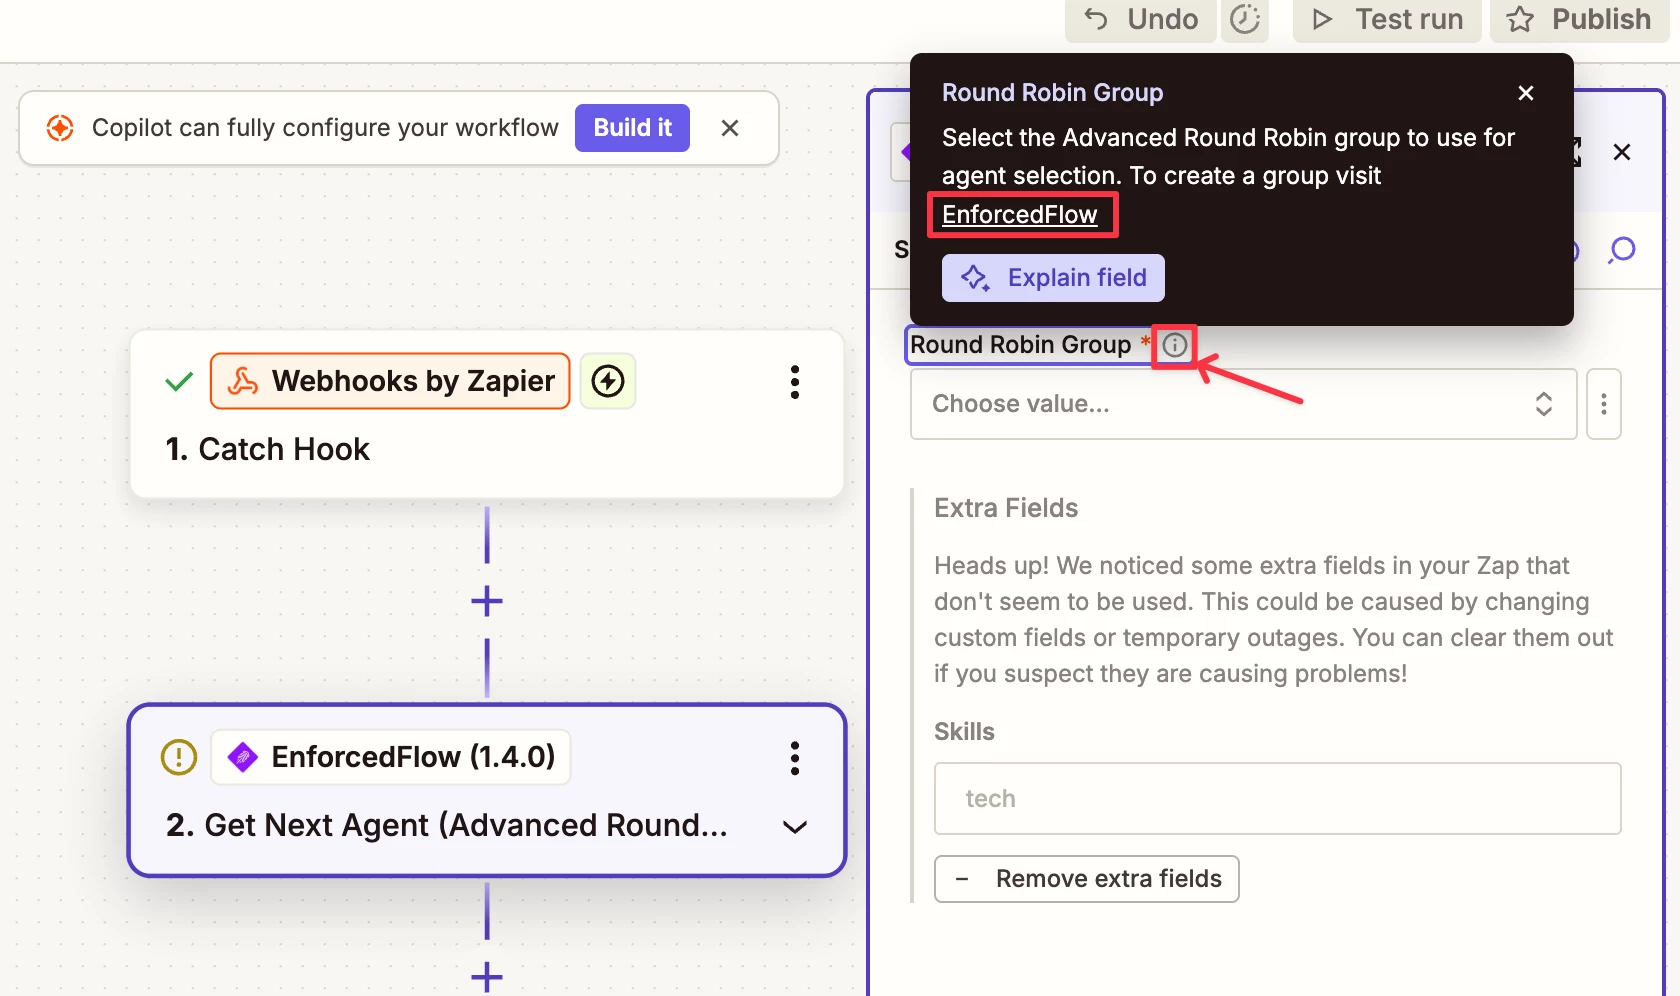
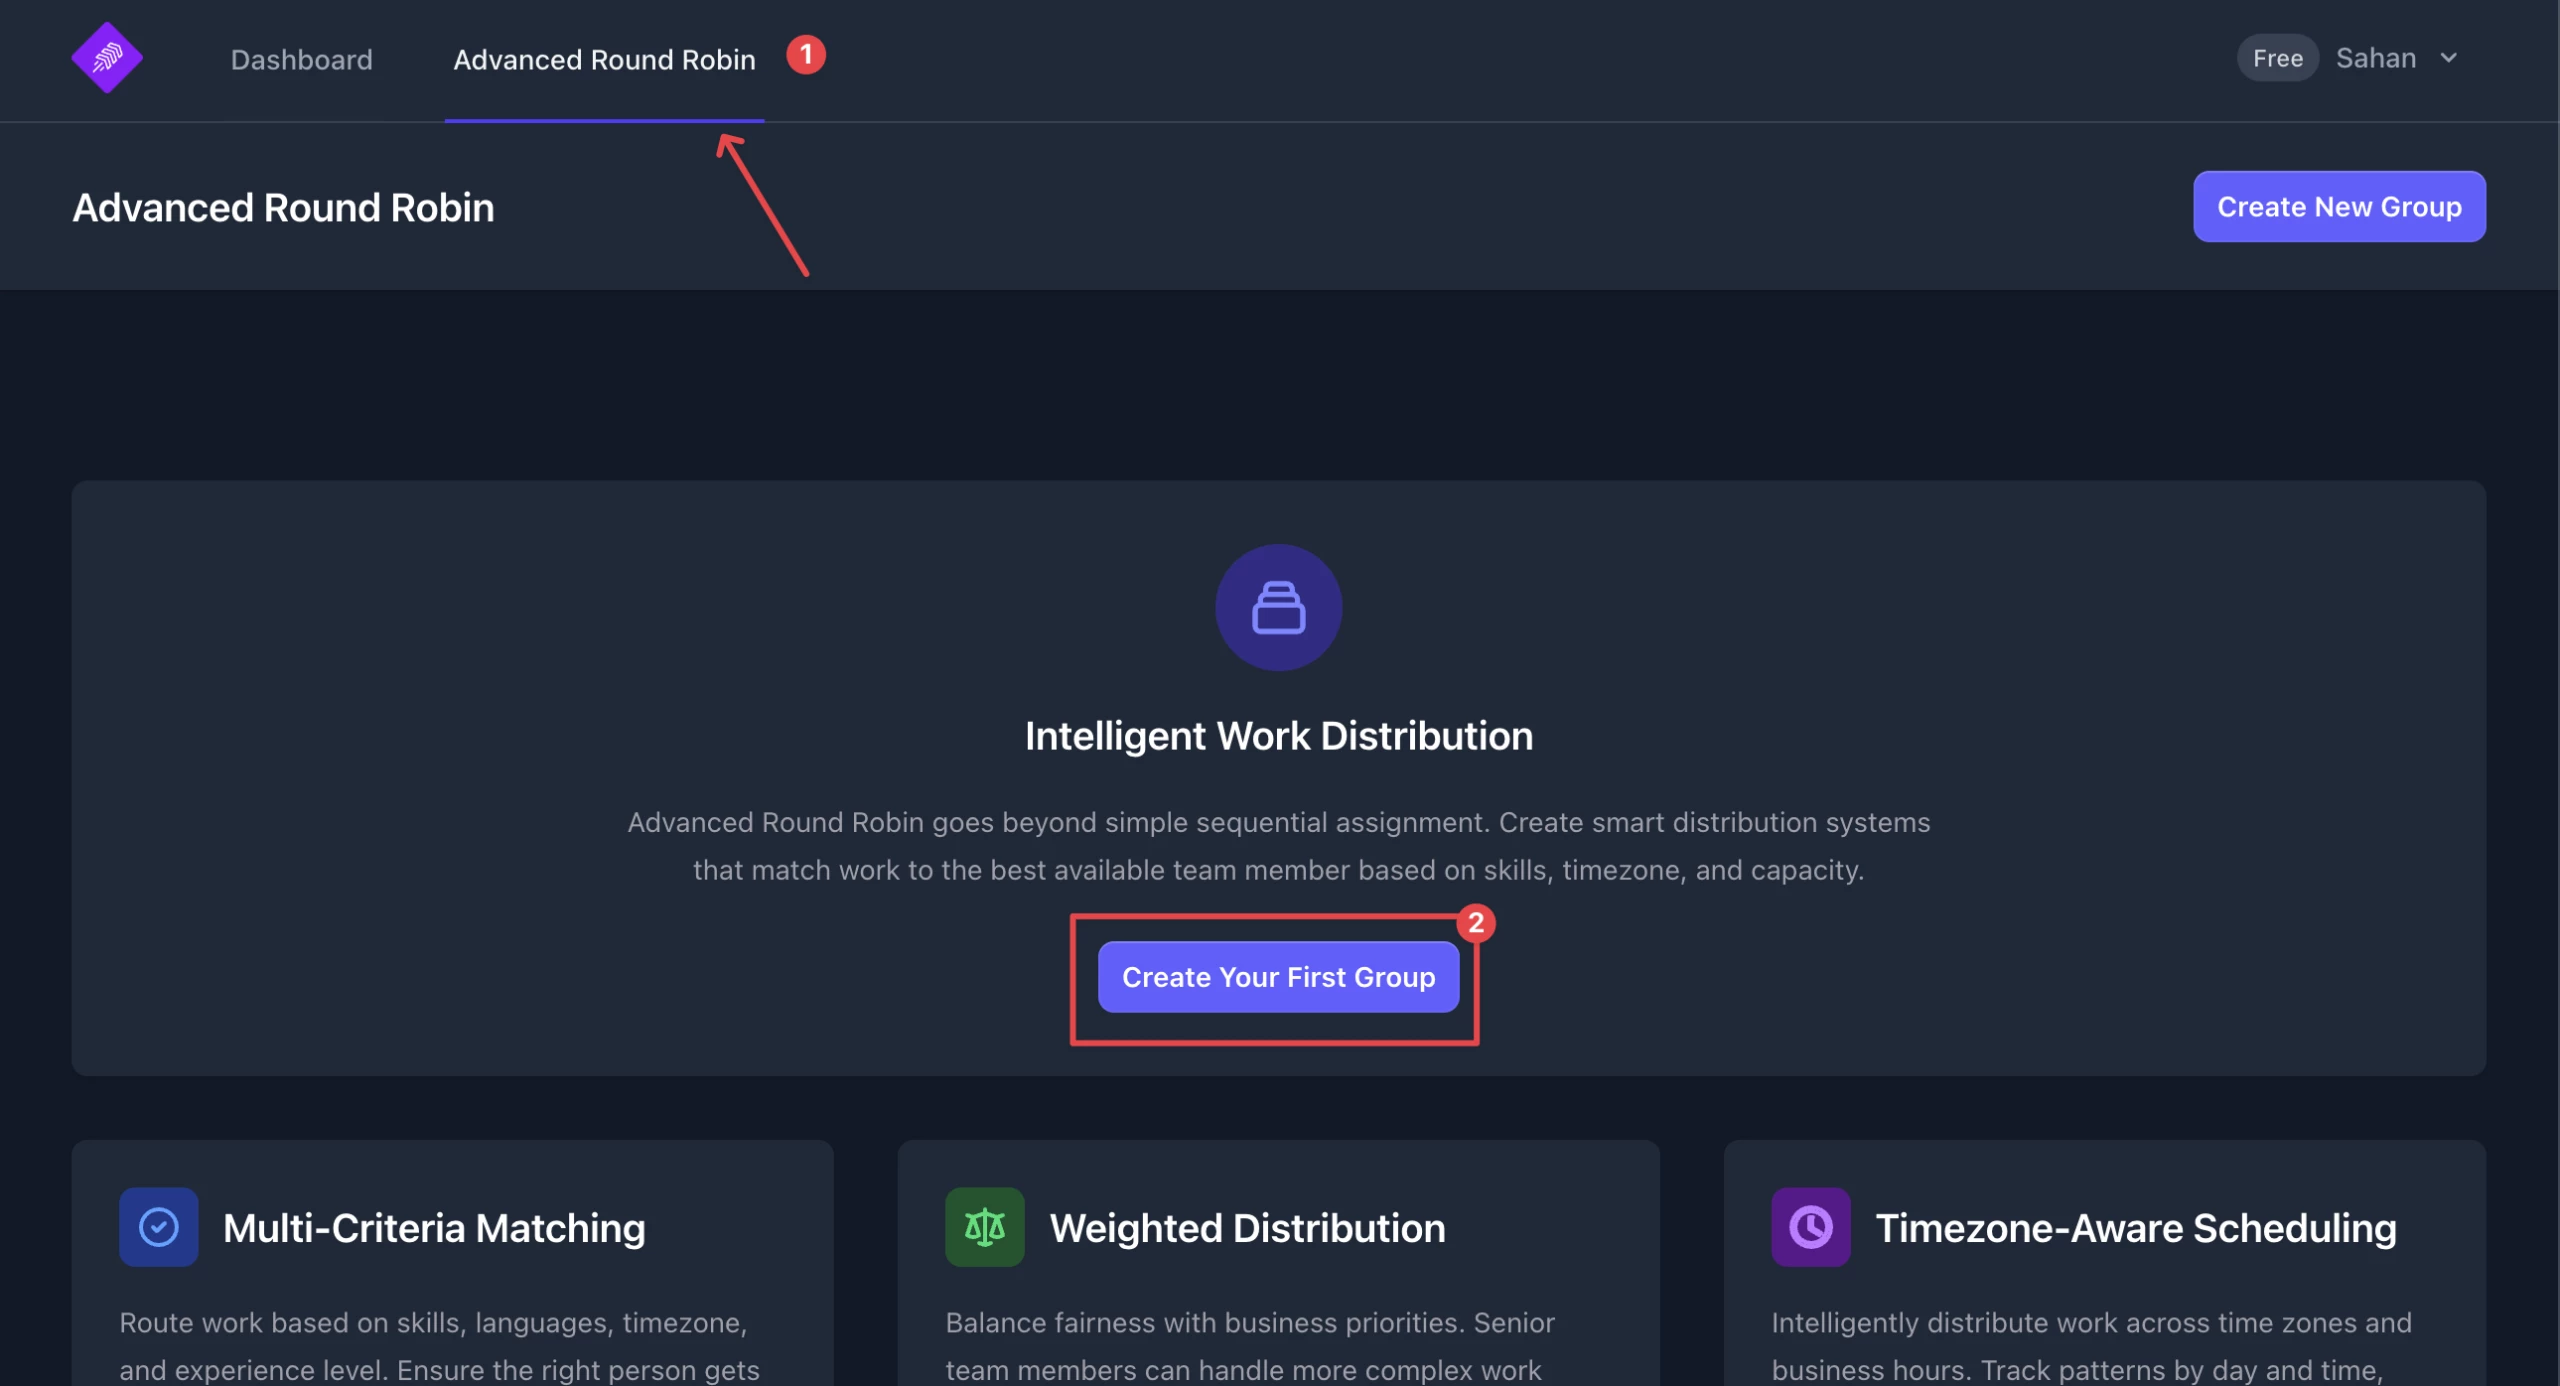
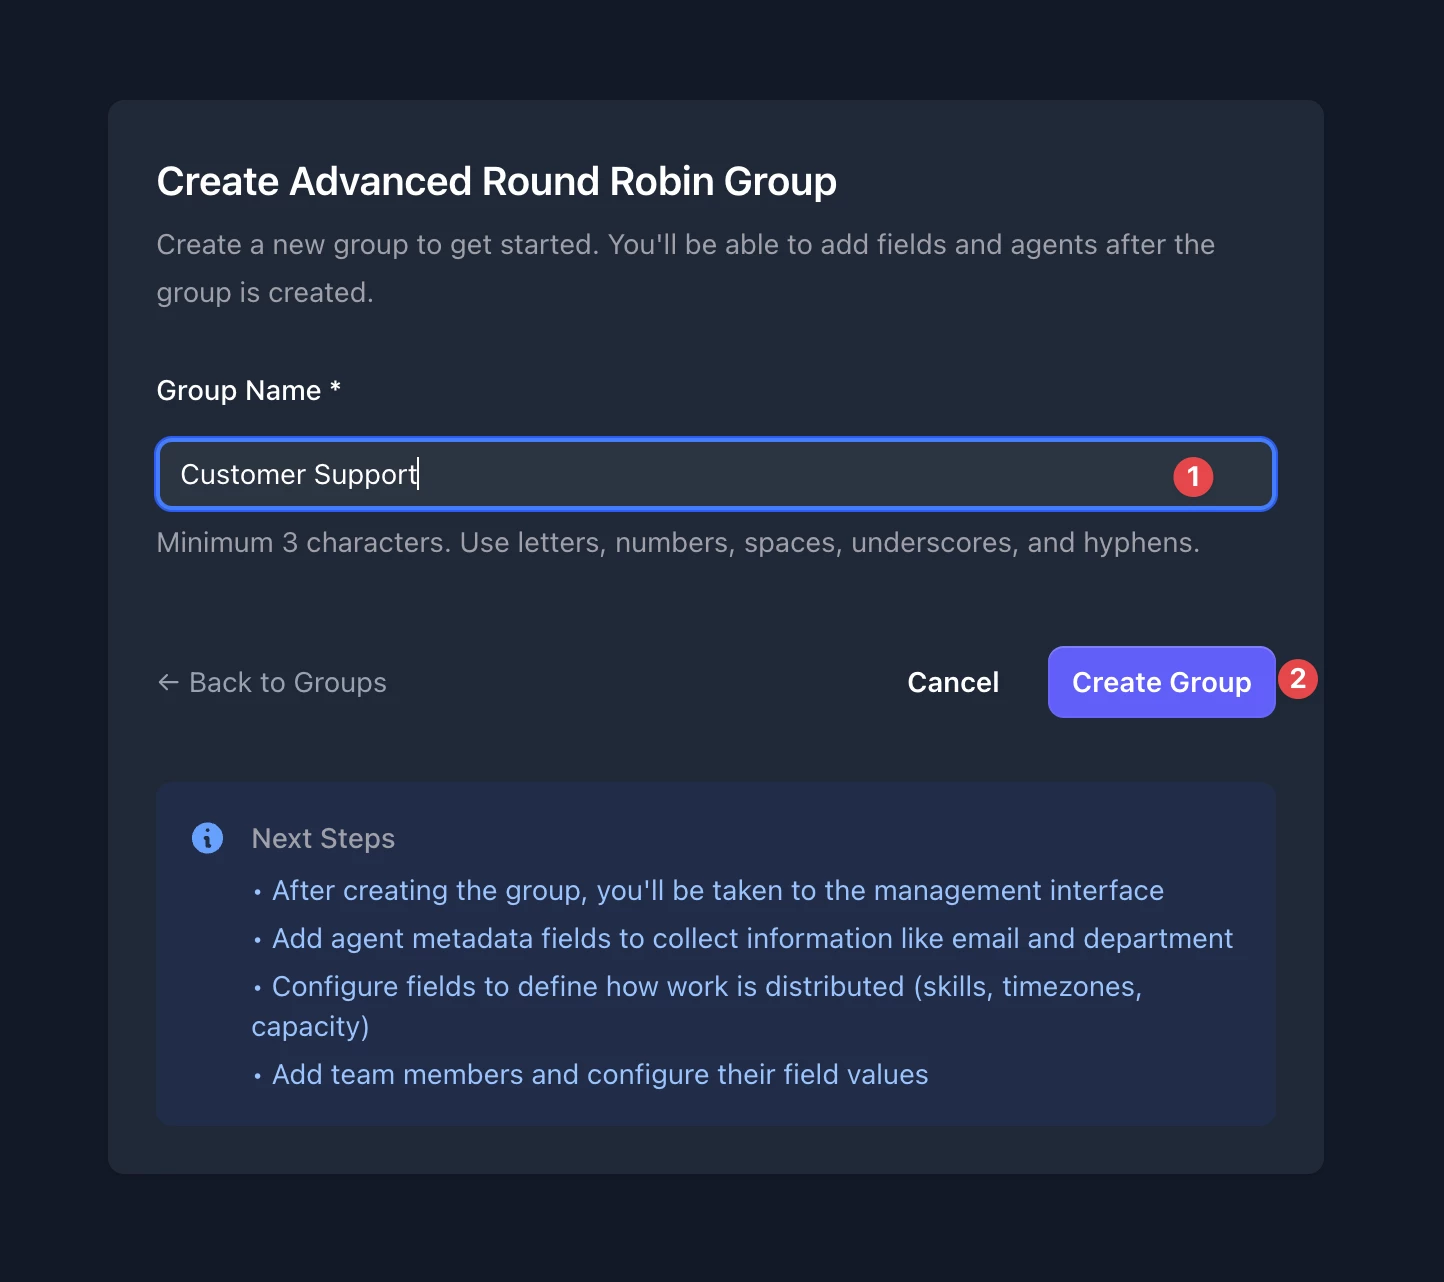
Step 2: Setup a Round Robin Group
In next step you will be required a select a group, first we need to create a group, click the link in help text and visit EnforcedFlow to setup a group
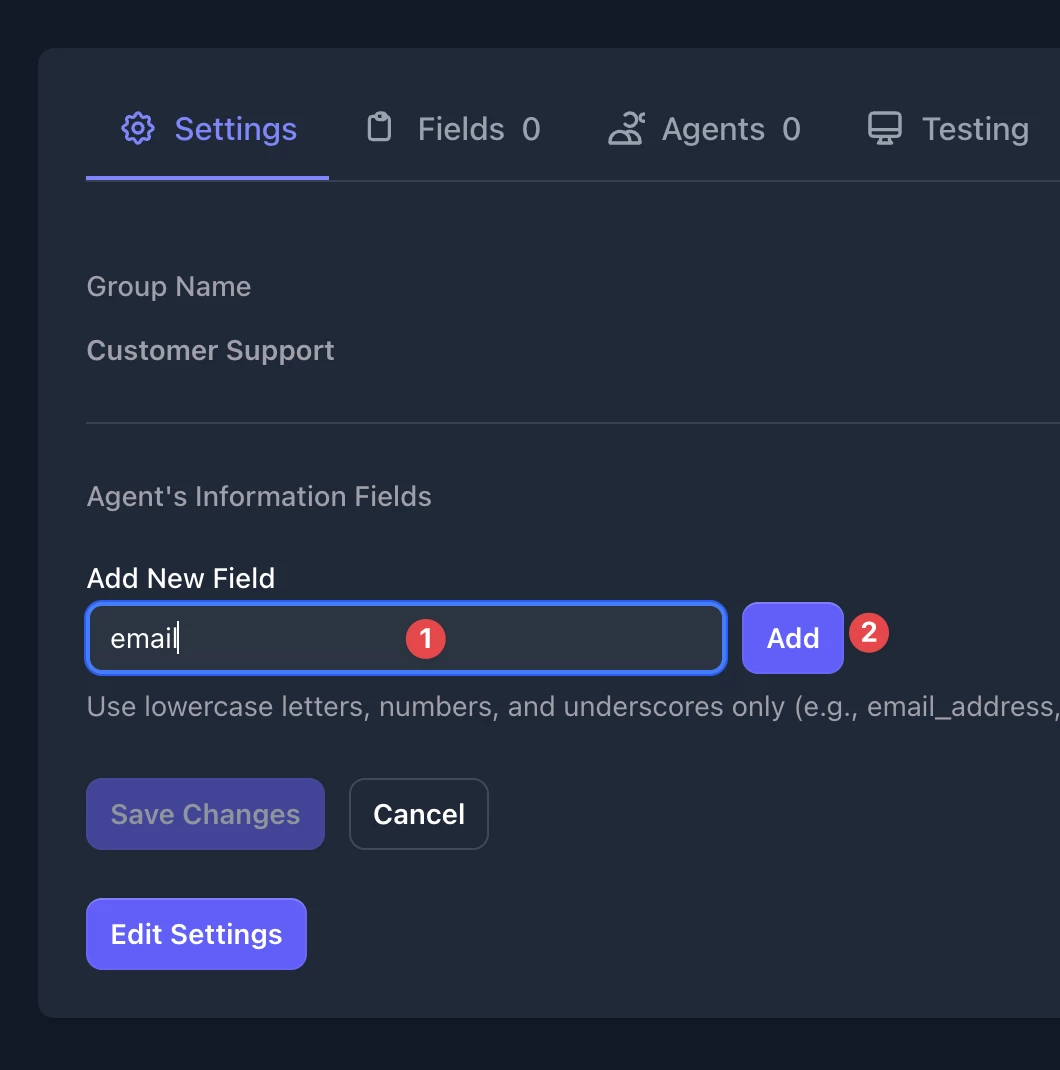
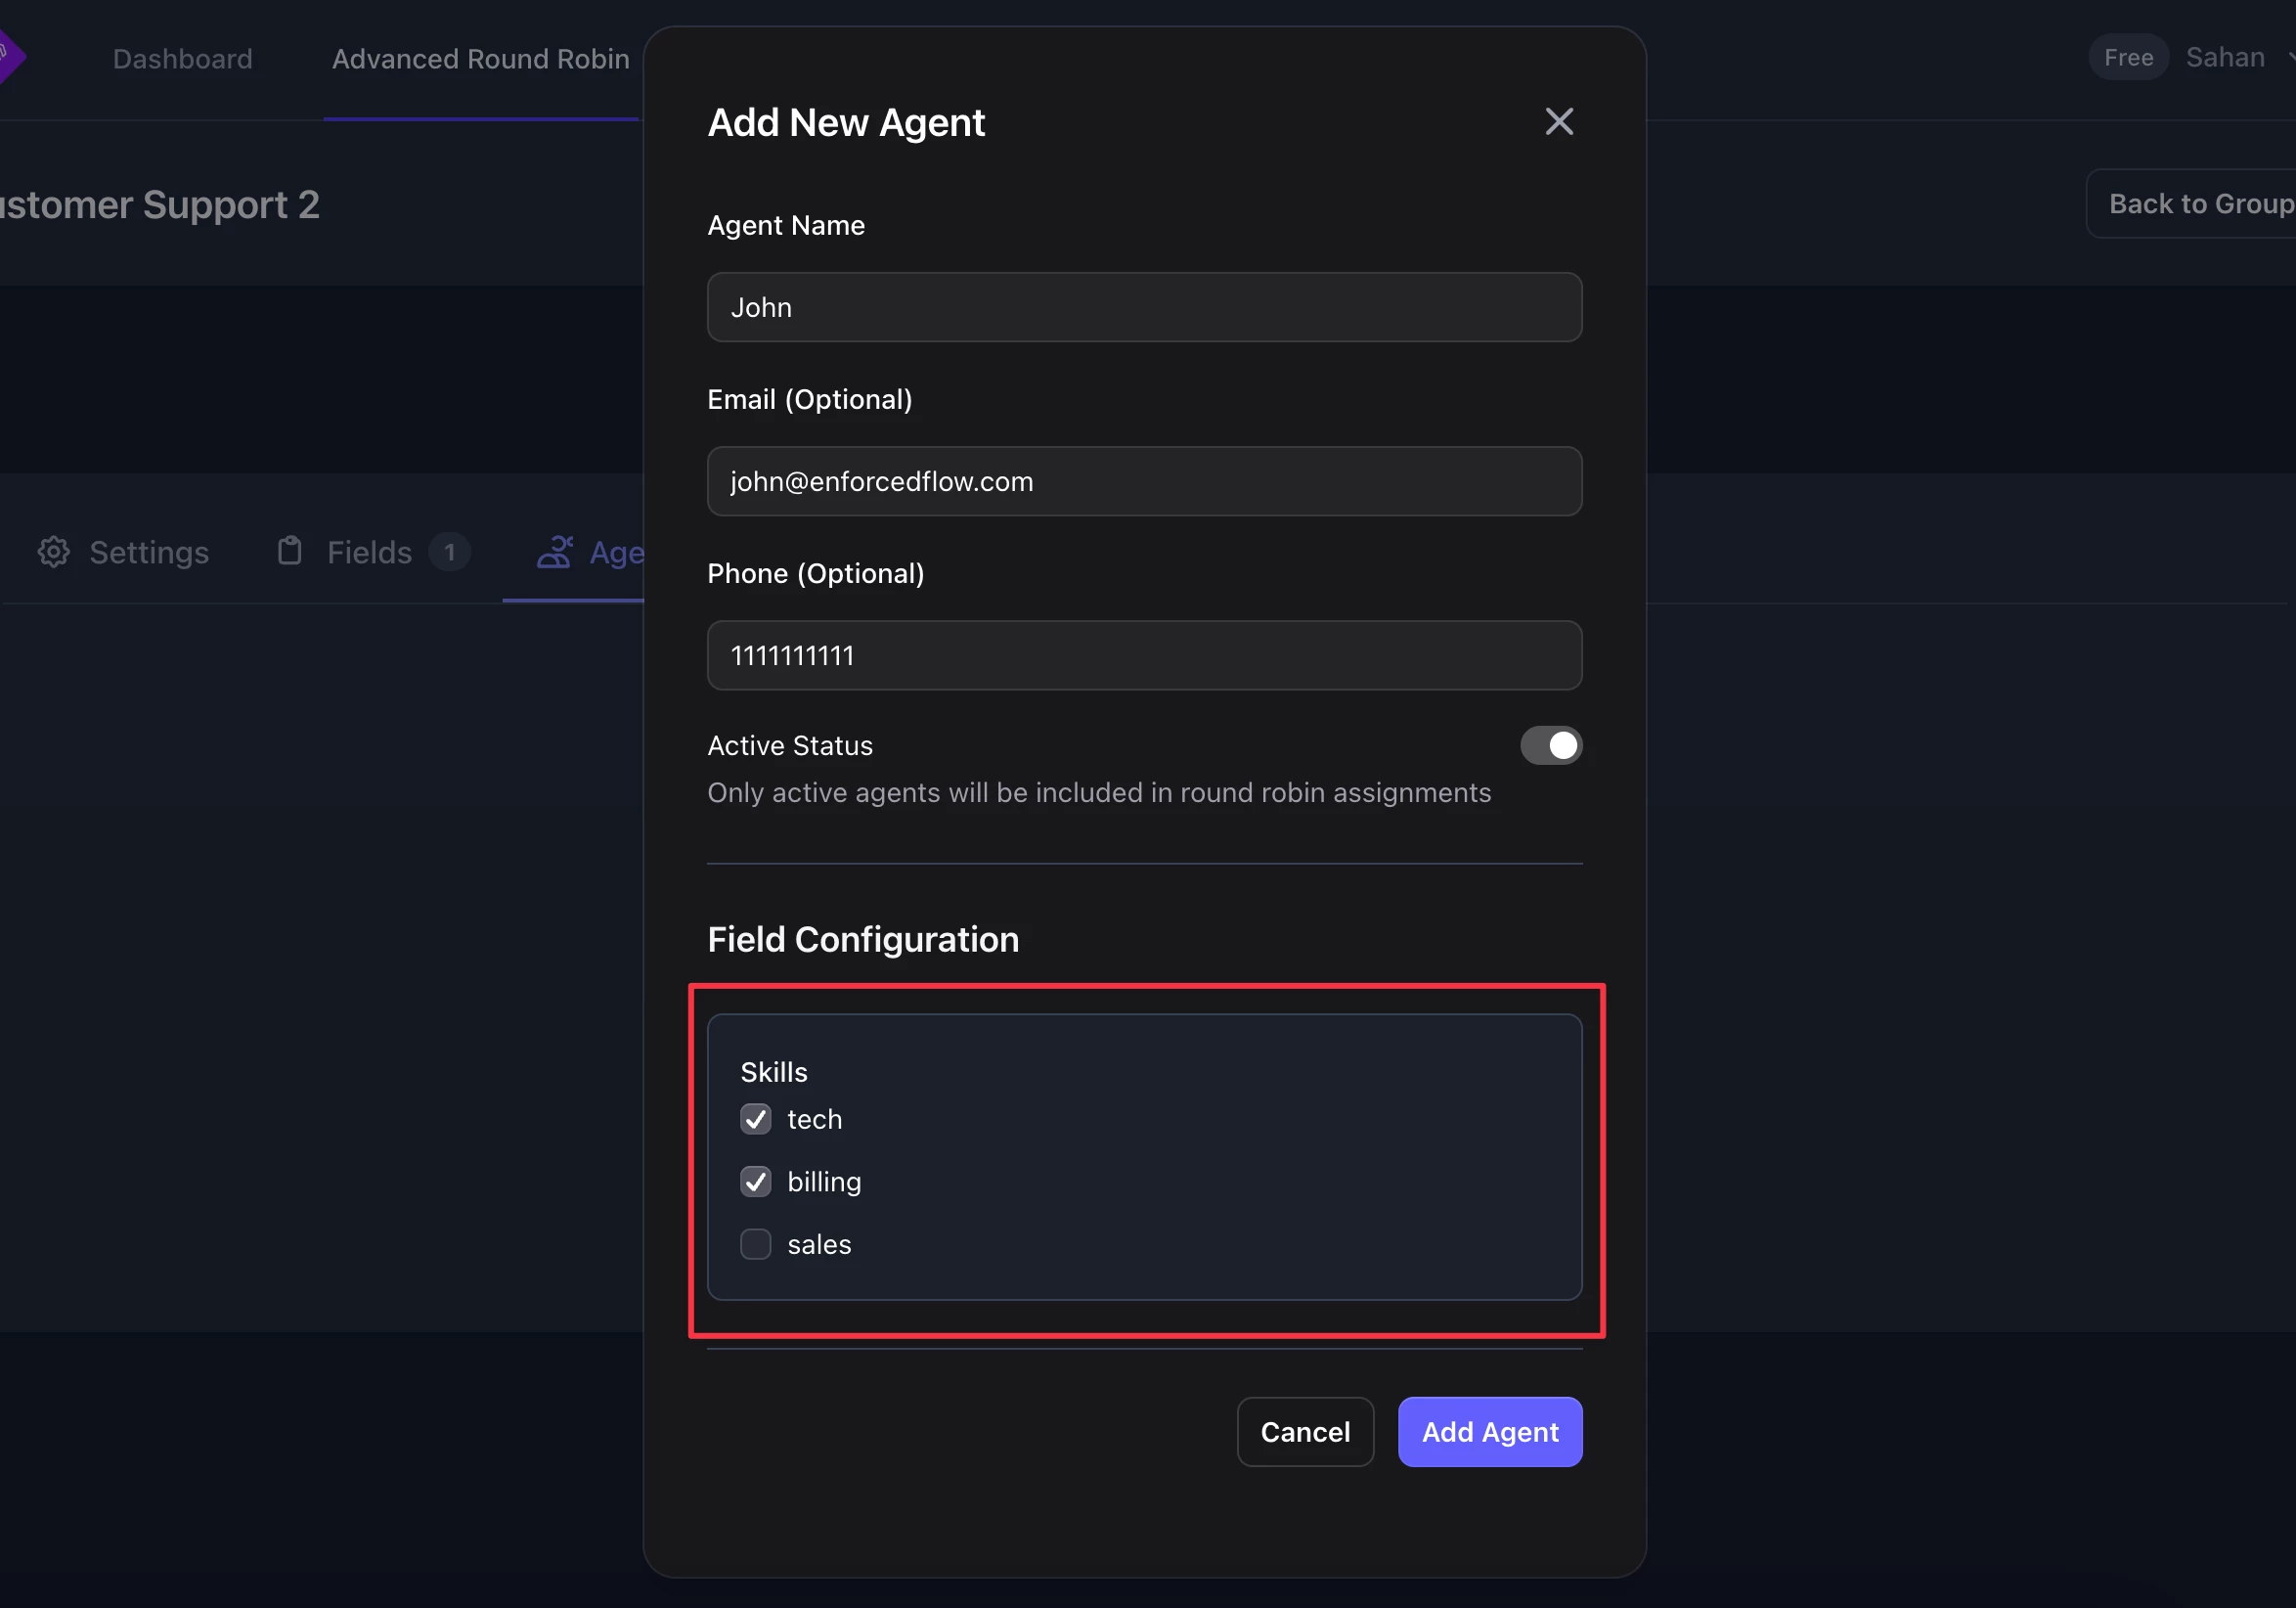
Setup Agent Fields
Before setting up agents, you need to decide what kind of information to store.
In this example, we’ll be contacting the agent via email. To store the agent’s email, let’s create a field called email.
- If you want to send the agent a Slack message, create a field called “slack_user_id.”
- If you are doing call routing, create a field called “phonenumber.”
The usage of these fields will be covered later in the article.

Set Up Fields for Routing
Fields allow you to set the criteria for routing. There are three types of fields:
- Multi Select – Used when you want to route a request based on skills, language, or category.
- Day and Time – Used when you want to route a request based on an agent’s availability. You can set the agent’s working hours and days.
- Weight – Used to prioritise requests, e.g., assign 70% of tickets to Agent A.
EnforcedFlow supports multiple fields so you can set up powerful routing criteria.
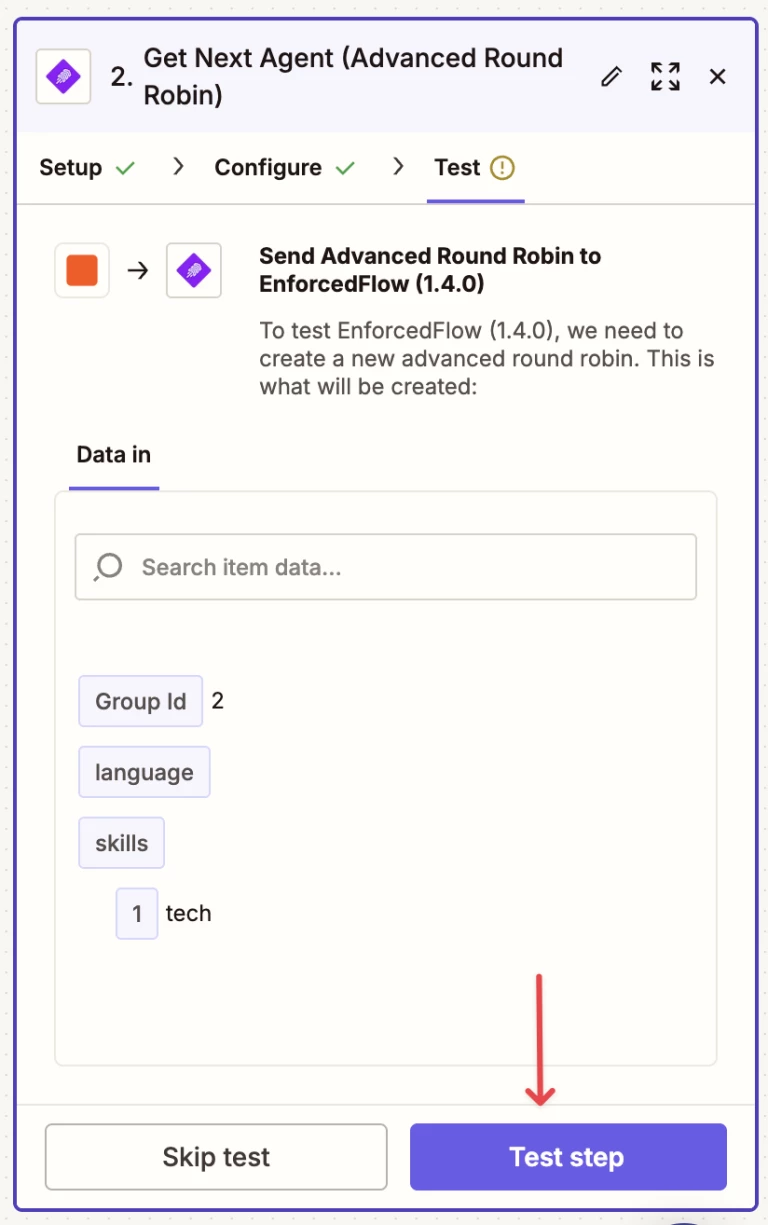
For skill based routing we need a multi select field.

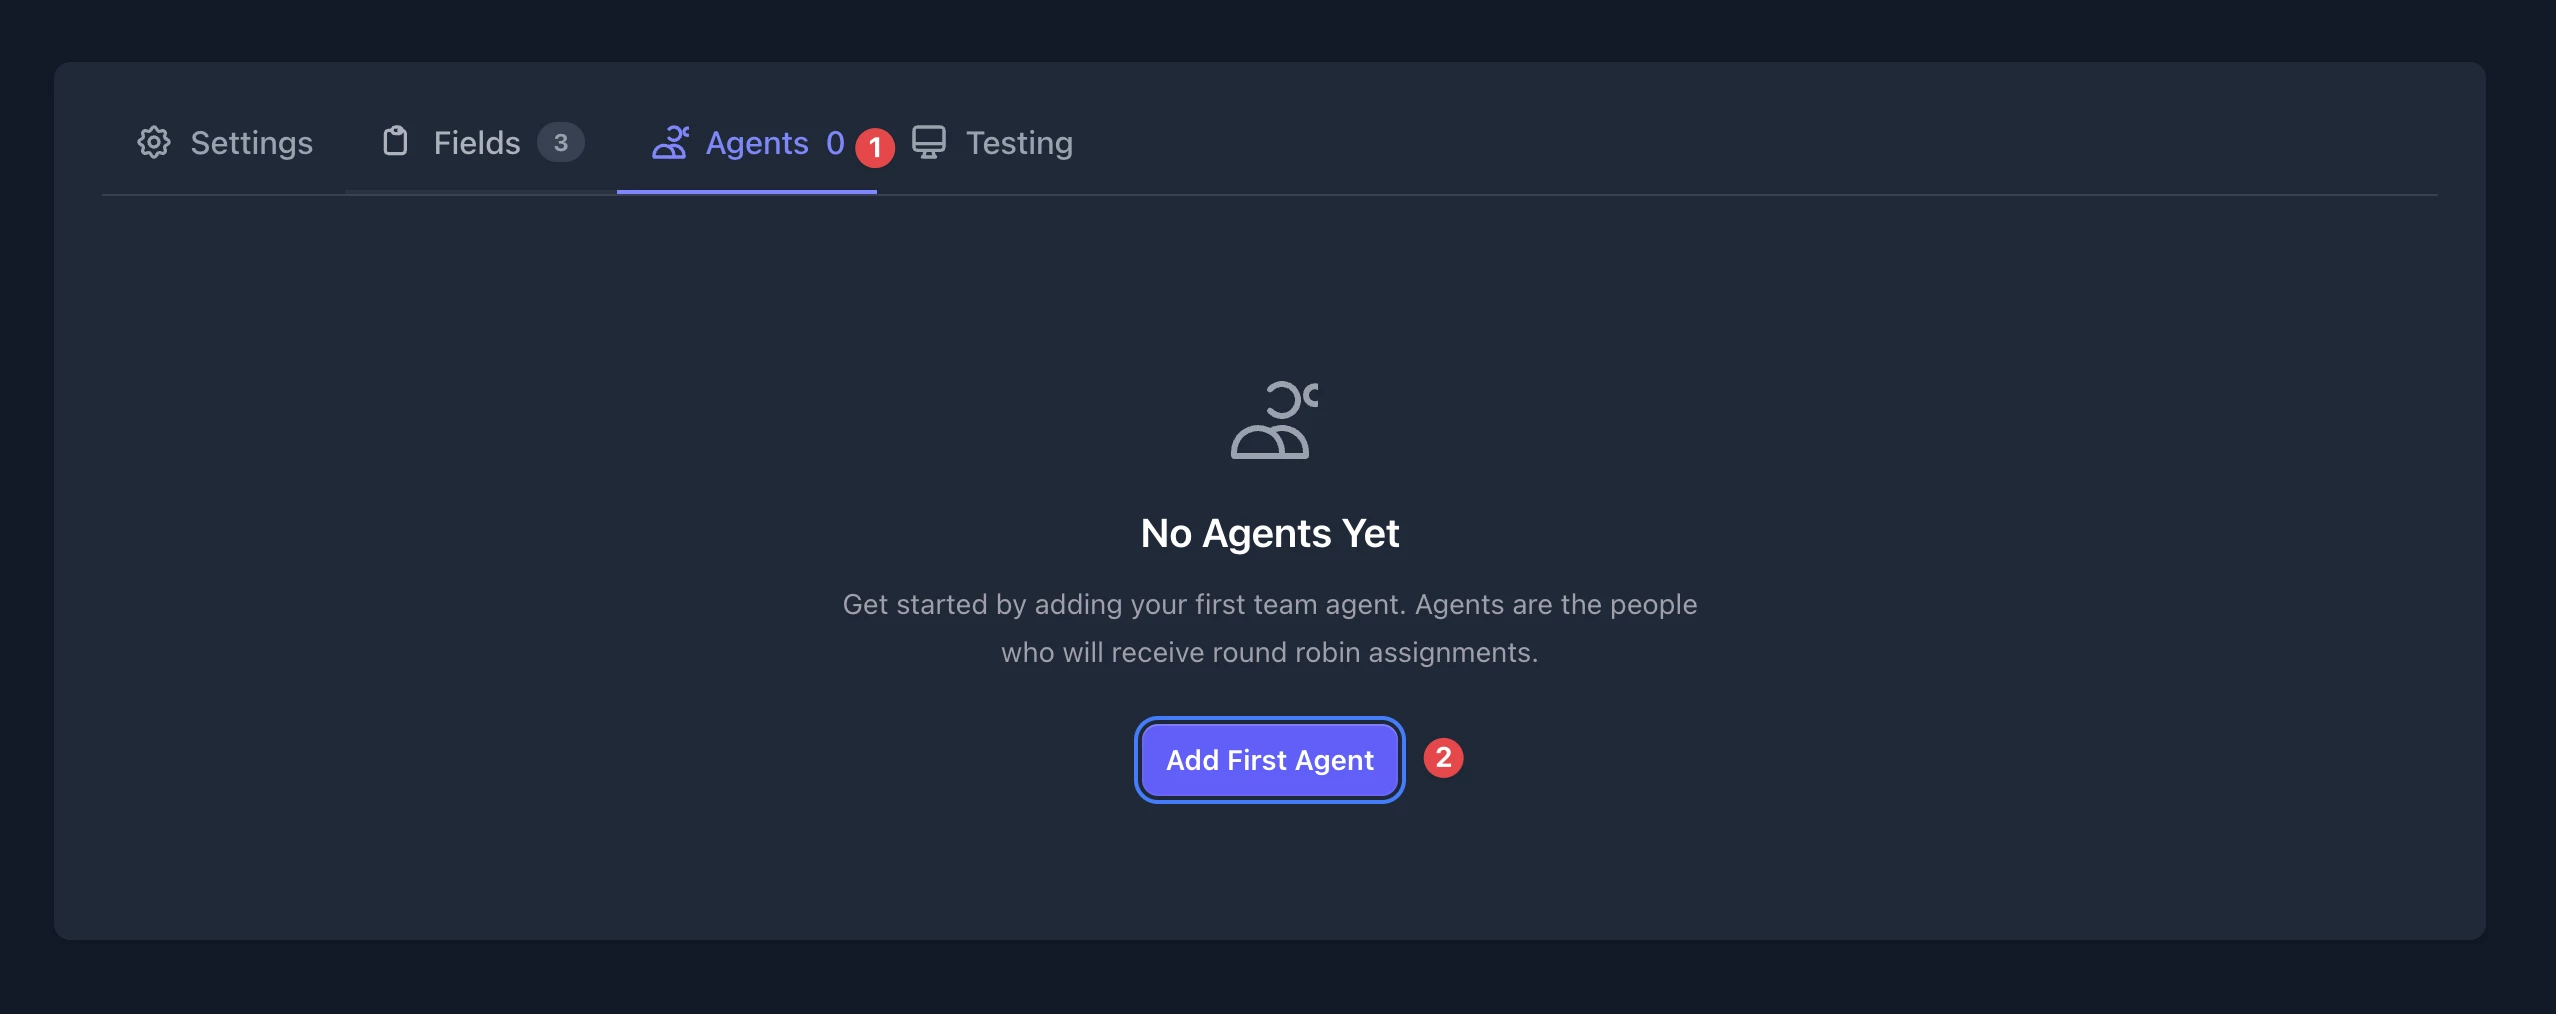
Add Agents
The final step is to add agents to the group.
Finalize the Zap
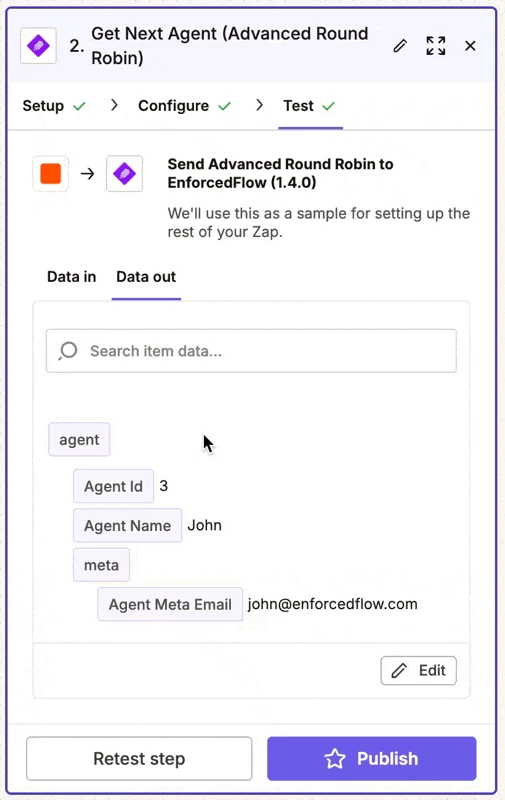
After adding agents, head back to Zapier. You should see the newly created group in Round Robin Group dropdown.