Triggering Zapier from an email can be an effective way to integrate with systems like Realtor.com, Venmo, Airbnb, or any other app that doesn’t have a Zapier integration yet. Often times, lead response time is critical and all of the Gmail Zapier triggers are scheduled (1-15 minute delay depending on your plan). This walk-though will show you how to set up Gmail forwarding to instantly trigger Zapier (bonus: since this solution uses Zapier Email Parser you may also be able to parse the email content at the same time)
*The below guide walks you through how to set up a forwarder in your Gmail account. However, you can set up forwarding rules for all different types of mail clients and the premise of the guide is the same. Here are details on how you can set up forwarding rules with an Outlook account: https://support.microsoft.com/en-us/office/use-rules-to-automatically-forward-messages-45aa9664-4911-4f96-9663-ece42816d746
Step 1: Create Your Parser account and Mailbox
- Create a Parser by Zapier account if you haven’t already at https://parser.zapier.com. Click on Login then Login with your Zapier Account. Once you’ve logged in you should see a screen like the below, with a list of all your mailboxes (or empty if you’ve never been here before).

- Click on Create Mailbox. You should see a screen like below. The highlighted text is your zapier parser email address.
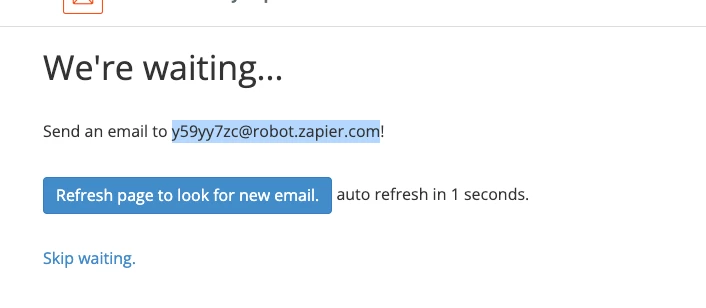
**PRO TIP: If you click skip waiting, you can rename your email address (highly recommended)

*****If you’ve named the mailbox: Scroll down and click on Save Address & Template. We will come back and configure this later. ****
Step 2: Authorize a Gmail Forwarder
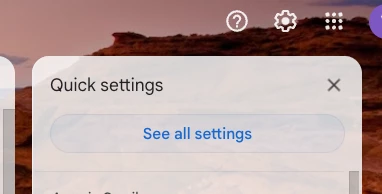
From your Gmail inbox, click on the gear icon then see all settings.
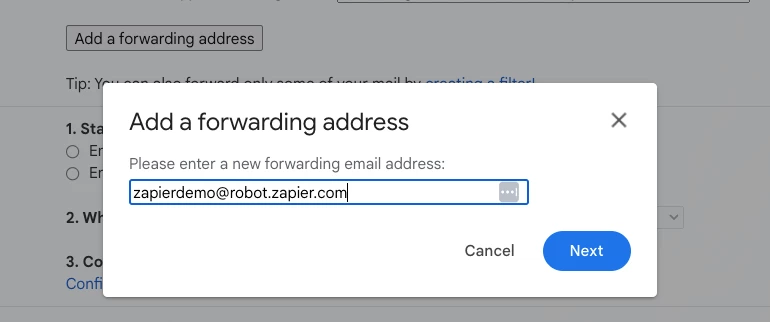
Across the top of the next screen you will see a tab for “Forwarding and POP/IMAP”. This is where we are going to authorize the Zapier Email Forwarder.

In the forwarding section click on ‘Add a forwarding address’ then paste in your Zapier parser email address (note, i’ve renamed mine in this demo)
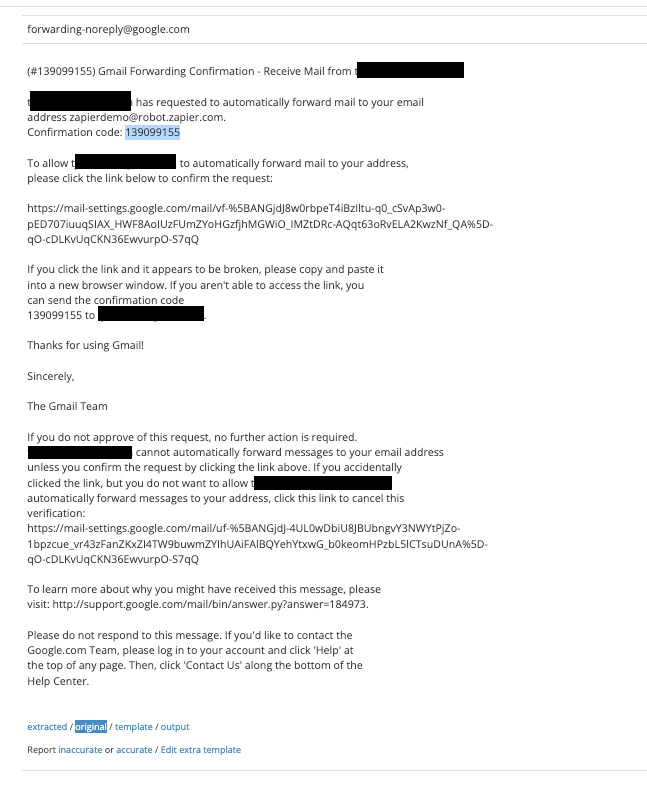
Click on next and Gmail will send you an email with an authorization code. Head back to parser.zapier.com and click on your View Emails next to your mailbox.
Since, you don’t have a template configured you may not see anything right away or you may be prompted to set up your template. But at this stage, we are just looking to copy the confirmation code. If you don’t see anything, click on original. Copy your confirmation code and paste it back in your Gmail account and click on Verify. You can delete this email in your mailbox once the account is verified.

Step 3: Create a Forwarding Filter
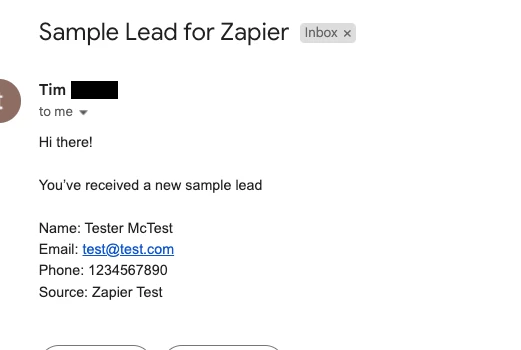
Now that we’ve authorized our Zapier mailbox, we need to set up forwarding rules so Gmail knows which emails to send to Zapier. For this demo, i will be using the following email. In our example, the email subject will always be “Sample Lead for Zapier”
From the Gmail inbox in the search mail bar, click on the 3 lines for advanced search options

You can now configure your email forwarder! Our rules in this demo are that the emails will come from a GetUWired domain and have the subject line “Sample Lead for Zapier”. If you need additional help with your search filter you can visit Google’s support docs here: https://support.google.com/mail/answer/7190?hl=en
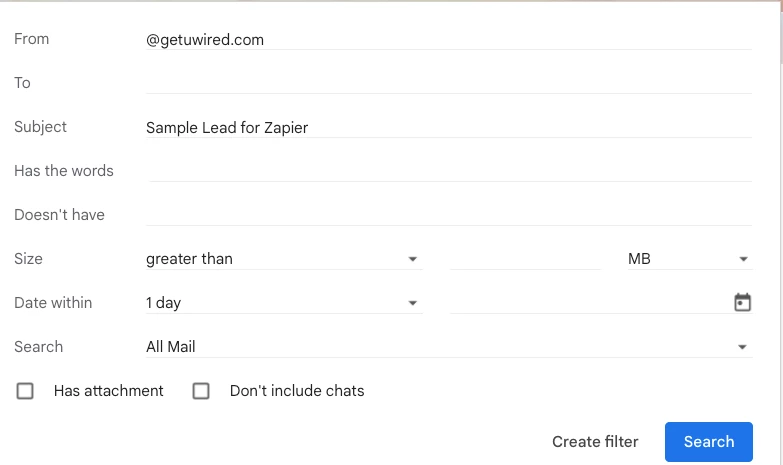
Click on Search and make sure your filter looks good! If not, modify your filter criteria to be more specific. If so, click back on the advanced search options then click on ‘Create filter’. Check the box to forward emails matching this criteria to your email address. Then click on Create filter
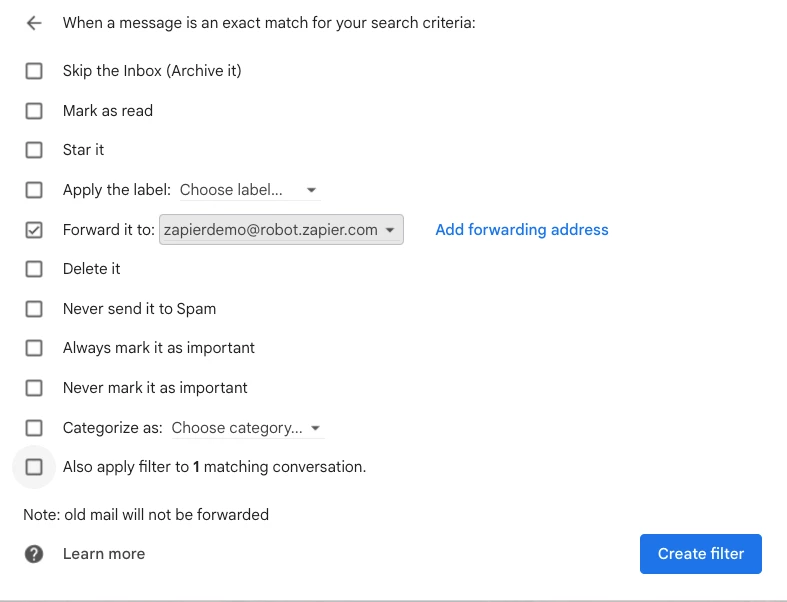
The next time you receive an email matching this filter it will be automatically sent to your Email Parser!
Step 4: Wait for a sample email to come in and finish everything up!
If you can trigger an email that’s helpful, if not, its best to wait a couple of days until an email comes in then you can finish configuring your template and set up your zap.
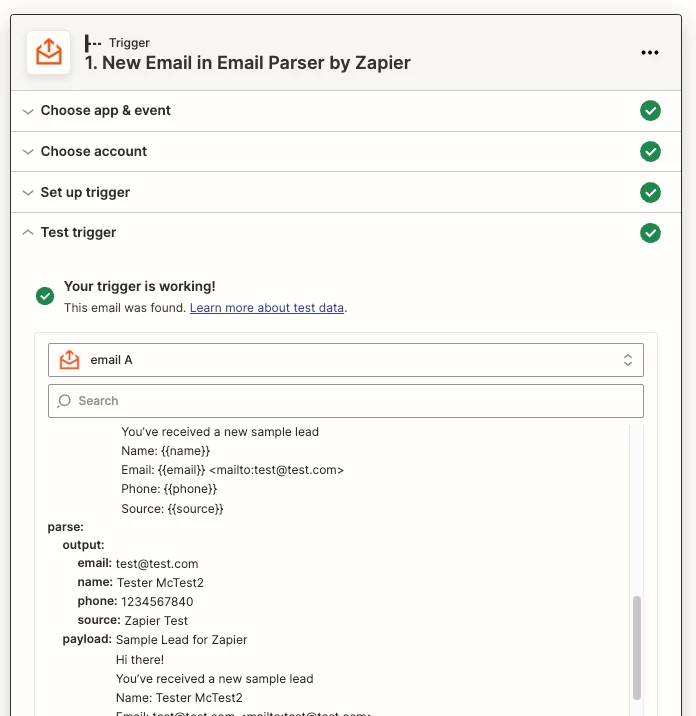
once you’ve received an email, log back into your parser.zapier.com account, click on your mailbox, then click on template, then another click here.

For help configuring your email parser you can visit Zapier’s academy here: https://help.zapier.com/hc/en-us/articles/8496008546061-How-to-Get-Started-with-Zapier-Email-Parser
Step 5: Set up your Zap!
set up your zap to trigger whenever you receive a new email in your parser and you are done! Now Zapier will trigger instantly for your Gmail emails.