Hi all!
I want to share my solution, maybe it will be useful to someone.
This post was inspired by this question: https://community.zapier.com/how-do-i-3/adding-a-checkbox-to-a-google-sheet-2059.
There are published solutions there, but maybe someone like me will not want to use "auxiliary" Tabs or do manual manipulations to manage checkboxes.
Our goal:
1. When a new response is received from a Google Form, insert a new row into the Google Sheet
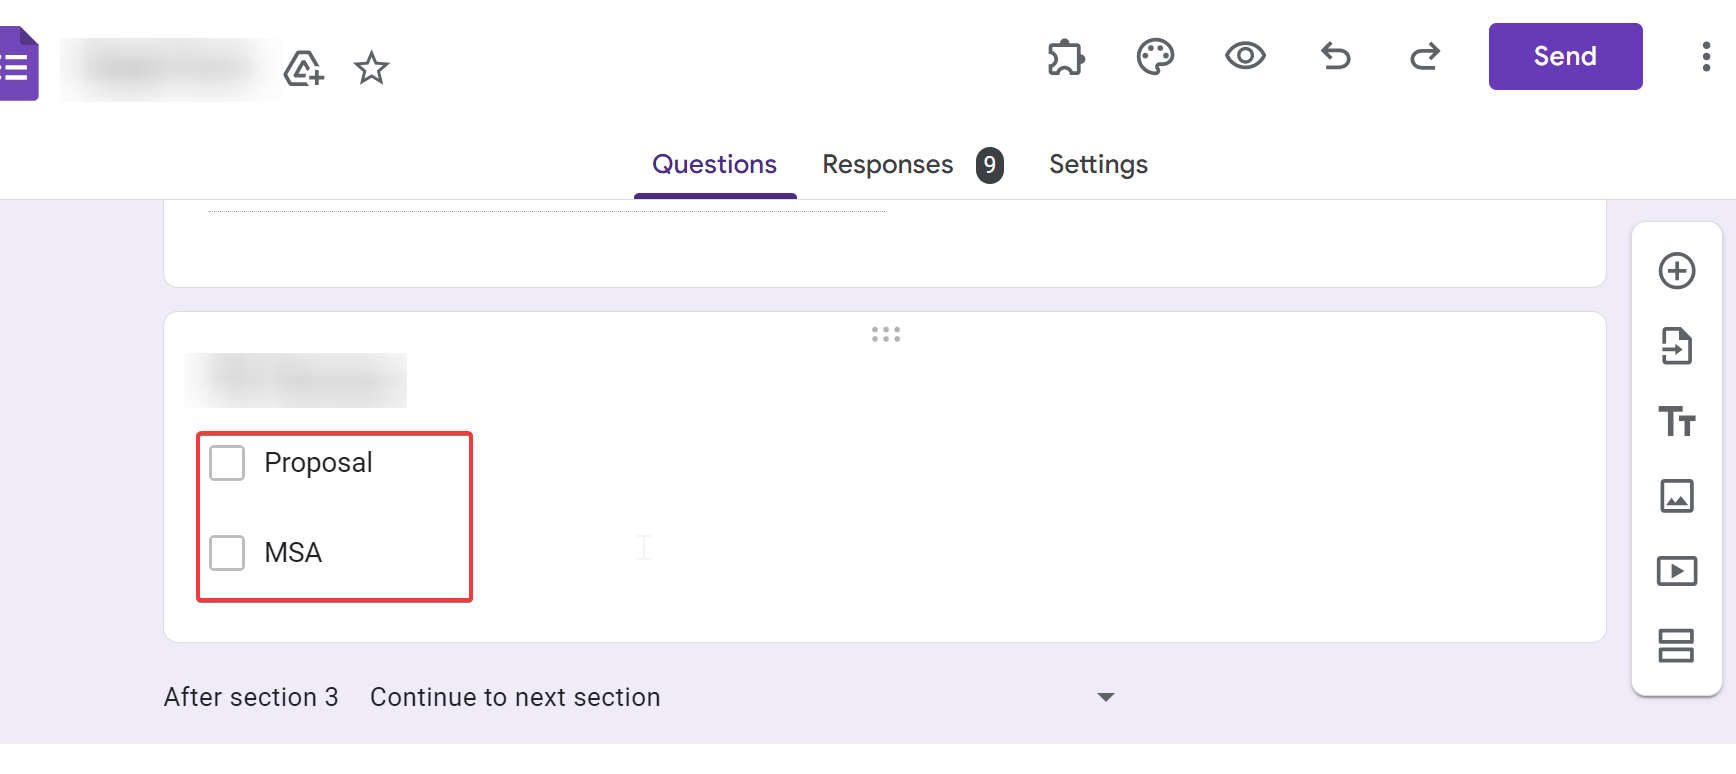
2. It should be noted that some fields in the form are checkboxes.
Form field:
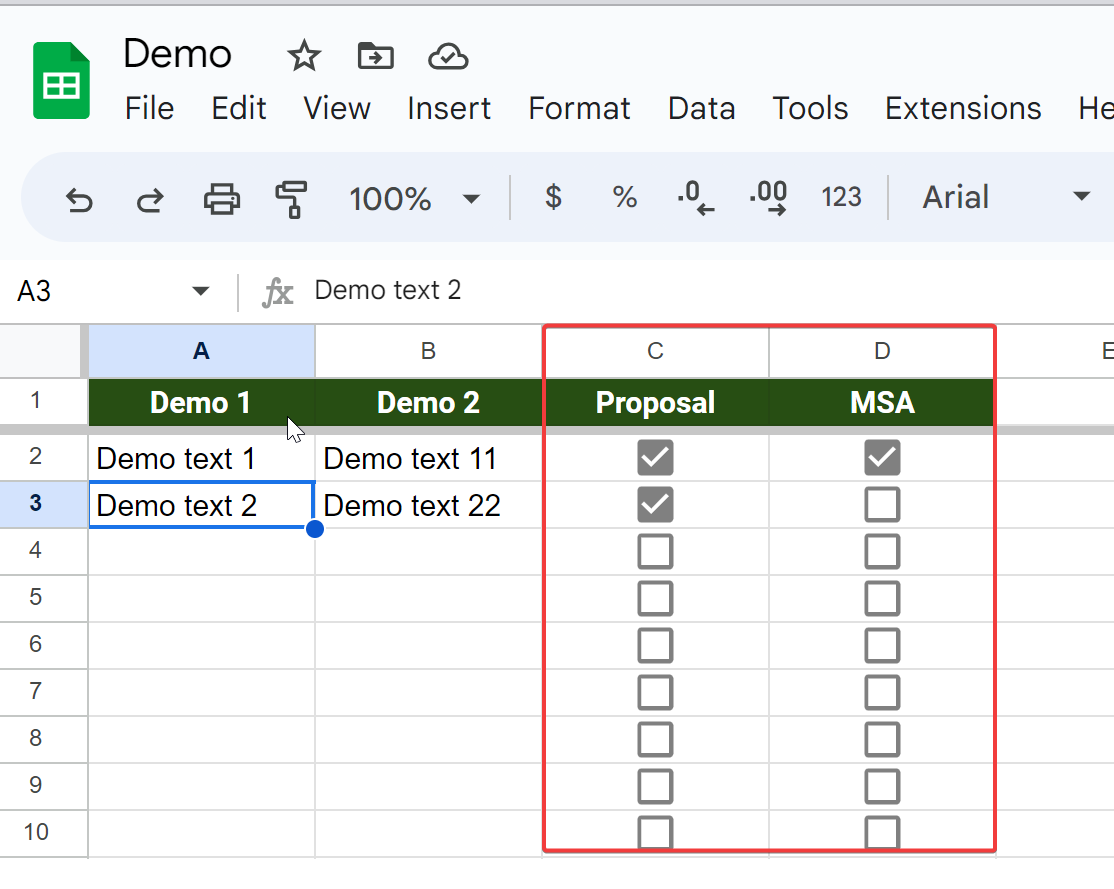
Sheet content:
Problems we solve:
1. By default, the "Create Spreadsheet Row" event will create a new row AFTER all rows that have a checkbox (even if they are not set to True)
2. By default, this event will write text values to cells with checkboxes, and will not set a new checkbox (which is unexpected behavior for us)
Example:
Solution:
Our final Zap looks something like this in a nutshell:
- Get response from Google Form (this is the same as always)
- Check if the fields we need are checked with checkboxes (JS code)
- Find first empty row on tab in Google Sheet (Get Many Spreadsheet Rows + JS code)
- Pass these values to the desired step (Update Spreadsheet Row + Js code)
DETAILS:
0. Get the result of the form (everything is as usual here):
- APP: Google Forms
- Event: New Form Response
- Trigger: Choose your form here
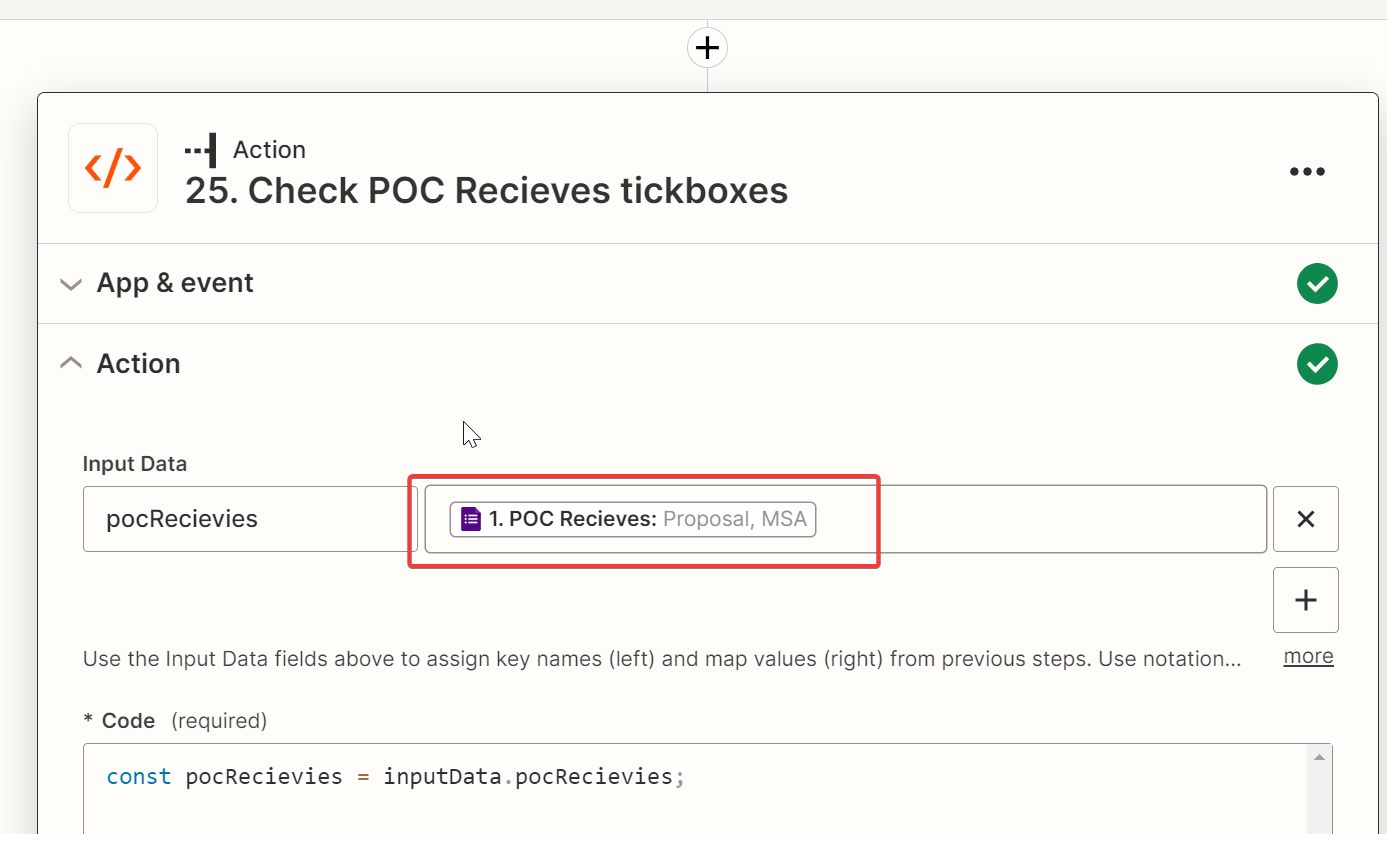
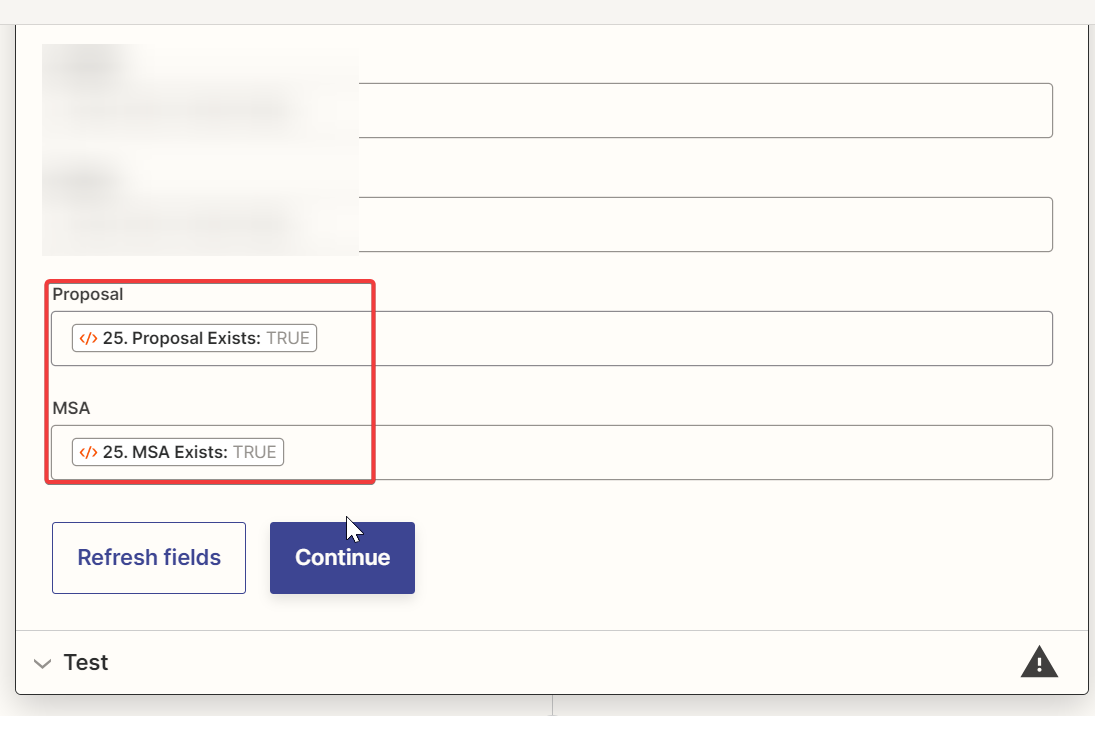
1. Check if the required fields with checkboxes are checked:
- APP: Code by Zapier
- Event: Run JavaScript
- Input data as in the screenshot (we pass our field with checkboxes to the input):
Action (code):
// Get input data
const pocRecievies = inputData.pocRecievies;

// Set default null values
let proposalExists = null;
let MSAExists = null;

// Check if answer contains "Proposal" value
if (pocRecievies != undefined && pocRecievies.indexOf('Proposal') != -1) {
   // Set value to TRUE to make checkbox works
   proposalExists = 'TRUE';
}

// Check if answer contains "MSA" value
if (pocRecievies != undefined && pocRecievies.indexOf('MSA') != -1) {
   // Set value to TRUE to make checkbox works
   MSAExists = 'TRUE';
}

// Output data to make it accessible by other steps
output = [{proposalExists: proposalExists, MSAExists: MSAExists}];
Now we know which of the checkboxes we should mark as True.
2. Get existing rows from the desired tab:
- APP: Google Sheets
- Event: Get Many Spreadsheet Rows (Advanced, output as Line Items)
- Select our file and the desired tab
Example:
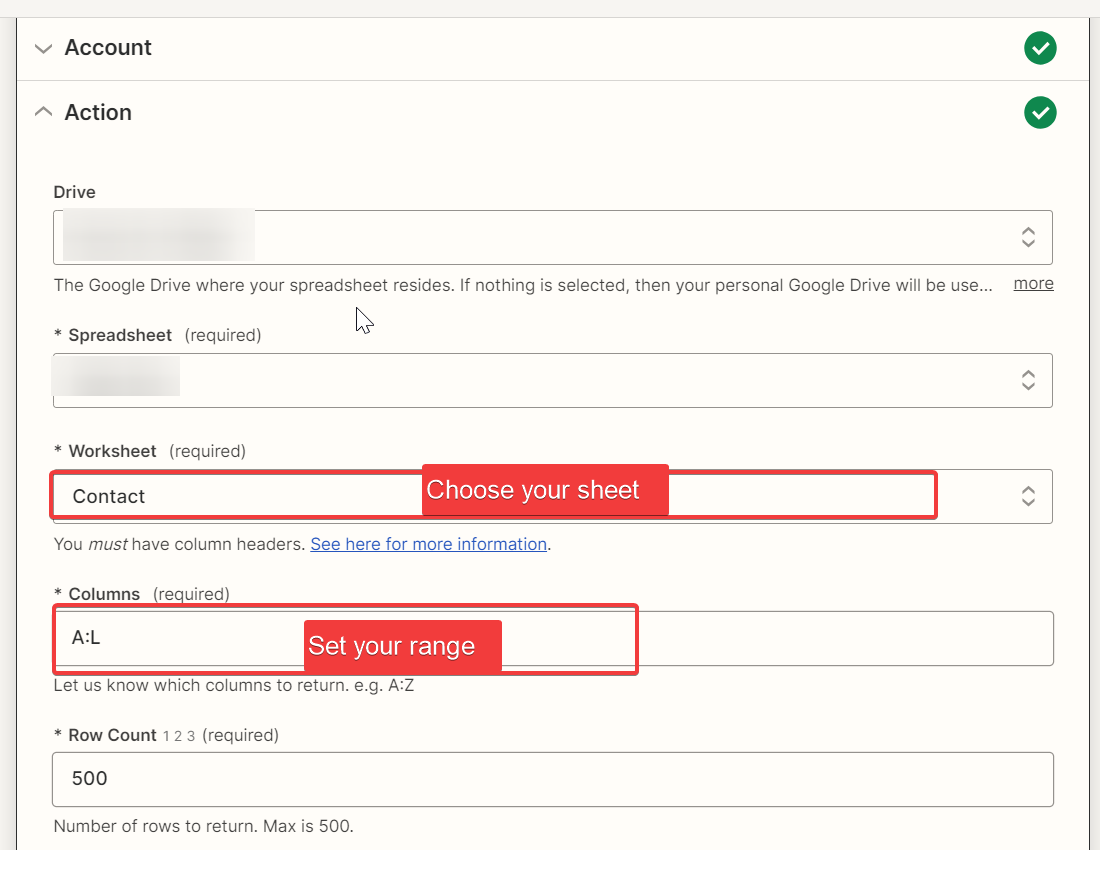
As a result, we received data that we can now pass to the next step to determine which of the lines is really the first empty line.
3. Define the first empty Row in our tab
- APP: Code by Zapier
- Event: Run JavaScript
- Input data as in the screenshot (pass data line by line)
Example:
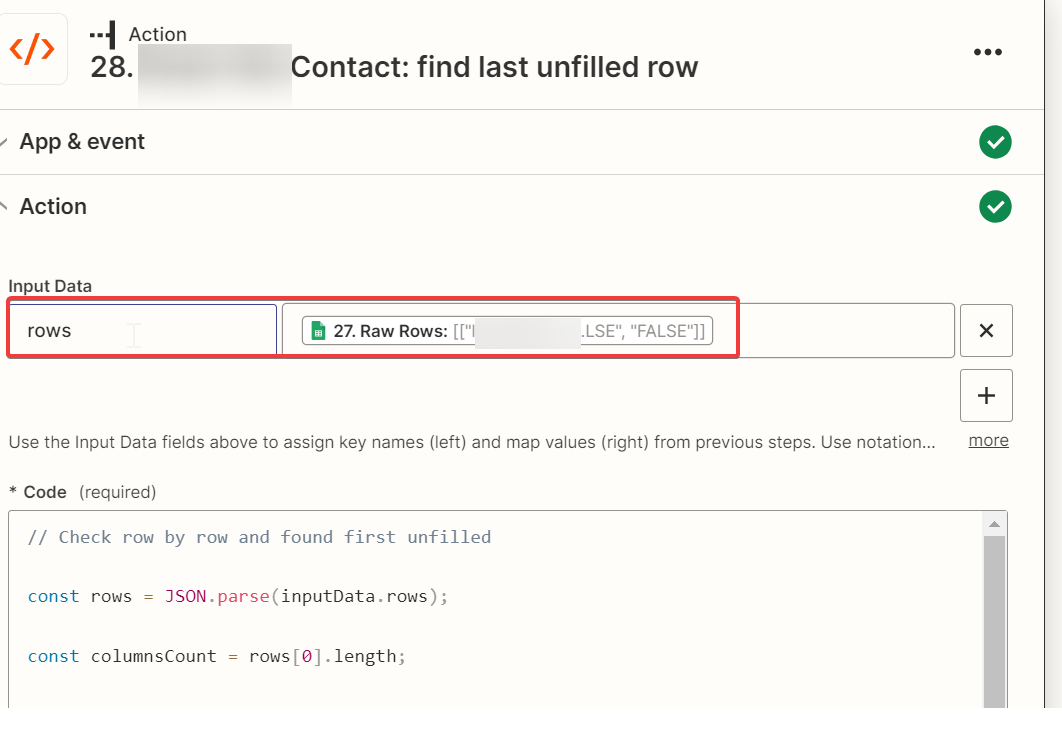
Action (code):
// Transform raw results to a JSON object
const rows = JSON.parse(inputData.rows);

// Count row length
const columnsCount = rows[0].length;

// By default first unfilled row is second (first one used for headers)
let lastUnfiledRow = 2;

// Iterate through each row
for (let rowIndex in rows) {

   // Set rowNumber (rows starts from second row (+1) & arrays starts from 0 (+1))
   const rowNumber = parseInt(rowIndex) + 2;

   // Get current row
   const rowItem = rows[rowIndex];

   // Set default value as "empty"
   let empty = true;

   // Check columns one by one to check if they have content or maybe contain only "FALSE" (that is equal to unchecked checkbox)
   for (let i = 0; i < columnsCount; i++) {
     if (rowItem[i] != '' && rowItem[i] != 'FALSE') {
// If some cell contain data & this is not a "FALSE" - mark it as a non-empty
       empty = false;
       break;
     }
   }

   // If this row still have "empty" status - it means that we have found our first unfilled row
   if (empty) {
     lastUnfiledRow = rowNumber;
     break;
   }
}

// Output this data to make it accessible by next steps
output = [{last_unfiled_row: lastUnfiledRow}];
As a result, we got the number of the first empty line.
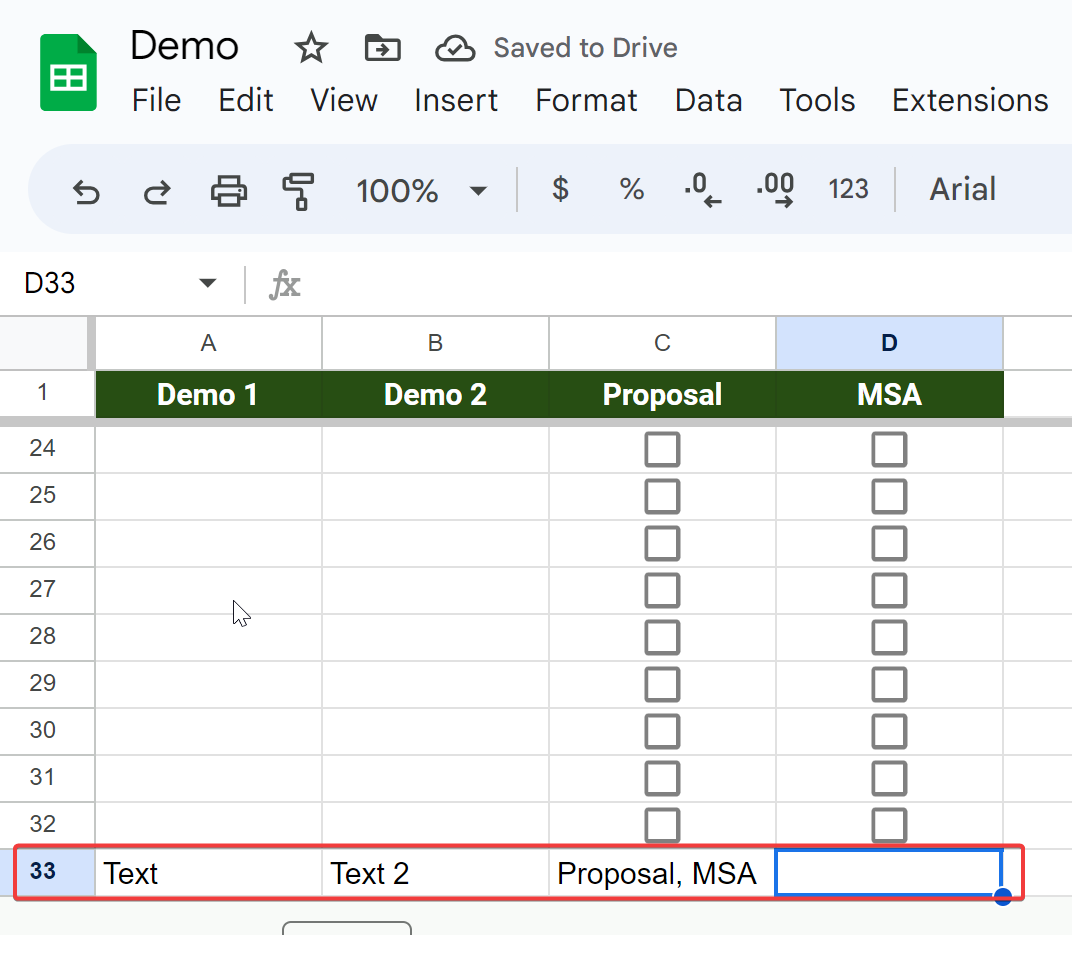
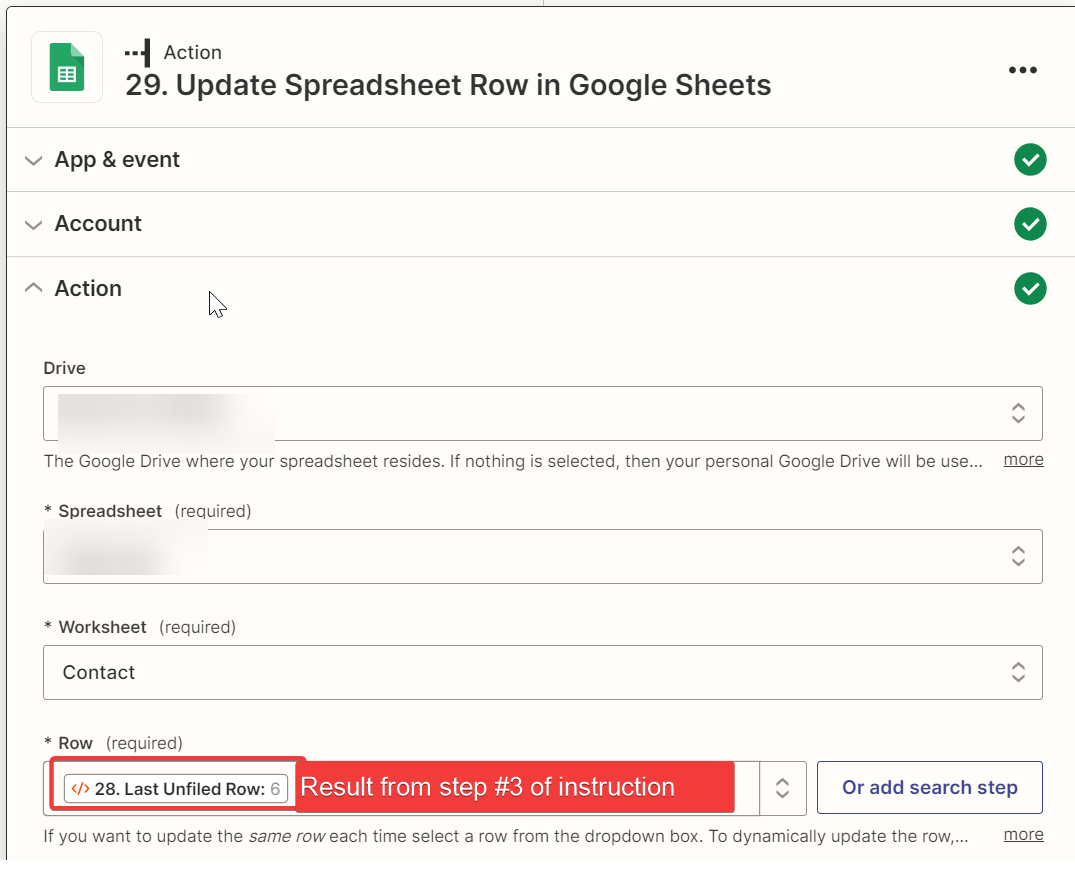
4. Final step! We are almost there. Fill in our row:
- APP: Google Sheets
- Event: Update Spreadsheet Row
Example:
That's all!
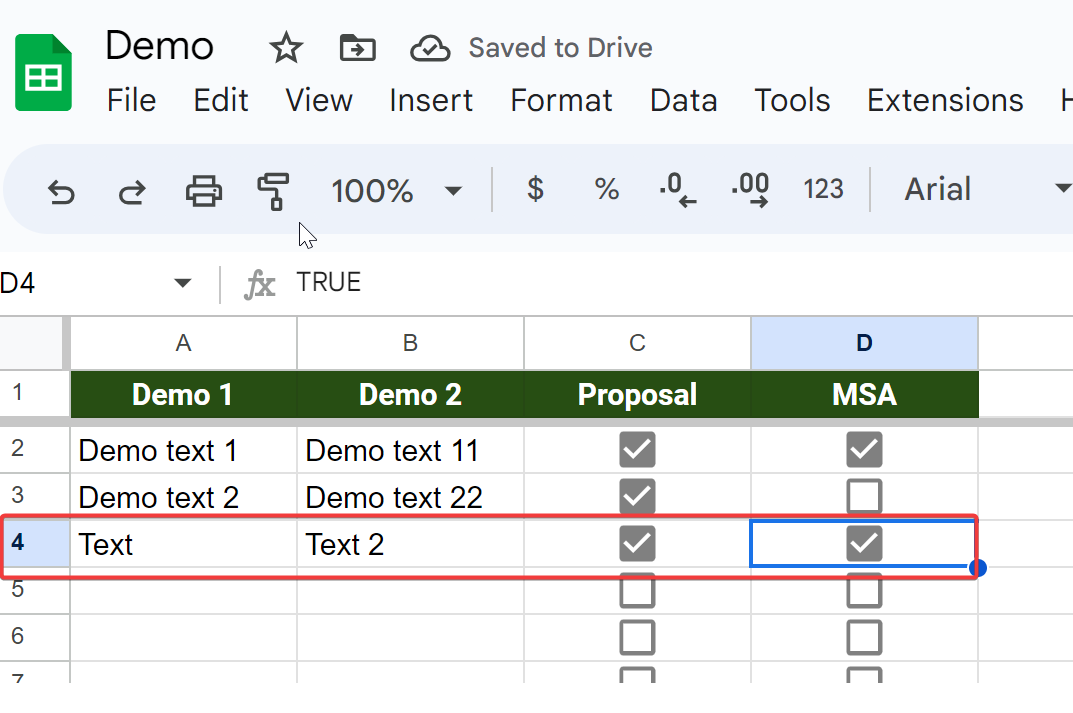
Zap inserted the data on the right line, and marked the checkboxes as required of him.
Example:
Limitations of this solution:
1. When changing / adding fields with checkboxes, you will need to make changes to the code (or you can upgrade the provided JS code so that it takes into account such cases)
2. By default, "Get Many Spreadsheet Rows" can return a maximum of 500 rows, so if you have more of them on the tab, the JS script will not determine the desired row.
To get around this limitation, you can use "App Extensions (Beta)"/"API Request (Beta)" and get rows via REST API.
p.s. This is my first post so I would be gratefull for any advices how to better mark up it :)