When it comes to adding a new Deal to Zoho CRM using Zapier, it’s all in the order of steps: add the Account first, then the Contact, then the Deal.
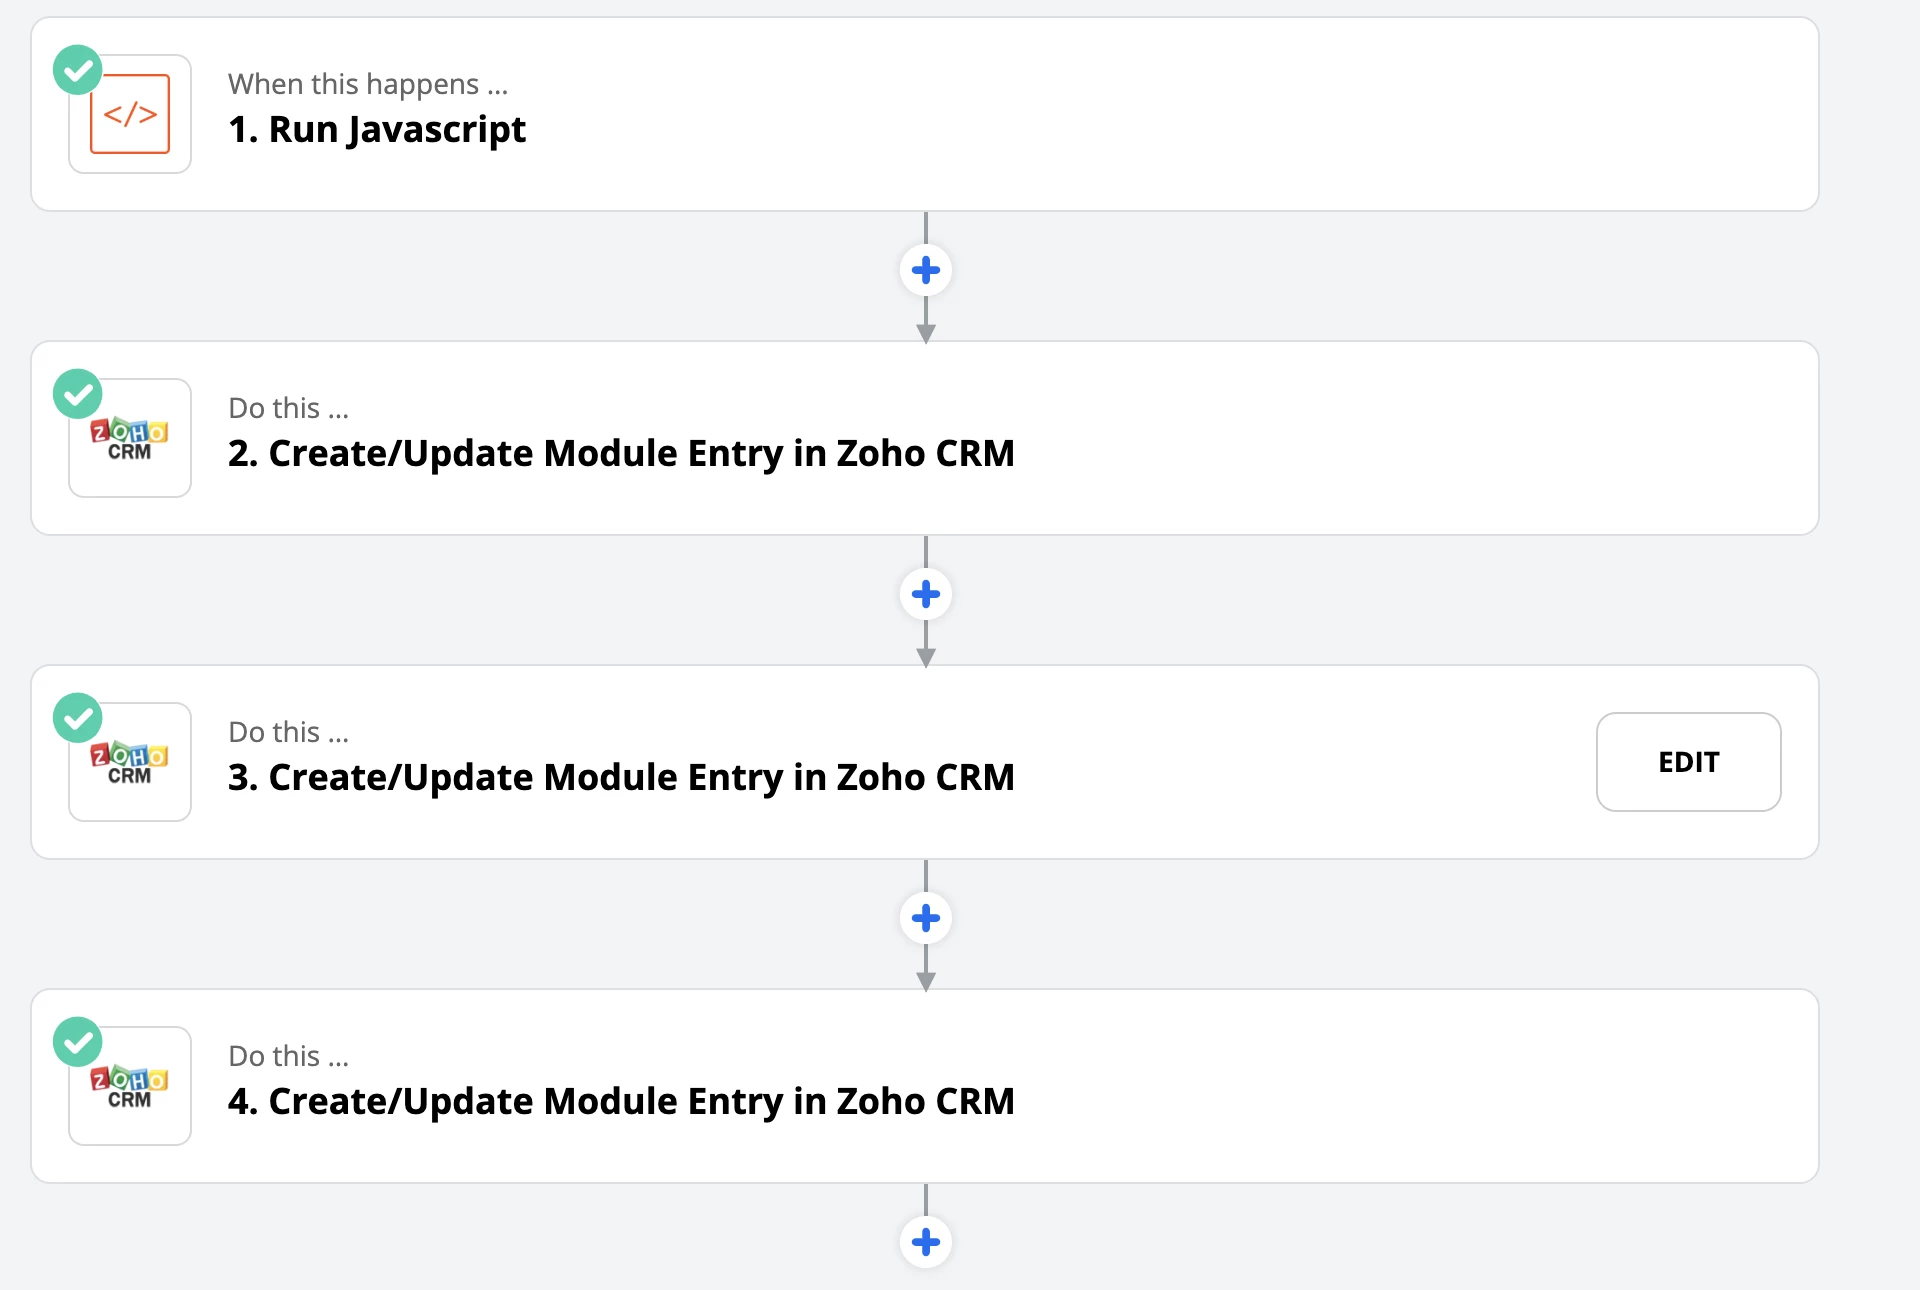
To do that with the updated Zoho CRM integration, you need to select the action ‘Create/Update Module’ for each action in the Zap, so the Zap will look broadly like this:

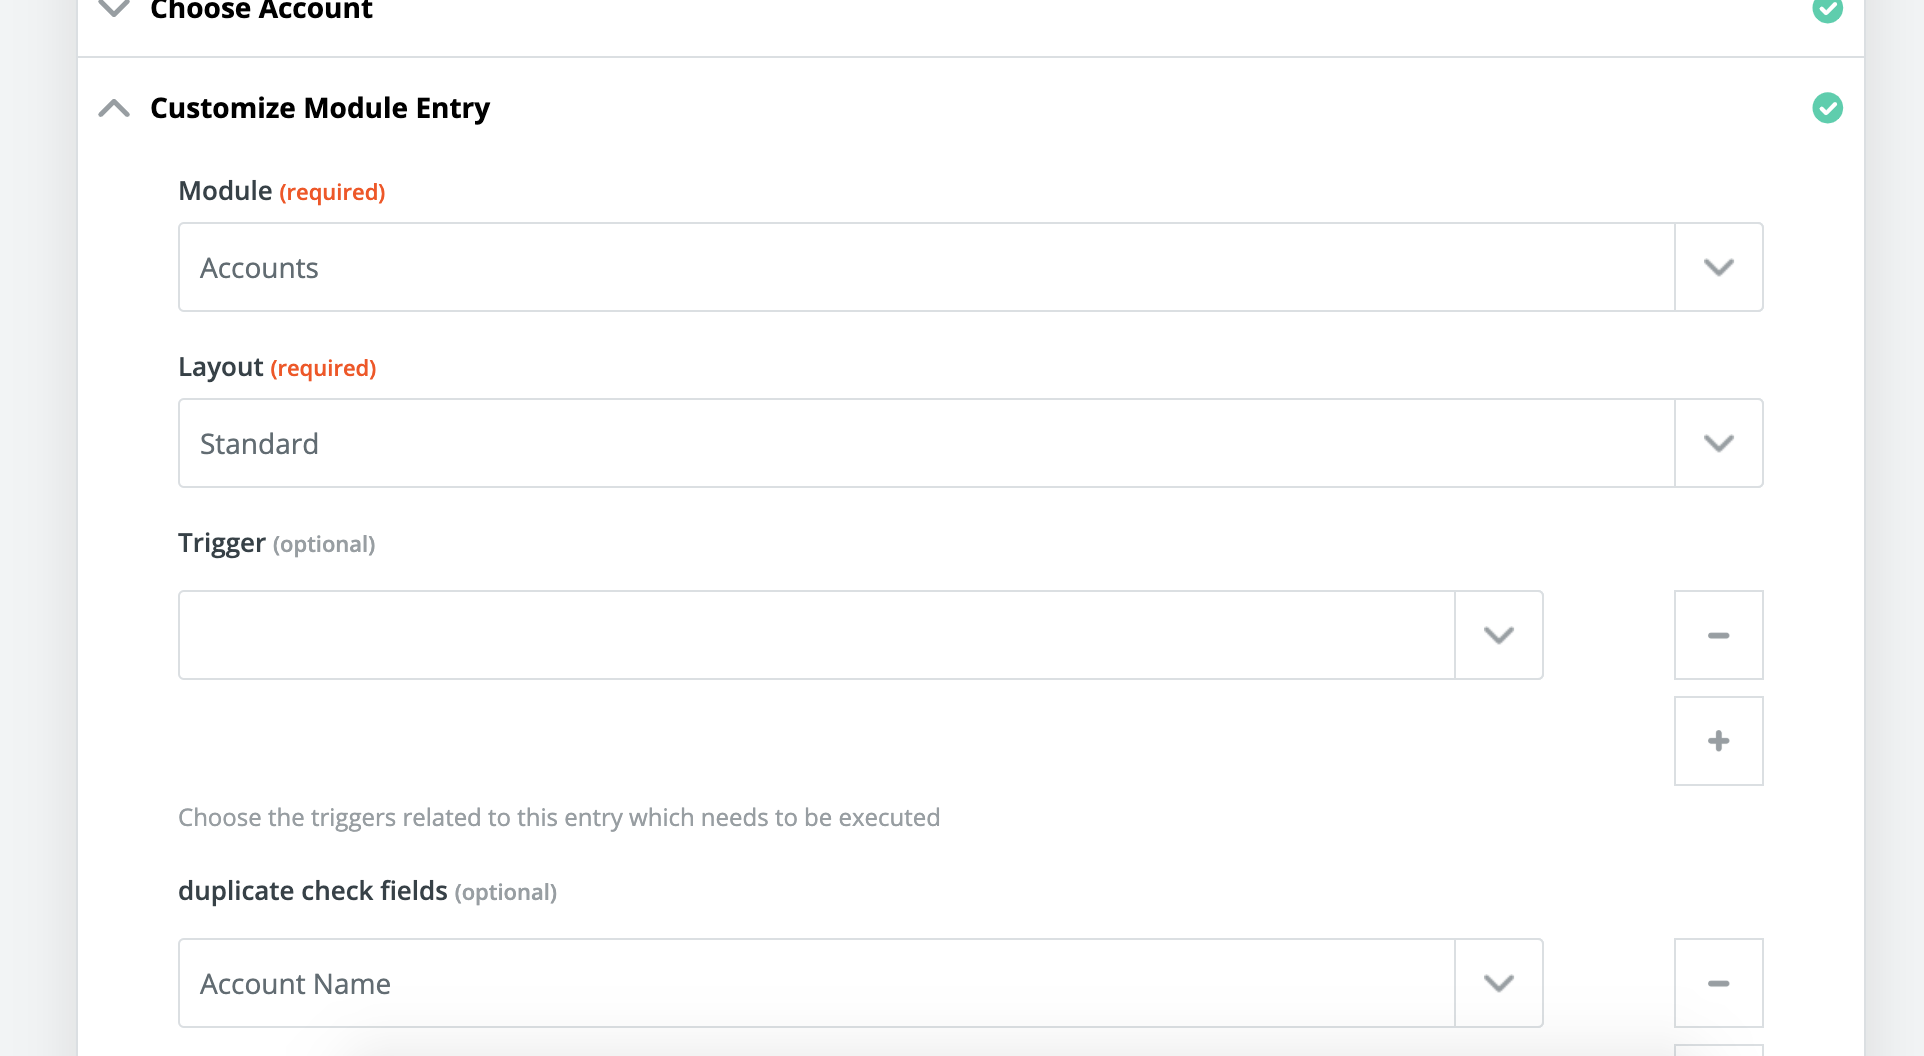
For each step, choose the ‘module’ that you’re creating or updating (Accounts, Contacts or Deals), then select the layout that you’d like to use.
It’s important to add the ‘duplicate check field’ as this is the field that Zoho will use to see if there’s an existing entry that needs to be update, or whether it should add a new item.
 For the Account step, add any details that you need and test the step to move onto the next action.
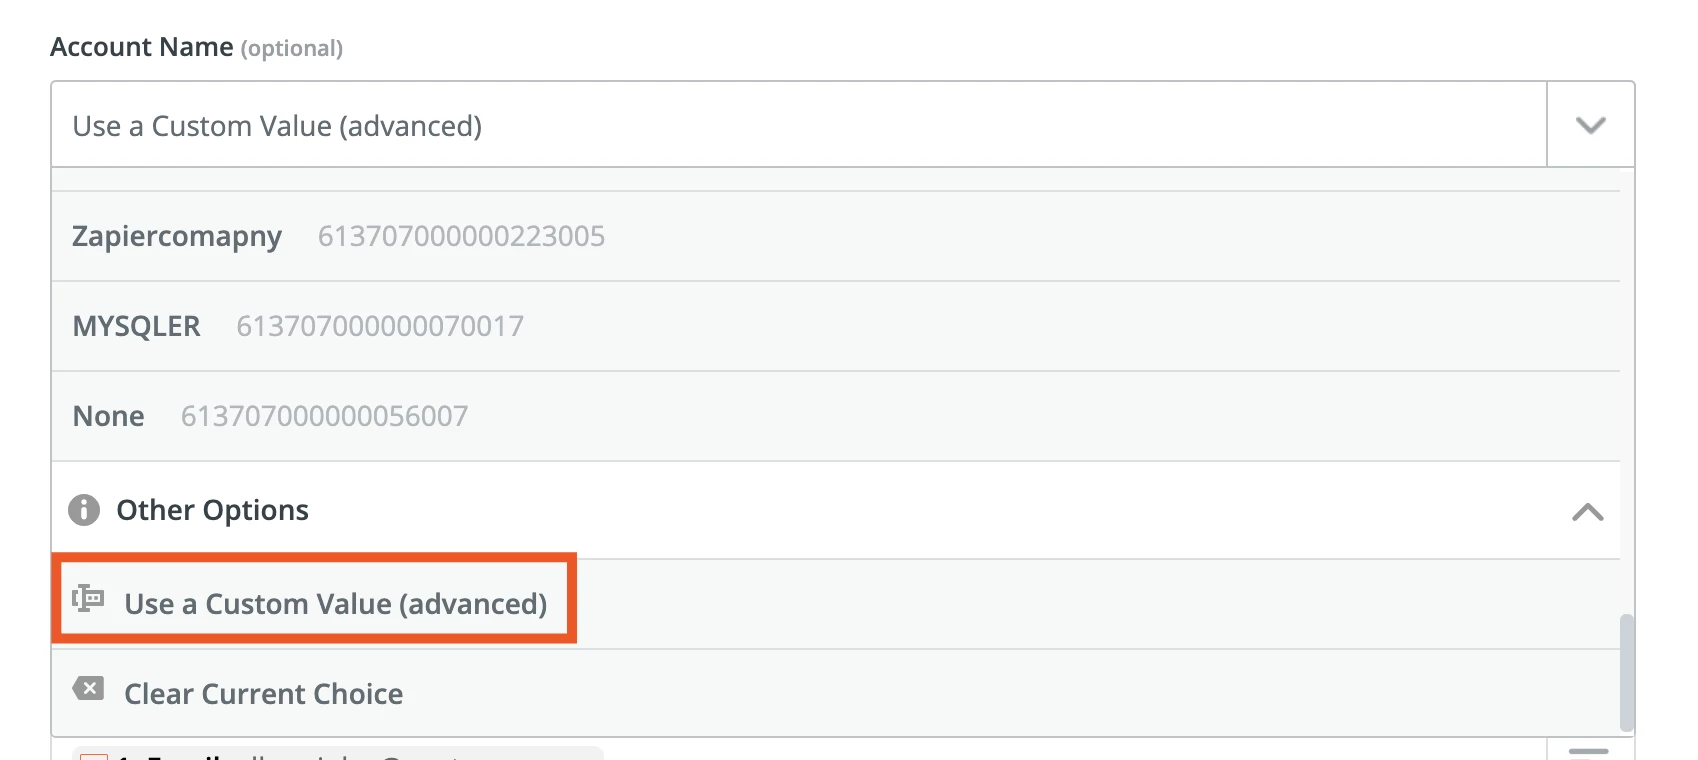
For the action to add the Contact, don’t forget to link the contact to the account by adding the Account name.
To do that:
1. Use the dropdown to pick ‘Use a Custom Value'
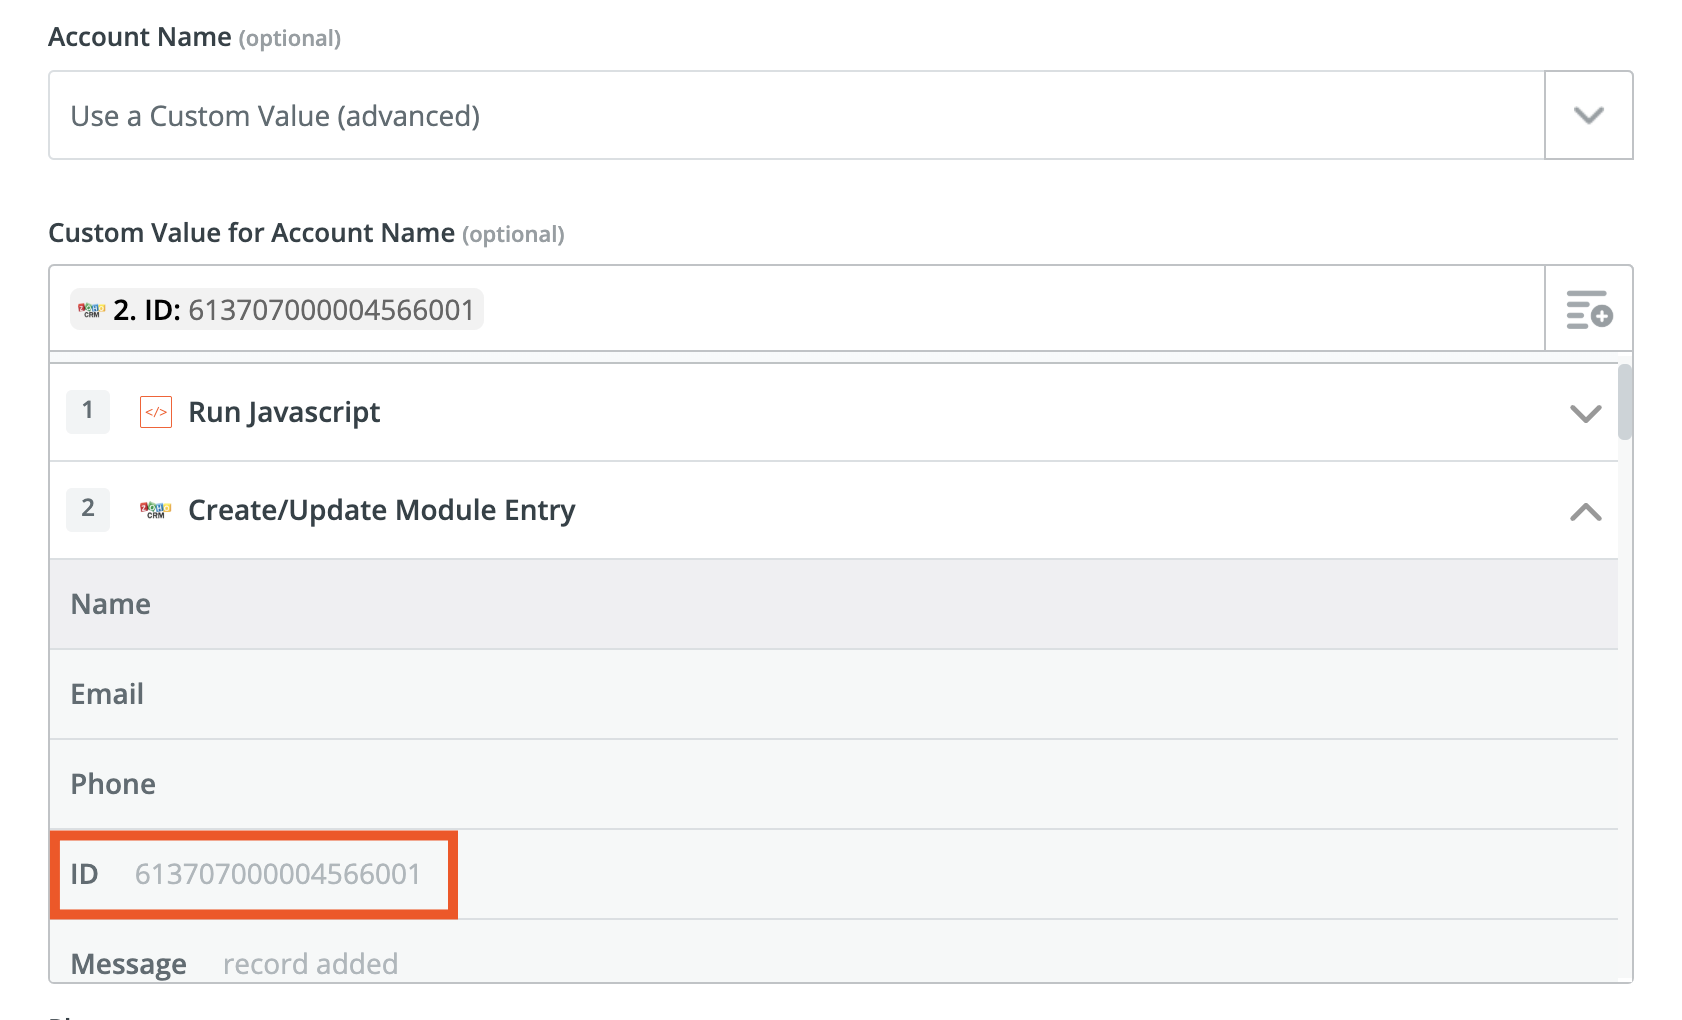
 2. For the Custom Value, select the ID of the Account from the previous step.

When you’ve added the rest of the Contact’s details, you can move onto the last step to add the deal. In this step, you can add the Account and Contact name in the same way as above - use a custom value and select the ID from the ‘Create/Update Module’ step related to the Account and Contact.
To sum up, if you want to add a Deal in Zoho CRM, you’ll need three ‘Create/Update Module’ actions that add the following (in this order):
- Account
- Contact
- Deal
Finally, here’s a link to an example of a Zap that's set up in the way described above: https://zapier.com/shared/0454a0119c00a22790c949259184449437234e19


