If you are using Airtable and integrating it with Zapier, then you always had the Line Items support problem! In this quick guide I will show you some cool tips and tricks on how to use the Line Items with Looping by Zapier.
Previous Issue:
A lead comes over from another app (or even from Airtable) and you want to send a text message to 5 of your Sales team so they can process this lead. There was no way to do that in the past (specially before the Looping by Zapier).
Current Solution:
- Setup your Trigger to get the new lead from Airtable (or any other app you are using)
- Create step “Find Many Records (With Line Item Support) in Airtable” (Finally!!!) to find all Sales people in your Airtable. You will then get all the records that matches your search criteria (you can even use a formula to add more than 1 criteria)
- Create step “Create Loop From Line Items in Looping by Zapier” . In the “Values to Loop” part, add whatever values you will need from Step 2, such as Name, Phone Number, Email. Those values are what you will need to send an email or a text message in the next step.
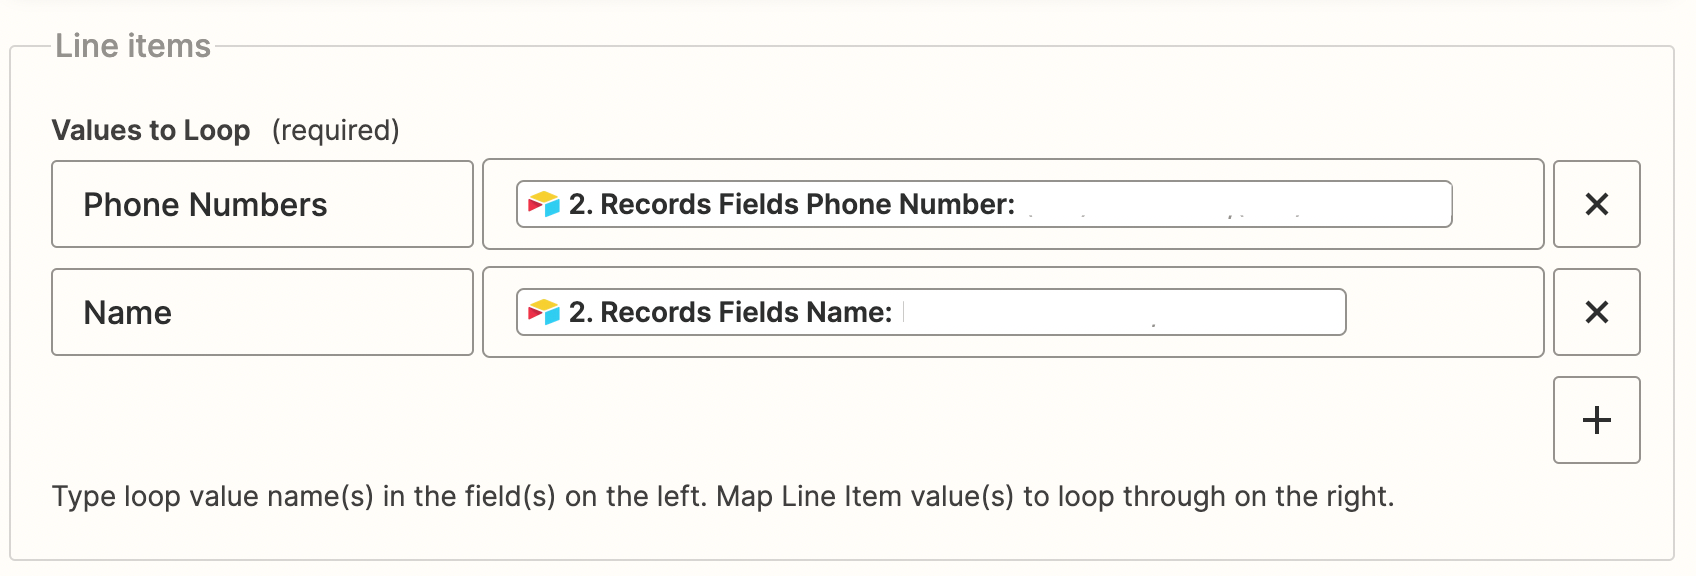
- In case you want to limit the data being sent to a certain number (in case the Find step returns 100s of records and you only want to send it to 5 of them), set the “Maximum number of Loop iterations” to 5
- Now not only did you get all the records you need from Airtable, you also split them into individual values that will loop !
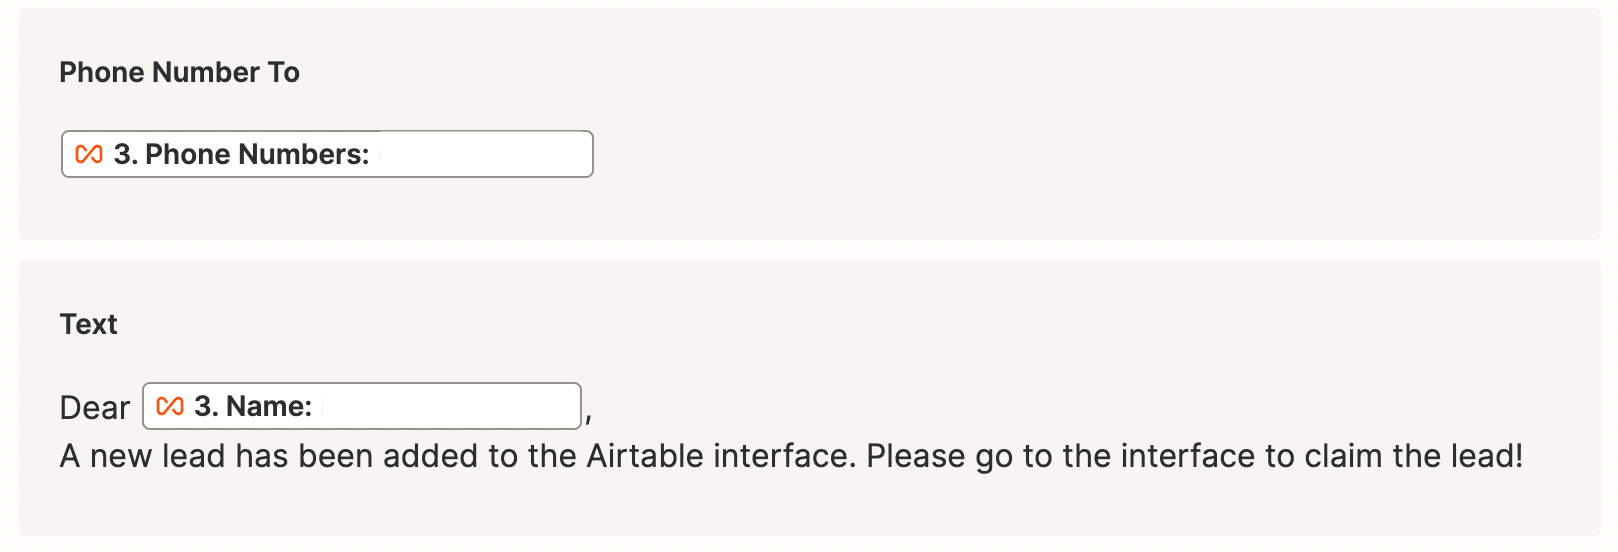
- Now you can add a step for the texting (using Ringcentral for example) and a step for the Email (using Gmail for example). Make sure that you enter the Phone Number and the Email values you got from the Loop step not from the Find step.
Hope this helps!