

The Challenge
The Zoom integration for Zapier does not have a New Meeting Registrant trigger, which lots of people would love to see. We have a open feature request for it, so if you’d like to be added to that please let us know in the comments below.
One Approach
Zoom can send a notification email when someone registers for a meeting, and we can use that email to trigger a Zap (either directly using the email app or by auto-forwarding it to something like Email by Zapier in order to trigger instantly).
NOTE: Yes, there are ways to parse the data using something like an email parser, a code step, multiple Formatter steps, or RegEx (maybe someone will comment on this post with that info), but since getting the data into Google Sheets is often a final destination for users, I opted to go that route.
Some Zoom Caveats
- This requires a licensed Zoom account, meaning that free Zoom users aren’t able to set up those notification emails.
- The meeting you are enabling registration for cannot use your PMI and cannot be a No Fixed Time recurring meeting.
- You must check “required” under the Registration option, as outlined here.
- You must enable the Send an email to host when someone registers option, as outlined here.
The Zapier Solution
This can be a 1-Zap setup, which would be (for reasons you’ll see below) 3 tasks used in order to send the registrant information to your app of choice.
OR, you can use 2 Zap workflows: one to trigger on the email and parse the data, and the other to trigger on that parsed data and send to your app of choice. This option will use 2 tasks to accomplish the same thing as the single-Zap setup above.
The 1-Zap Option
First, let’s tackle the option that uses fewer Zap workflows but one extra task.
Trigger: The email notification (from your email app or being forwarded to Email by Zapier.
Action: Google Sheets — Create Row (we use a formula to parse the email into useable data)
Action: Google Sheets — Find Row (for some reason, we don’t get the fields in the output from the step above)
Action: Your app of choice — Whatever you’re looking todo
The 2-Zap Option
Or you can use multiple Zap workflows and save yourself a task.
Zap 1
Trigger: The email notification (from your email app or being forwarded to Email by Zapier.
Action: Google Sheets — Create Row (we use a formula to parse the email into useable data)
Zap 2
Trigger: Google Sheets — New Row (we trigger on the row created by Zap 1)
Action: Your app of choice — Whatever you’re looking todo
The Setup
In Zoom
- Following the directions on this page, make registration required for the meeting and enable email notifications. See Zoom Caveats above to see everything that’s required in order to do this.
- Create a meeting that requires registration and then register for it, in order to have Zoom send you an email notification.
In Zapier
Let’s use the 1-Zap option, since if you’re able to do this one then the 2-Zap solution is straightforward.
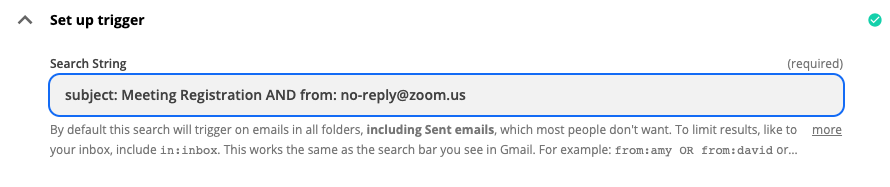
The Trigger
If you’re using Gmail (or G Suite), you can use Email Matching Search and use something like this:
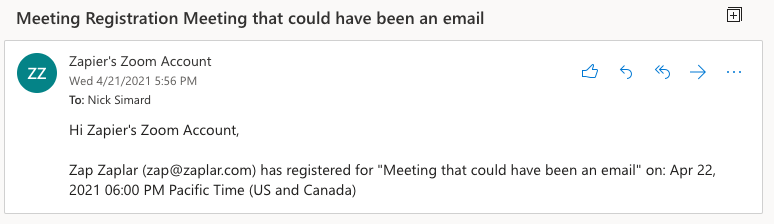
The email that Zoom sends looks like this:
If you’re NOT using email by Google, please see the You May Be Asking section at the bottom of this post for some tips.
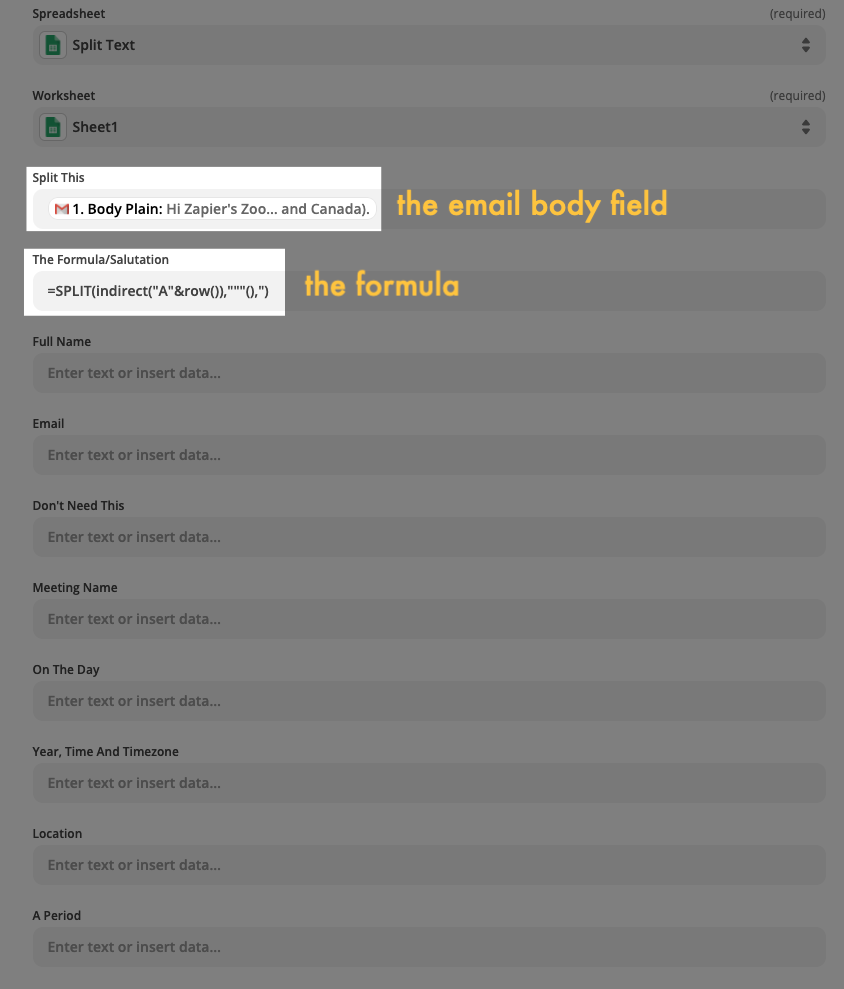
Action #1: Google Sheets — Create Row
We’re going to use a SPLIT function, coupled with an INDIRECT row reference (Google describes it in detail here).
Here’s the formula:
=SPLIT(indirect("A"&row()),"""(),")
It’s not as scary as it looks. Here’s an explanation, if you’re interested:
Everything before the first comma could just as soon be A3 or A4 (etc), but we’re using the indirect reference so that the formula will always refer to the row that the Zap is creating.
I tried simply mapping the body field into the formula directly in the Zap but because of the line break, Google Sheets throws an error.
Everything after the first comma (and in between the “ and “) is what I’m splitting my email text on.
- “ “ in order to get the meeting name isolated
- ( ) in order to get the email address isolated
- , in order to split out everything after that first salutation comma
TIP: feel free to experiment with the things you place between the last “ and “, as your needs may not be the same as I’ve outlined. For example, if you add a space in there you can get the first and last name separated, in case you need that for a CRM or something.
In Google Sheets
Because I’ve tested this, I know where everything will end up (using the formula above). So my sheet looks like this:

In the Zap
Let’s Test This Step
When this step runs, you can see that the formula in column B now displays the salutation and the Zoom account holder’s name and all the other columns give me much more useful data than the original email did.
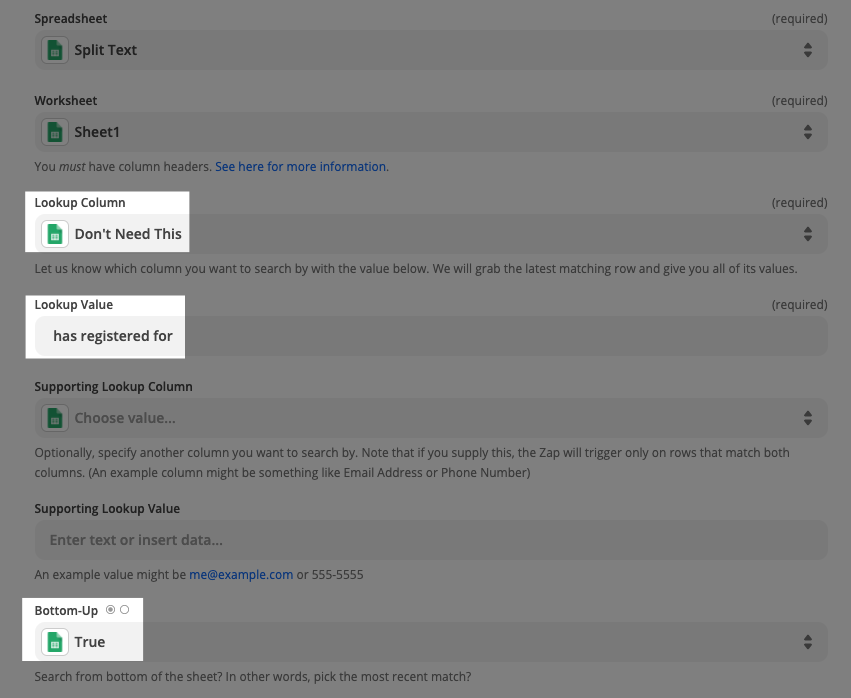
Action #2: Google Sheets — Find Row
I’m assuming it’s because of the formula, or maybe the INDIRECT part of it, but the Create Row step doesn’t return the fields that are necessary for later steps, as you can see below.
This is where that extra Find Row action step comes in, and here’s how you can set it up. Because you have to look for a particular value in a specific column, I’m using the Don’t Need This column, and searching for “has registered for” bottom-up (to make sure I retrieve the row that was just added):
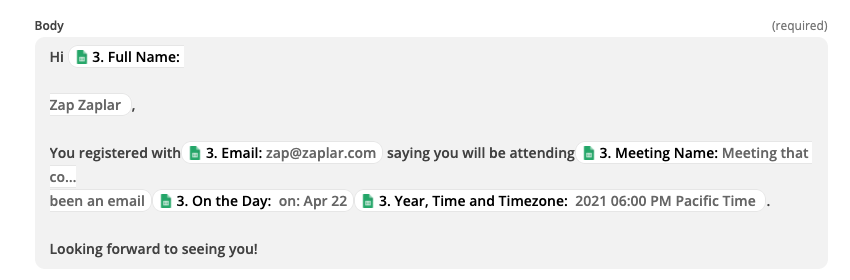
Your App of Choice
To show a basic example, here’s how I can now string together the fields to send the registrant a personalized email.
You could do any number of things with your data, beyond my super simple example using a CRM, email marketing, scheduling, calendar, etc.
OR, you could have Google Sheets as your final destination.
You May Be Asking...
Instead of all of this, why not just add the Zoom trigger for new meeting registrants?
I’m not an engineer and don’t personally have the ability to add the New Meeting Registrant trigger to the Zoom integration, so I’m doing the best thing that I can, which is to offer a workaround :)
What about the 2-Zap option that you mentioned?
This post is already quite long and in-depth, so for the sake of not making it much longer, the 2-Zap option is pretty straightforward if you managed to create the 1-Zap version. I included the outline above but here it is again:
Zap 1
Trigger: The email notification (from your email app or being forwarded to Email by Zapier.
Action: Google Sheets — Create Row (we use a formula to parse the email into useable data)
Zap 2
Trigger: Google Sheets — New Row (we trigger on the row created by Zap 1)
Action: Your app of choice — Whatever you’re looking todo
What if I don’t use Gmail or G Suite?
If you don’t use Google email, you can do one of several things:
- use your email app (if it has an integration) and add a Filter step if there’s no “email matching search” type of trigger, which will add a task to your Zap when it runs
- if it doesn’t have a native integration, try using the IMAP integration
- you can also set up forwarding rules (Outlook example) in your email account and send it to an Email by Zapier inbox, then trigger on new emails there. More info can be found here.
Wrapping Up
I hope you found this helpful, even if it’s just to give you some inspiration for triggering on emails. Then you can parse the data in any way that works for you (code, RegEx, Formatter steps, etc).