Have you ever found yourself making the same steps over and over in different Zaps? It’s honestly not a great use of time, but until recently it was the only way to get things done.
But now with Sub-Zaps, you can build those steps once, then re-use them in any Zap! That way, you can spend more time on the interesting things in life, like learning how to cook a perfect medium-rare steak, or building a treehouse for your cats.
A Sub-Zap is basically a normal Zap, but instead of having a normal trigger, it’s triggered by a different Zap, then returns information back to that Zap in its last step. You can think of it almost as a custom Action step that you build yourself, and can use in any Zap you like.
When you’re making a Zap and want to add in a Sub-Zap, you’ll add an action as normal, but choose the “Sub-Zap by Zapier” app:
This will let you choose the “Call a Sub-Zap” action, and pick which Sub-Zap you want to use in this Zap. If you’re following this guide, you haven’t made one yet, so you’ll click the link to Create a Sub-Zap.
This will create a brand new Zap for you with the special “Start a Sub-Zap” trigger and “Return From a Sub-Zap” action. These are the basic building blocks for your Sub-Zap - any actions between these two will take place every time the Sub-Zap runs.
In my example, I’m using a dedicated Sub-Zap to capitalize all the letters in a single input. Let’s set up the trigger for that. You’ll want to put at least one Input / Argument into the list, since this is how we’ll send information over and return it later:
Next, we’ll want to add one or more actions after the trigger, but before the “Return from a Sub-Zap” step. In this case, I’m going to add a formatter that turns everything into Uppercase. Use one or more of the inputs from the trigger - if you need real sample data, go ahead and go back to your original Zap and test the “Call a Sub-Zap” action with real data. But otherwise, you can just use the generic sample date.
Here’s what my Formatter looks like with real data:
Once you’ve added all the actions you want to, go to the “Return from a Sub-Zap” action. This is where we set up the output of this Sub-Zap based on what happened in the previous steps. Mine is returning the output of the formatter as “Capitalized,” which you can see below:
Test this step and turn the Zap on, and now you’ve got yourself a functioning Sub-Zap! You can test the “Call a Sub-Zap” action again in the original Zap to get some real sample output from this, and use it in the other Zap:
And that’s all there is to it! It’s simple to set up, but it’s also extremely flexible. In this case, I’m calling the Sub-Zap from multiple forms and capitalizing a response, but you can put any action into a Sub-Zap.
Another consequence of using Sub-Zaps is that it becomes much easier to make changes down the road. If you use the same Sub-Zap in 20 Zaps, then making a change means you only have to change 1 Zap and all 20 Zaps will operate differently. It could save you a lot of time!
A Brief Video Showing the Process
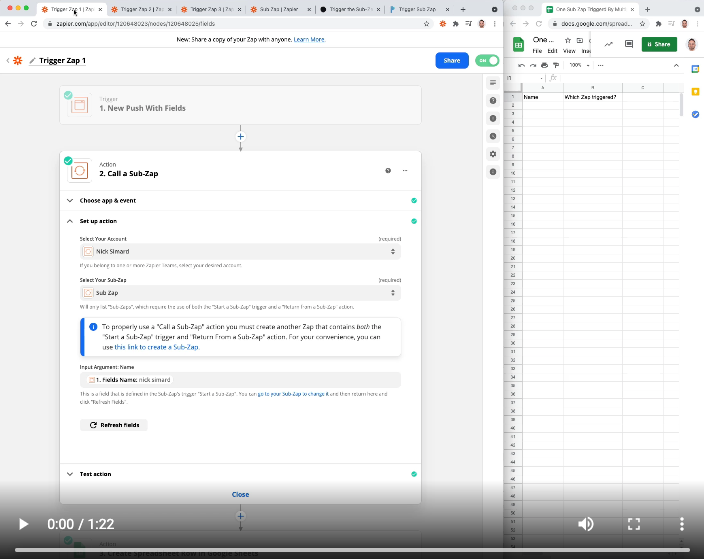
One of my colleagues also put together a short (1 minute) video showing a similar usage of Sub-Zaps, if you’d like to take a look:

I hope this saves you time and gives you a chance to build even cooler Zaps!


