We recently had a couple of users who had asked how to achieve this sort of workflow:
- the trigger provides line items (like ordering products, for example)
- there can be multiple items, but the number can vary
- the end result should be something like
product/item x quantity = total(like in an email confirmation) but only for non-empty line items - we want to avoid something like
x =showing up in the email when some lines are empty
Courtesy of some help from our resident Workflow Whiz,
NOTE: this will differ slightly, depending on how your data comes through the trigger step
Click “Show Content” to see the ways in which your data will typically come through:
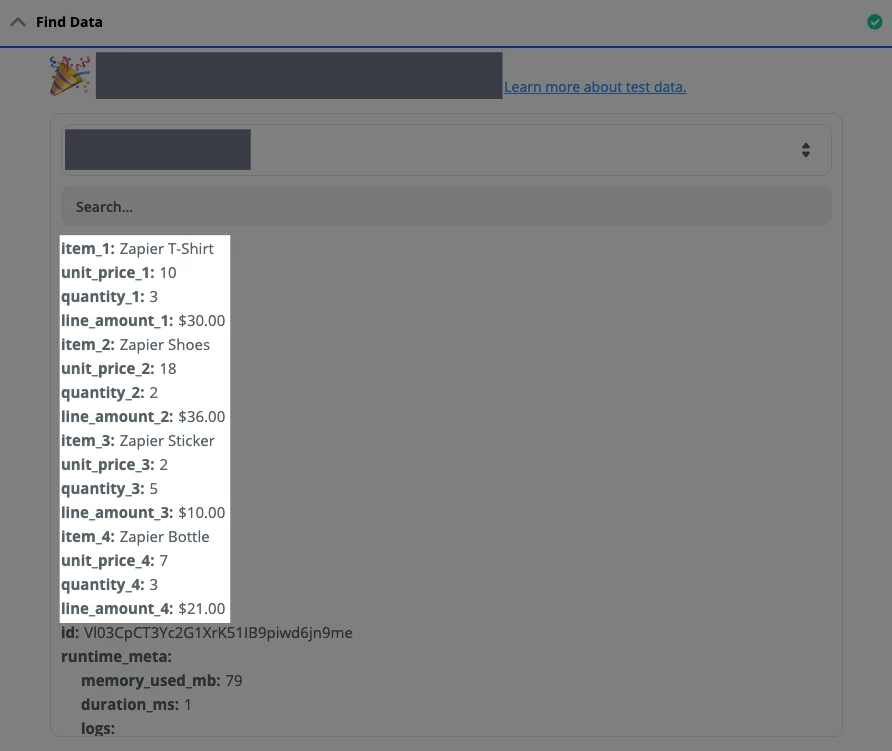
1) Each piece of info is its own separate field (like from a form, for example):
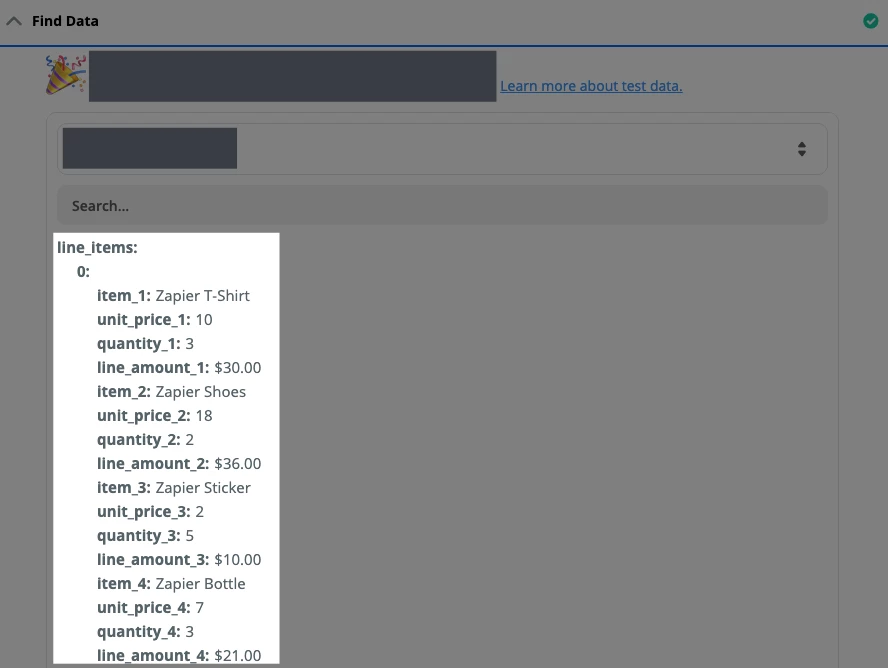
2) All the fields are under a single line item (notice the line_items and the 0):
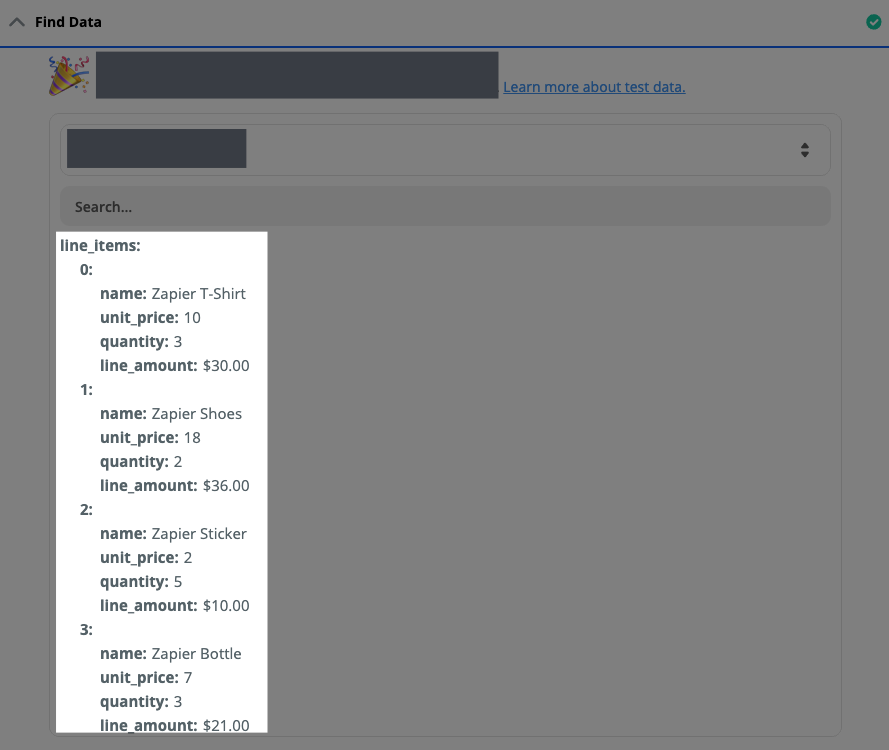
3) The fields already come through as proper line items (notice the line_items and the 1, 2, 3):
What We’re Going to Build
Trigger: Whatever you’ve chosen...could be a form app, a webhook, etc.
Action: Formatter — Utilities — Line Itemizer (if necessary)
Action: Formatter — Utilities — Line Item to Text
Action: Formatter — Utilities — Split Text (remove empty lines if there are any)
Action: Whatever else you need, like an email app, for example
How the Zap Works
NOTE: For this example, I’m going to use #2 from above, where all the data comes through a single line item. This process will work the same if each piece of info is its own separate field (like #1 above). If you’ve got proper line items, like #3 above, you can omit the Line Itemizer step.
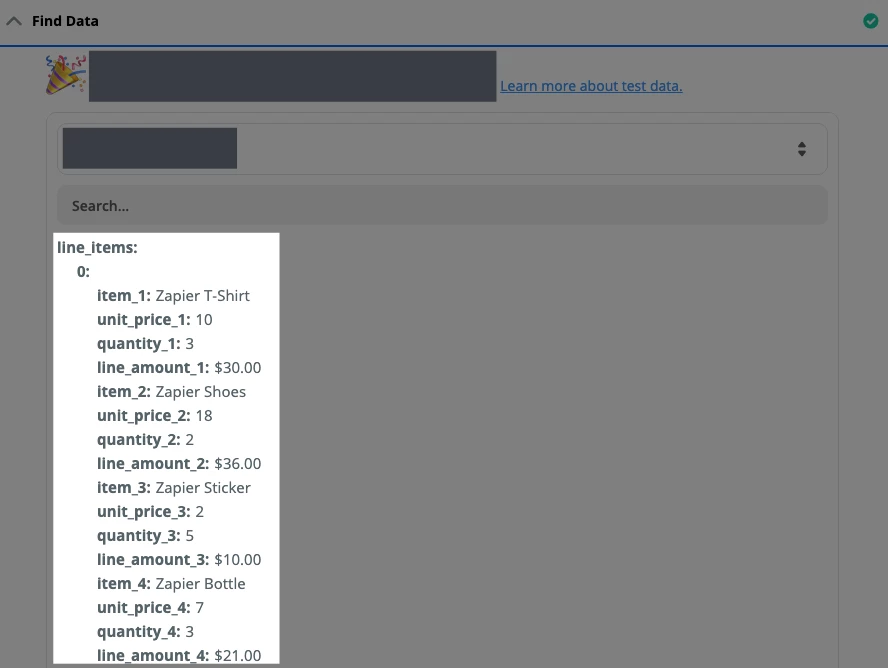
A) Here’s what the data looks like from my trigger step:
Notice that we have line_items and then the 0: but everything is under that, rather than having multiple line items (if you’ve already got multiple line items, you can skip step B below).
B) Formatter — Utilities — Line Itemizer (Create/Append/Prepend)
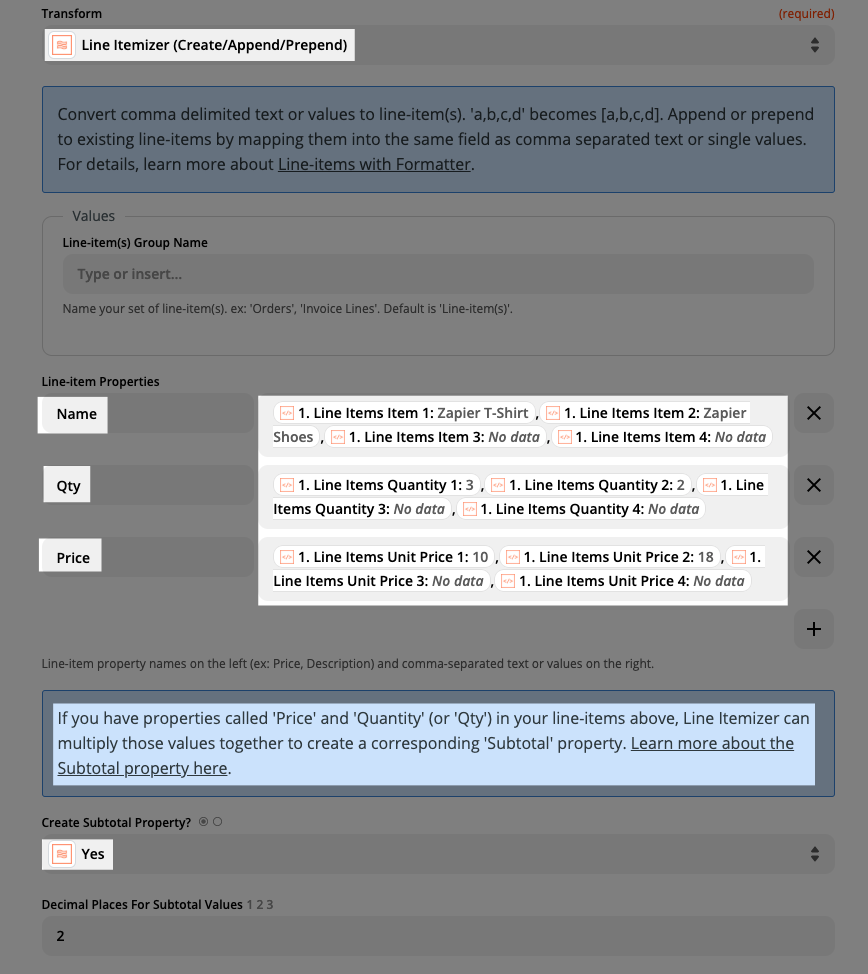
How you set up this step will depend on whether you have a field for the line total, or whether you need to do that calculation in the Zap. I happen to have these fields available to me:
- item: the thing itself
- unit price: how much each one costs
- quantity: how many were purchased
- line amount: the quantity multiplied by the unit price
You’ll need an example that contains the fields for the maximum number of items you could see from your trigger step (it’s fine if some are empty, but the fields themselves will have to be present — e.g. I need to see the fields that end with _3 and _4 above in order to properly map it all out).
NOTE: if you have proper line items provided by your trigger step (like example #3 above — under Show Content) and you don’t need to calculate a line total, you can skip this step entirely.
If you need to calculate the total:
Note that you have to name the quantity and price properties in a specific way, in order for the subtotal field to be produced. Make sure to set Create Subtotal Property to Yes.
When separating items by comma (as shown below in the big highlighted block), don’t include any extra spaces. Also, notice that I have the Unit Price in the Price field, since it will then be multiplied by the quantity.
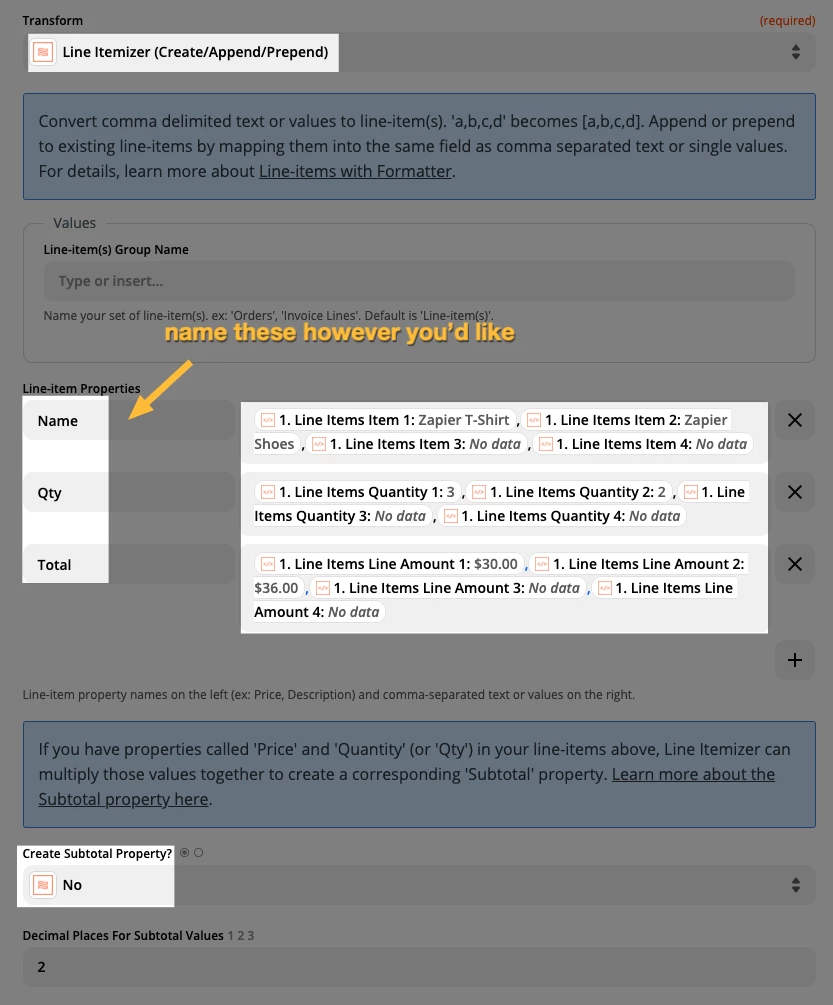
If you have the total already:
If you don’t need to calculate the line totals, you can use whatever you’d like for the Line-Item Properties, and you’d select No for the Create Subtotal Property option. Then you’d map the total instead of the unit price (notice how I have Line Amount in the Total field below).
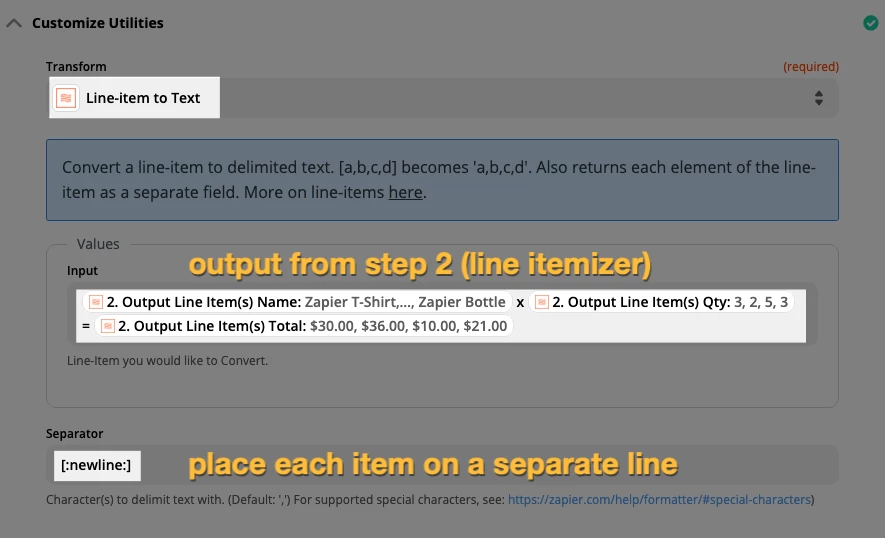
C) Formatter — Utilities — Line Item to Text
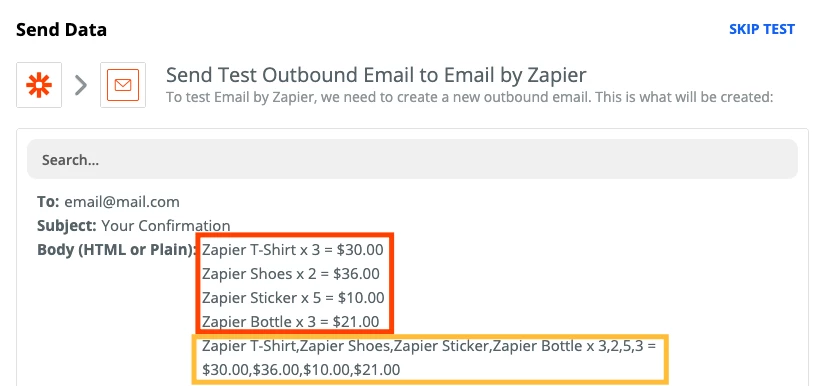
This step take your line items and formats it into something you can map into an email step, for example, as plain text (like in the orange box below). If you try to add the line items into an email directly, you’ll end up with something like the yellow box below:
If you created your line items with the Line Itemizer in Step B above, map the output of that step:
If you already had line items from your trigger (Step A above) then map the output of that (since you won’t have added the Line Itemizer step at all):
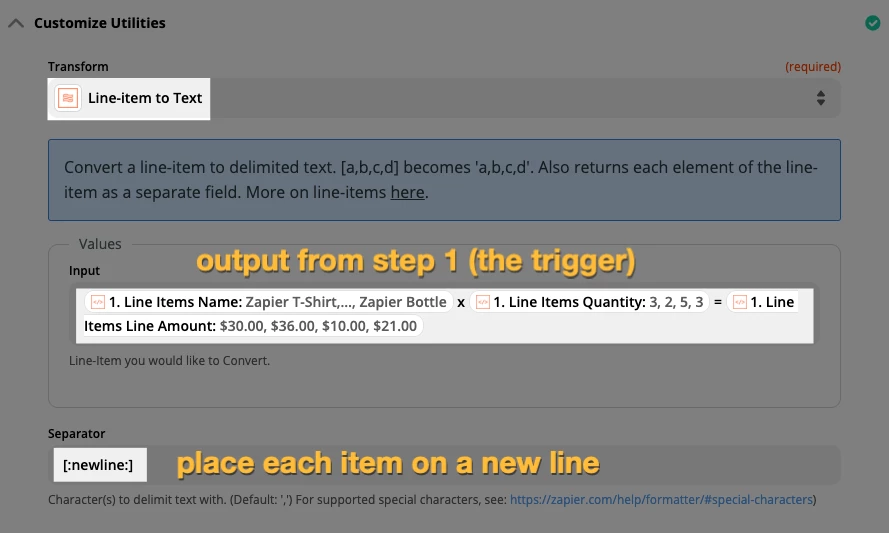
NOTE: You can use whichever format you like. I chose [item name] x [quantity] = [line amount] (notice the lowercase x) but you may want something like [item name]: [quantity] x [unit price] = [line amount]. Just adjust accordingly in the next step, when removing empty lines. If you’re not sure what to use as the separator (more info below) we can help :)
D) Formatter — Text — Split Text
This is the magical step that makes sure that empty lines (i.e. when someone only orders some of the available items) are removed from your final output.
Click on Show Content to see the difference this step makes
Without this step you could have:
Zapier T-Shirt x 3 = $30.00
Zapier Shoes x 2 = $36.00
x =
x =
With this step you’d end up with:
Zapier T-Shirt x 3 = $30.00
Zapier Shoes x 2 = $36.00
Here we use the output of the Line Item to Text step and we want to separate by the text that’s left behind by missing items (the x =). Notice that there’s one space, then the x, followed by two spaces then the =. Below you can see that [:space:] can be used to denote the spaces. This makes it easier to know at a glance how many spaces are there.
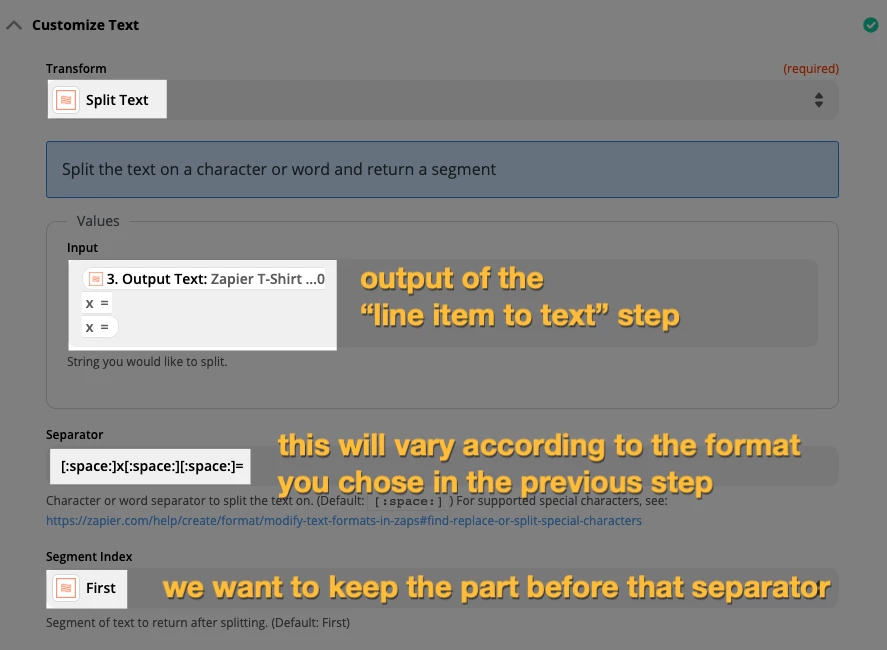
This is what we get after stripping out the extra x = (perfect!):
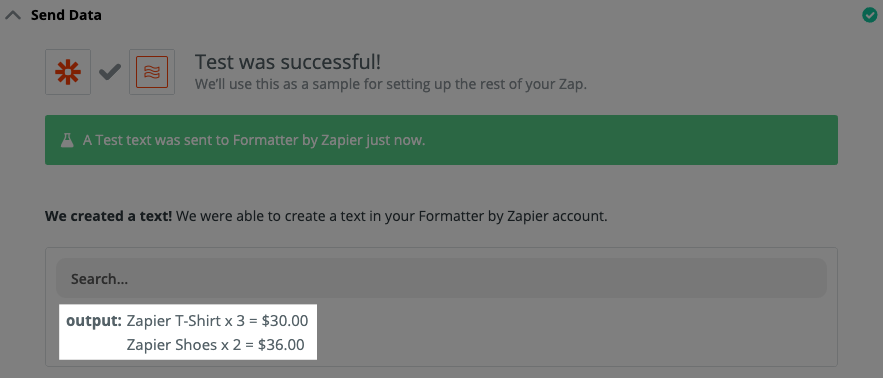
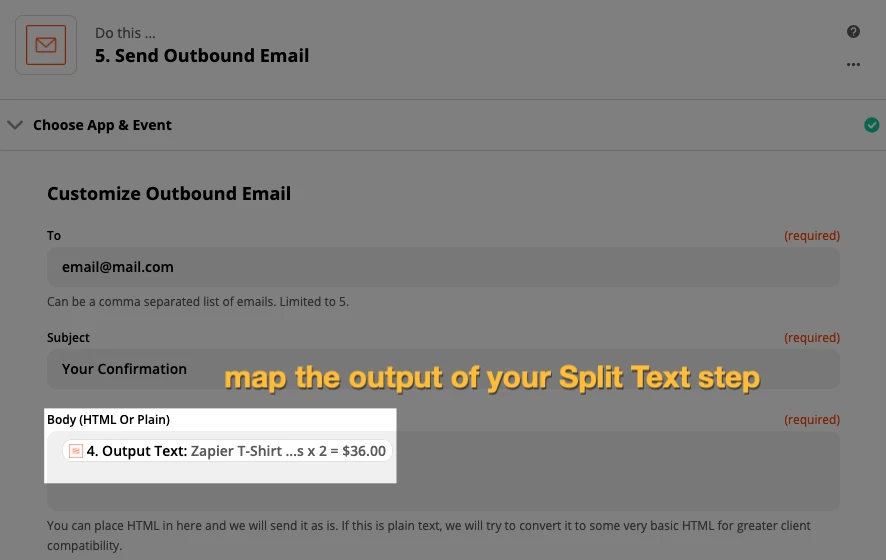
E) Whatever your final step is (map the “sanitized” text)
For this example, we’ve mapped the output into the body of an email step.
Wrapping Up
Whew! That was quite a lot to process. It’s not the easiest thing to explain in writing and with screenshots, so if you have any questions about anything above, please let us know!

