Hey Zapier Community - Jared back with another post.
Do you use Airtable?
Airtable is a database App that is popular with Zapier users.
And like any database app - Zapier users are frequently wanting to pull data out of those database tables to use in other applications.
Our current triggers and actions (as of May 2021) provide a lot of options for getting at that data - but we do not currently have an action for finding all records in a View.
Why might a user want to find all records in a view?
Well - imagine we run a Construction Company - and our Equipment is used across multiple Jobs.
So we’ve created a View specifically for tracking Equipment that is Checked-Out so you know which Equipment is in use.
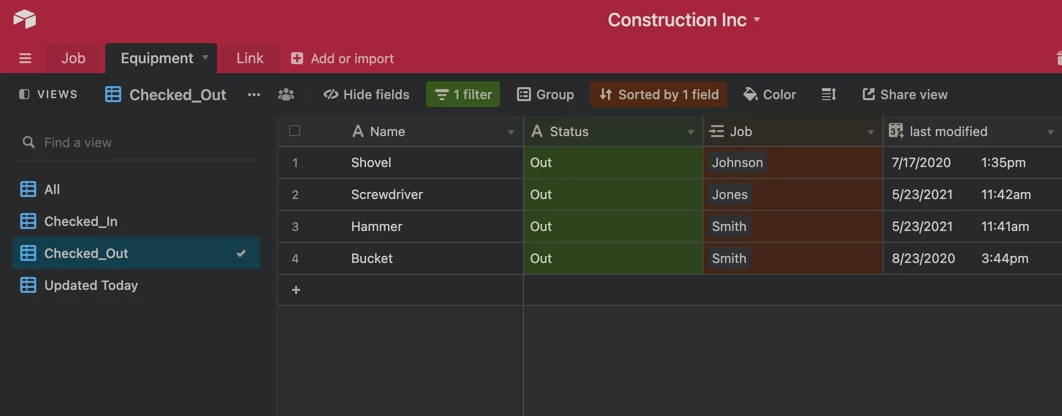
And we want to send ourselves a slack message every morning to review which equipment is currently checked out.
Our current Find Record action would require us to look up each piece of equipment one-by-one.
But using Webhooks by Zapier - we can make a GET request to Airtable and find all records in the View.
Find your Airtable API Key
Just head to Settings > Account in Airtable and you’ll find your API Key there.
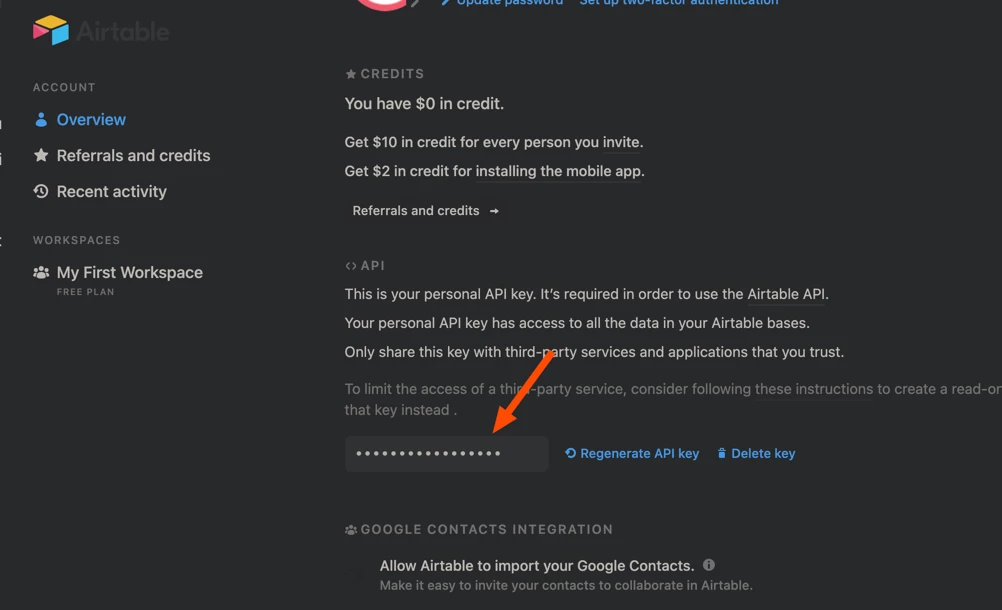
If you don’t see an API Key there you may need to Generate one first.
Airtable has instructions on how to do this here: How do I get my API key? – Airtable Support
Find Your Airtable APP ID
Again - Airtable has some guidance on this in their Community: What is the APP ID? Where do I find it? Airtable Community
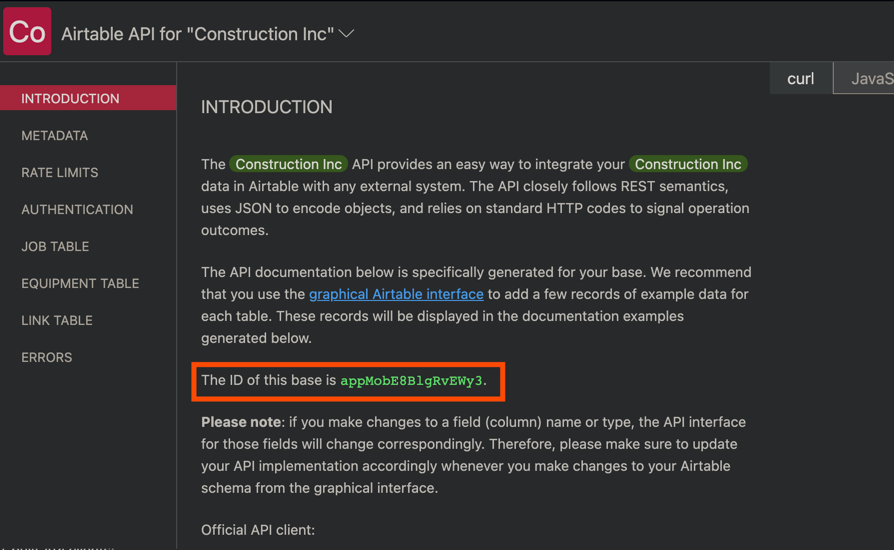
The quick version is head to https://airtable.com/api and click on your Base.
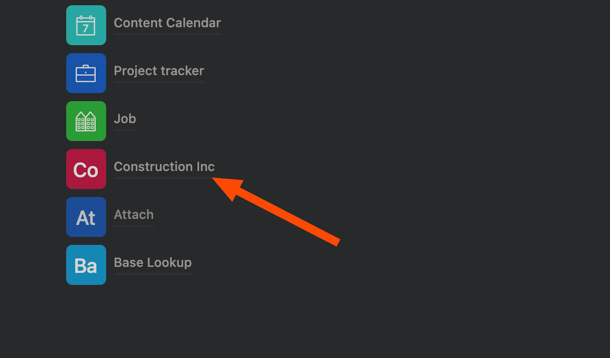
You’ll find the App ID in the URL as well as the middle of the page.
Building our Zap: Trigger
Now that we’ve got all the codes we need from Airtable - it’s time to build our Zap.
We’re going to use Schedule by Zapier as the trigger - since we want to schedule this report to run at 8am every day (including weekends).
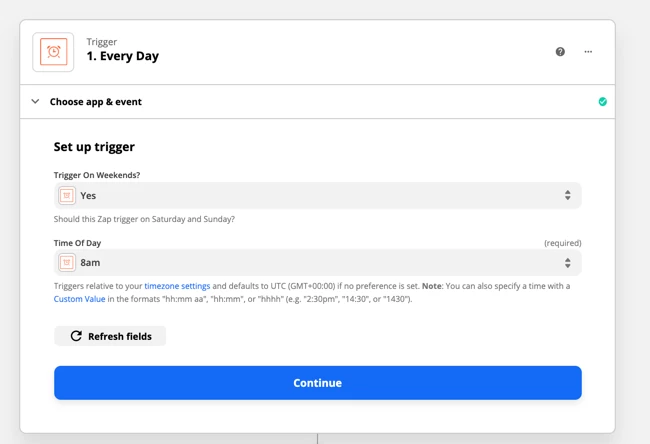
Building our Zap: Webhook GET Request
Once our Zap triggers at 8am - we want to use Webhooks by Zapier to make a GET request.
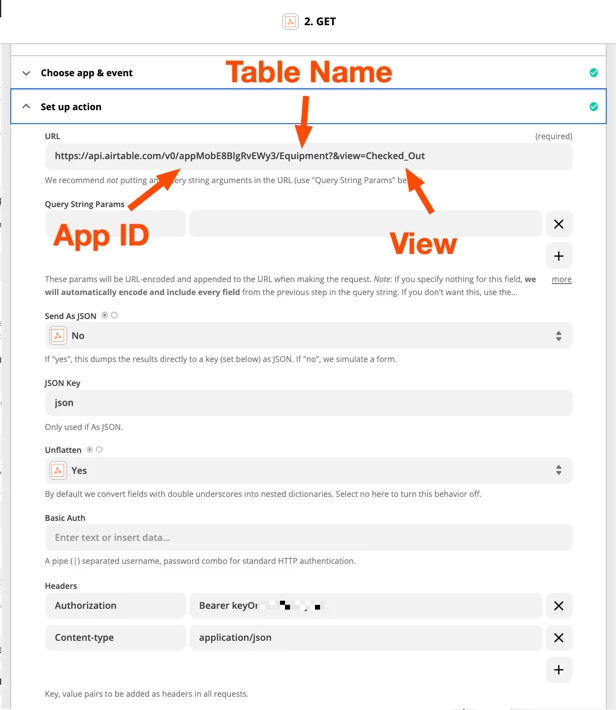
Let’s take a deeper look at our URL.
https://api.airtable.com/v0/appMobE8BlgRvEWy3/Equipment?&view=Checked_Out
appMobE8BlgRvEWy3 is the App ID we found above.
Equipment is the name of our Table
Checked_Out is the name of our View (My view name actually includes the underscore in Airtable).
If your Table or View names have spaces - you’ll want to make sure to encode those with %20 for the space.
For example if the Table name was Equipment Status and my View name was Checked Out - the URL would be:
https://api.airtable.com/v0/appMobE8BlgRvEWy3/Equipment%20Status?&view=Checked%20Out
Then under the Headers - we’ll use “Authorization” on the left with “Bearer (a space) and our API Key” on the right.
Likewise - we’ll use “Content-type” on the left and “application/json” on the right.
And that’s it.
Now we can run the test.
Building our Zap: Output as Line Items
There are a couple of things to note about the data that gets returned.
First - it is in Line Item format - which is a unique data format in Zapier.
Whenever you see Numbers for different records - this is a clue that we could be dealing with line items.
And next - because Airtable is a relational database - we won’t always see the names for every field - we might see codes instead.
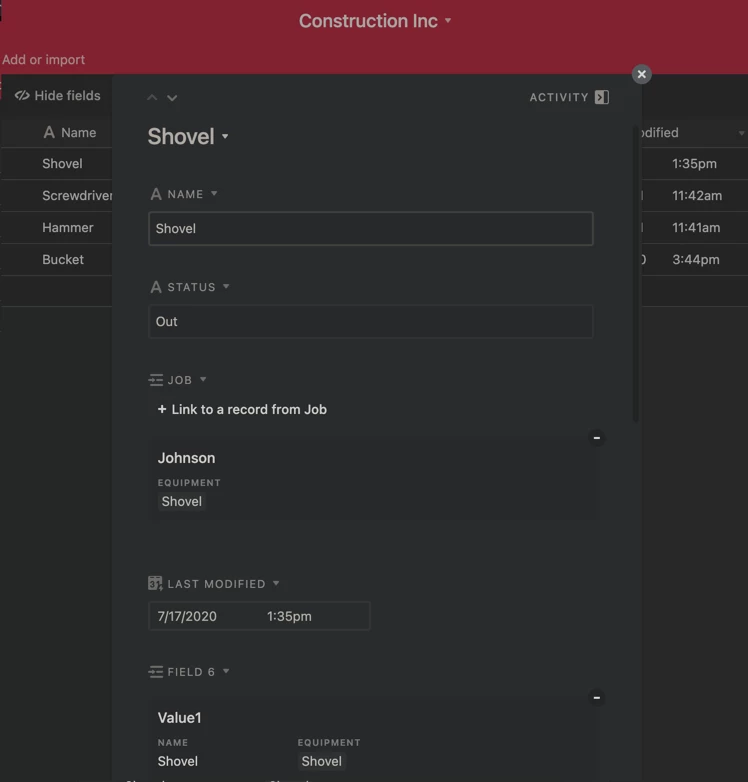
For example - my Equipment table references another table that stores Jobs. But in the data returned from the Equipment table I don’t see the Name of the Job - only the Code that would identify the matching Job record on the Jobs Table.
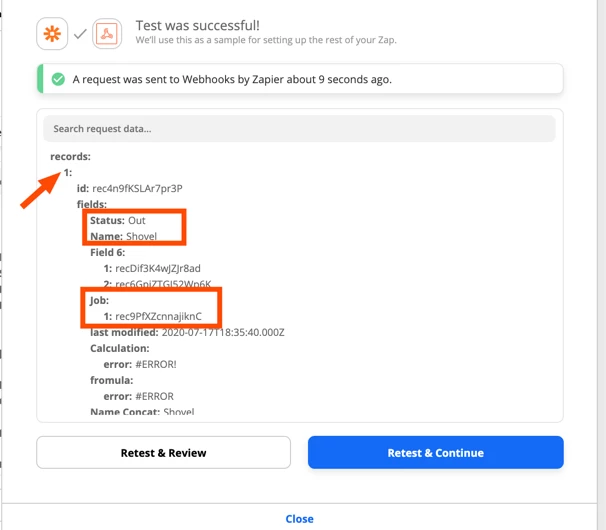
For the purposes of this post - I’m going to keep it simple and just assume all the data we need is on the Equipment table directly and that we’re not concerned with which Job the Equipment is checked out to.
Building our Zap: Formatting our Message
I want to send the output here to Slack - but if I just try to send the Line Items for Equipment Name and Last Modified Date to Slack - it isn’t very readable.

So we can add a Formatter > Utilities > Line Item to Text Action to help format it in a way that is easier to read.
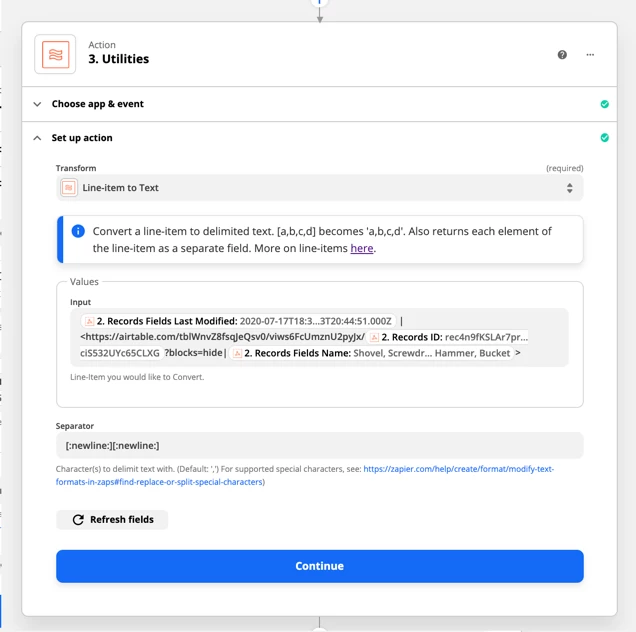
In the screenshot above - I’ve started with the Last Modified Date - so I know the last time the record was updated and then using some special Slack Formatting - I’ve turned the Equipment Name into a Link that will take me directly to the entry on my table.
The [:newline:][:newline:] separators will put each set of information on their own line.
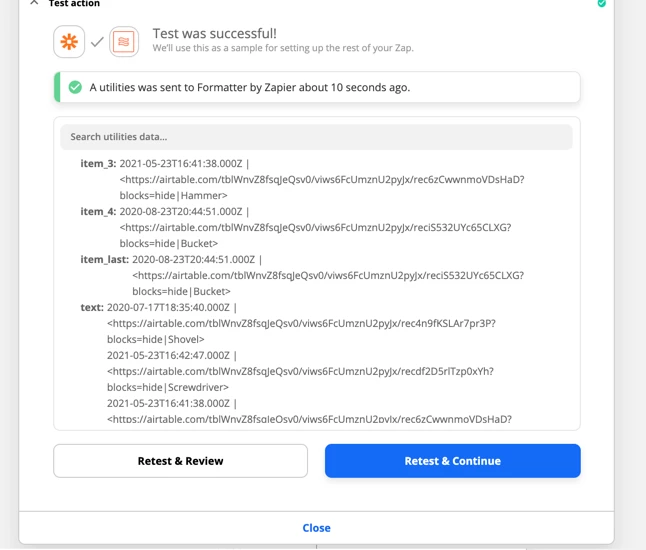
When we test that step - we’ll see individual Items for each record as well as a block of text with all records.
It’s this block of text we will send to Slack.
Building our Zap: Sending out Slack Message
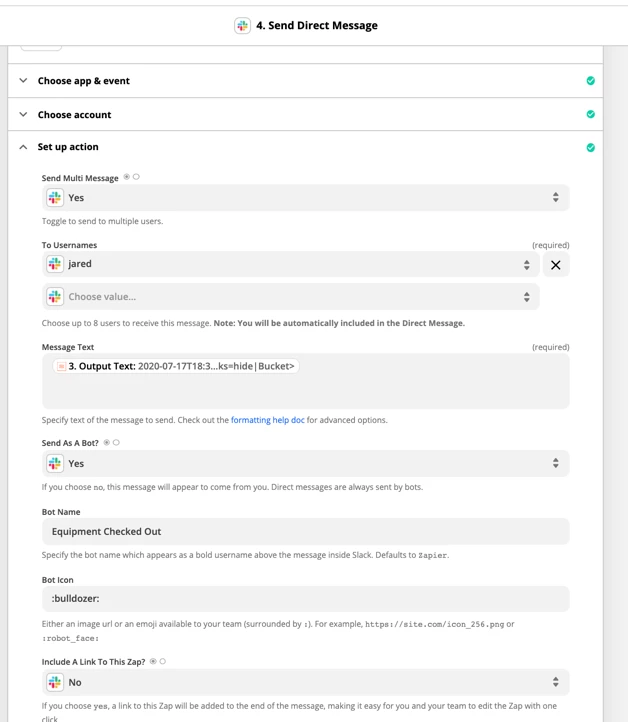
And now we’re ready for the final step - sending the Slack Message.
As I mentioned above - this is where we’ll map in the Output Text from our Formatter Step.
Running the test will send us a well formatted Slack message - so we know exactly what equipment is checked out!
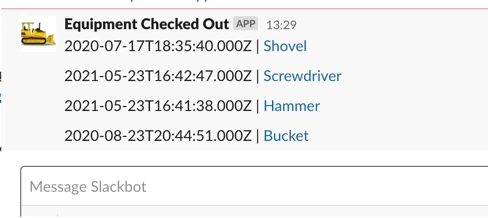
And those hyperlinks will take us right to the piece of equipment if we want more detail. :)
Summary
The current Zapier Find Record action will only return 1 record.
But as long as an App provides API Key (or Basic Authentication) access to their API - we can typically use Webhooks by Zapier to make the request - and we can do that here with Airtable.
While we’ve used the request above to Find All Records in a View - we could make other requests to Airtable’s API in a similar manner.
Due to the Relational aspect of database tables - we may or may not get all the data we are wanting in one request - depending on how that data is stored on the tables.
If you do give this a try - I’d love to hear your experience (or any tips you discover) in the comments below!


