Recently, someone was asking about adding contacts to SendGrid when that person signed up for one of their Viral Loops campaigns:
The SendGrid integration doesn’t have a Create Contact action:
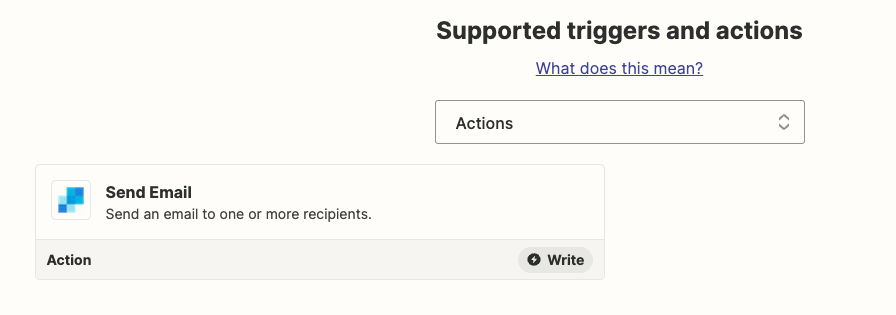
But! That doesn’t mean the workflow is impossible. We just have to get a little creative.
Let’s Check the SendGrid API
When you go here, you’ll see this:
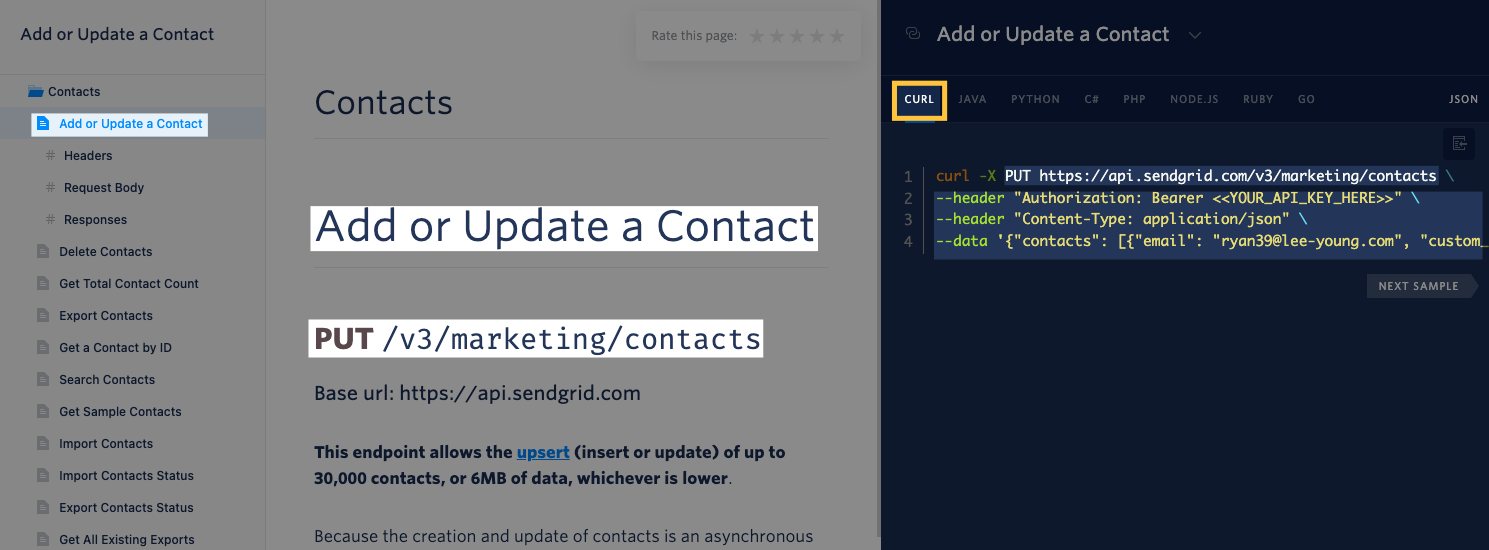
Of the options shown there, I find it easiest to use the CURL option to get the pieces we need.
What Do We Do in Zapier?
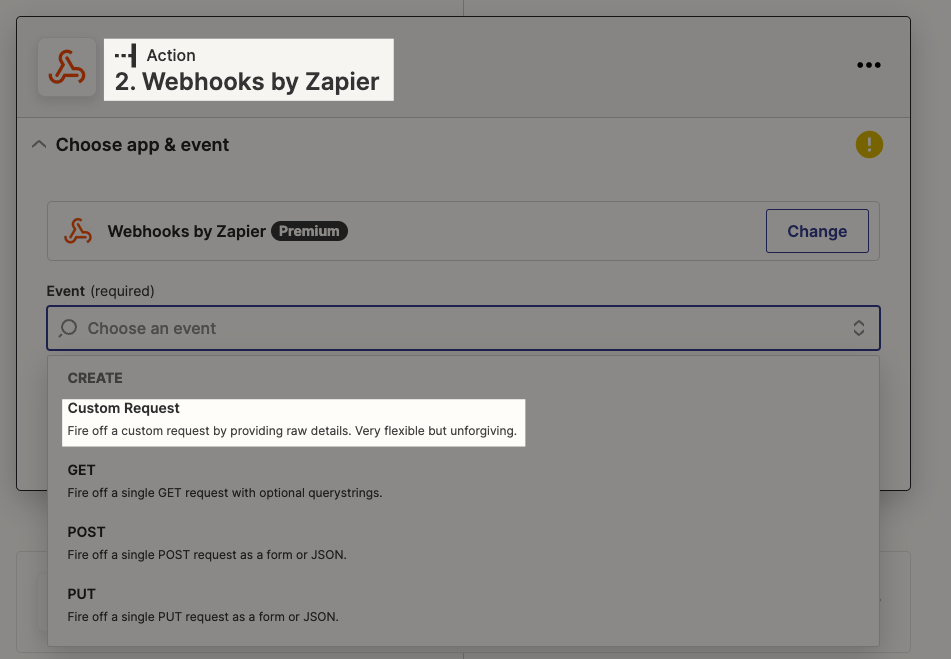
We’re going to use Webhooks by Zapier to perform this action. Make sure to choose the Custom Request option:
Looking at that SendGrid screenshot, here’s how it translates to the Webhooks step in Zapier:
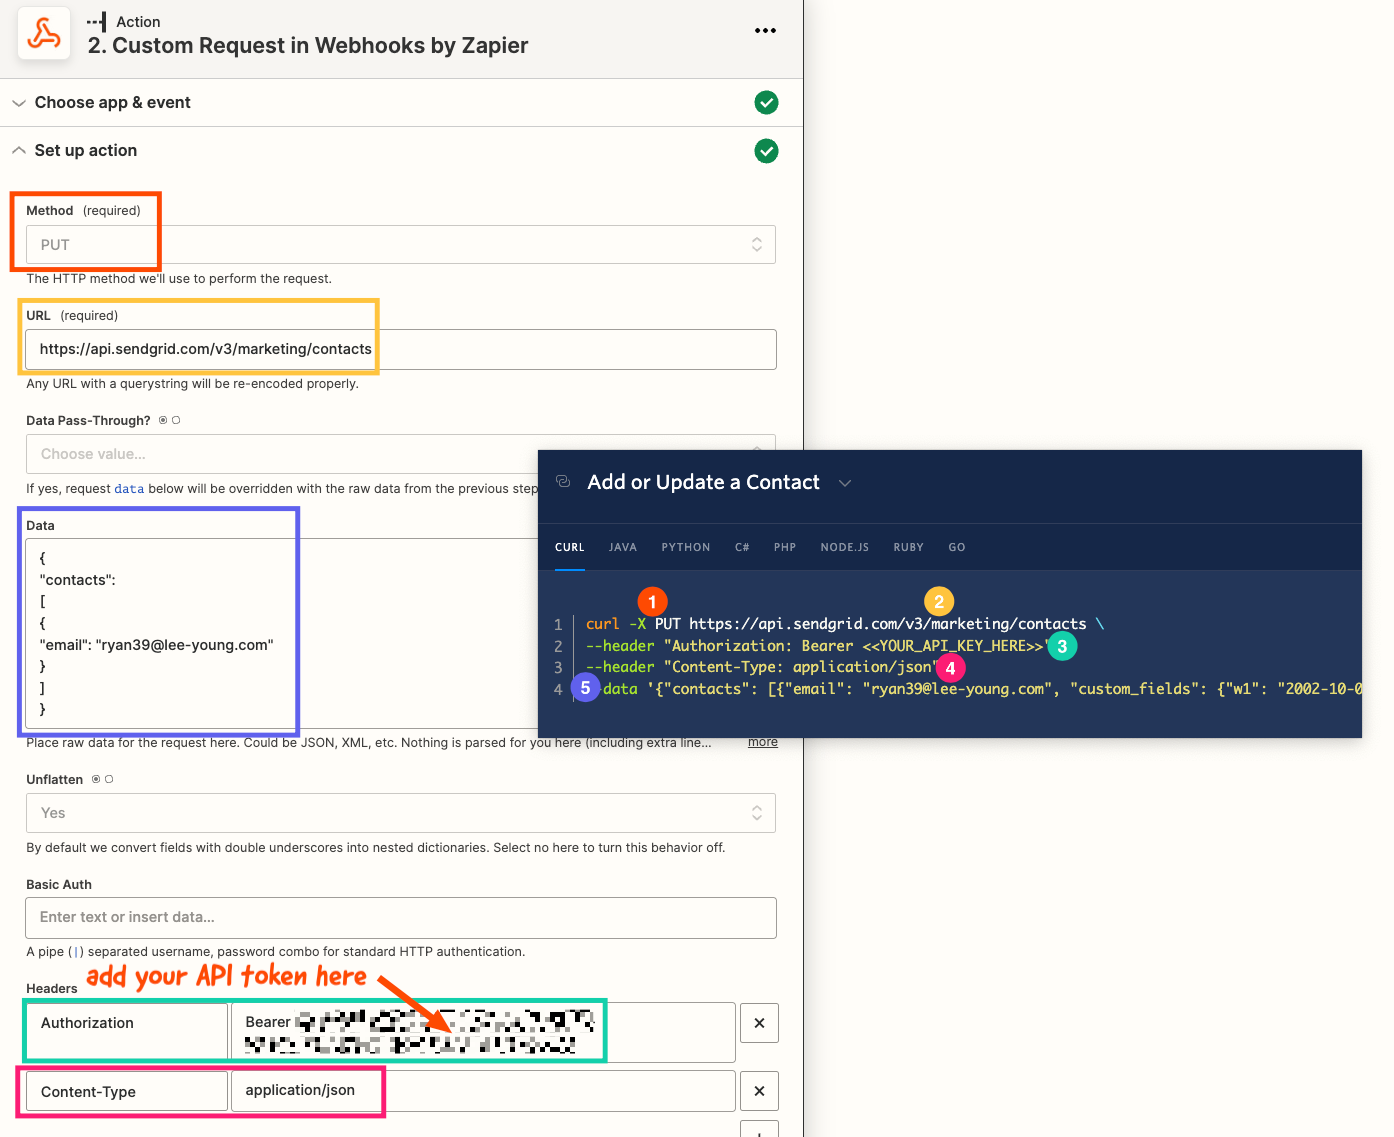
What Do We Put in the Data Field?
The code in that Data box is JSON, which you can get by clicking on this (from this page):
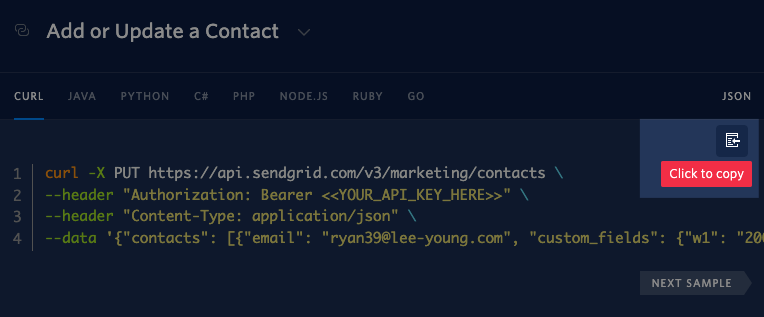
BUT, that gives you way more than you’ll likely need. If all you need is the email address, you can use this:
{ "contacts": [ { "email": "" } ]
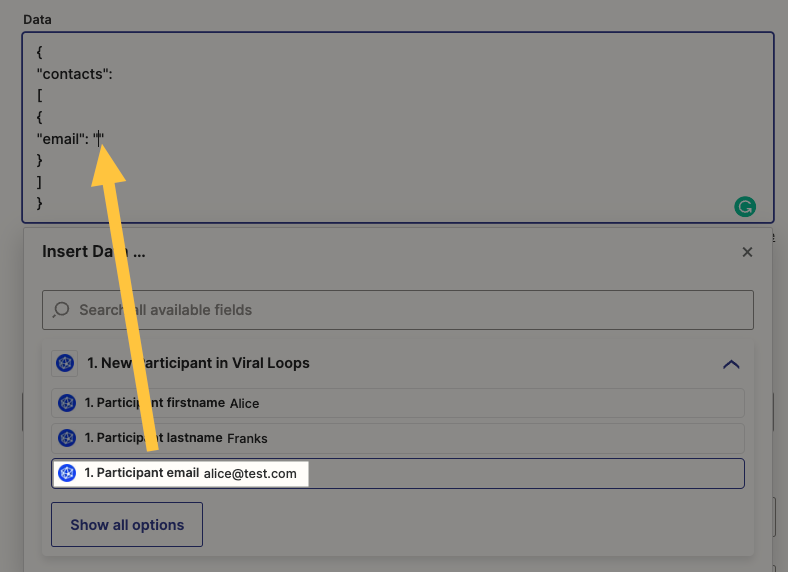
In between the “ “ for email you’ll map the field from your trigger (in this screenshot, it’s Viral Loops) that has the email address:
If you needed something like a first name, you’d add it under email address, like this:
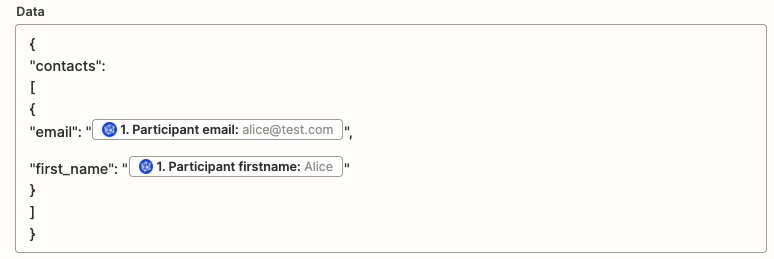
{ "contacts": [ { "email": "",
"first_name”: "" } ]
Getting the API Key from SendGrid
So, where do you get the API key that goes here:

To create your API key in SendGrid, go here: https://app.sendgrid.com/settings/api_keys
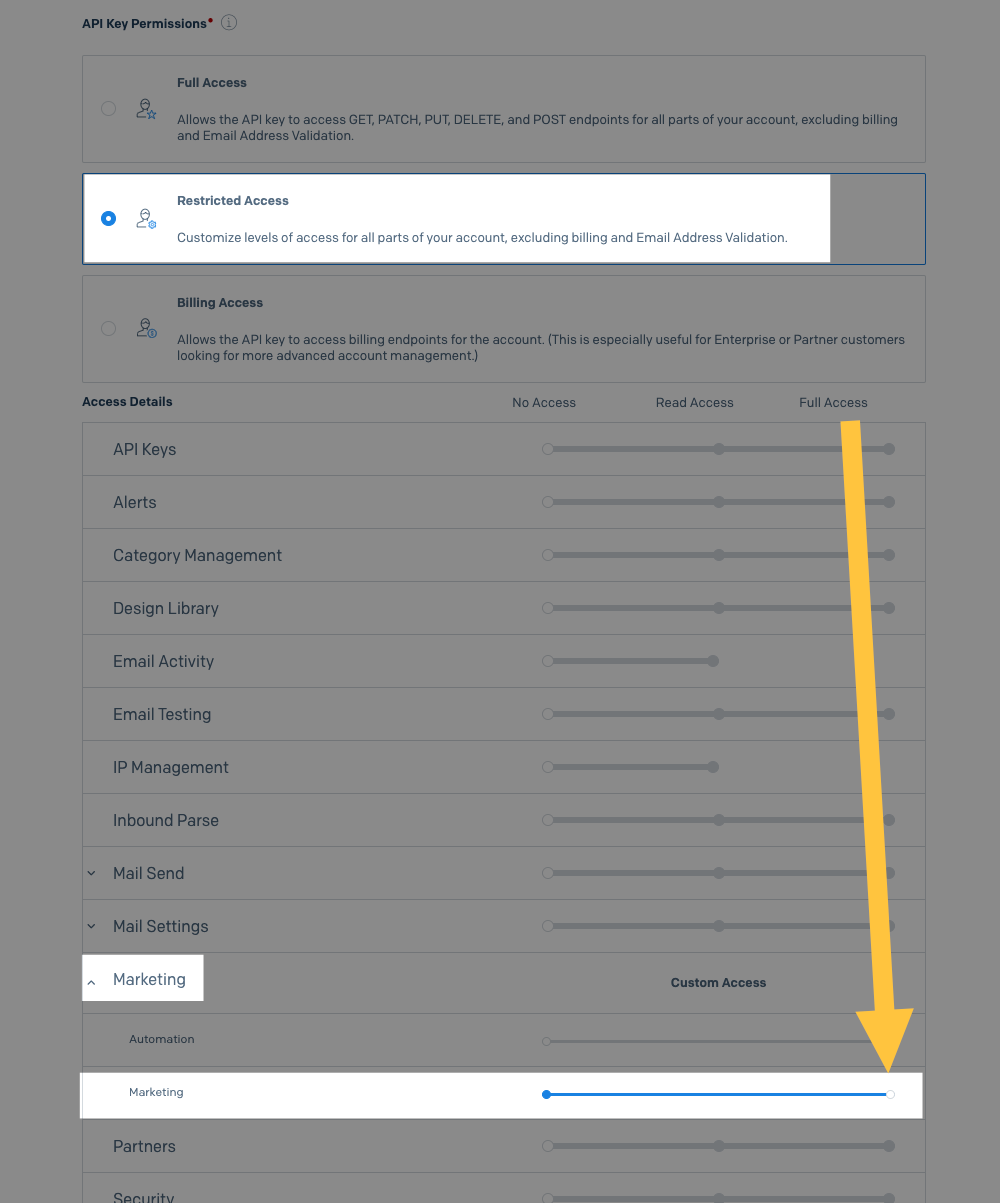
I’d strongly suggest giving it restricted access, to only what you need in order to add a contact. That’s this:
Make Sure to Test Your Zap
Make sure to test the Webhooks step to make sure that it does, in fact, add that contact to SendGrid. If you’ve followed along with the instructions above, you should be seeing that contact. You may have to refresh the Contacts page in order to see it :)
So, What Have We Learned?
With a little creativity and a bit of knowledge about how to use webhooks, you can get around missing actions in Zapier integrations. Once you get comfortable doing this, you’ll have so many more options open up!


