Tim here from the Zapier Support Team with a workflow idea.
Background
I’ve seen many users write in and ask for a Zap that can do the following:
Trigger on a Schedule, like once per week, for example
Pull in multiple rows from a Spreadsheet
Check each row for a particular condition
Run some actions for each row if that condition is met
An example might be checking to see if there are any leads in a spreadsheet that haven’t replied to you and generating notifications saying that they need another reach out.
I’ve also wanted a Zap that can do this from time to time, but it was a tricky problem that didn’t seem to have a solution. Recently I did find a way to do this that I’d like to share with you.
This method works by leveraging the Airtable API in a Code Step, so to use it, your rows would need to be in an Airtable. If you’re not familiar with Airtable, it works and feels a lot like a Spreadsheet app, and also has database features for linking records to each other. There are free plans that would work for this workflow, and you can check it out here: www.airtable.com
Setting up the Zap
You would set up the Zap like this:
Trigger: Schedule by Zapier: Every Hour/Day/Week/Month
Action: Code by Zapier: Run Javascript (this Step will pull in the records, and “Fork” the Zap. More on this below. If you’re not familiar with Code, don’t worry! I’ve packaged this up so that you won’t need to understand or edit the code at all).
Filter: Only continue the Zap if… (this is where we’ll set up our condition that will be checked for each row)
More Actions (We can add 1 or more actions from here that will be run on each record)
I mentioned that we will “Fork” the Zap above. To understand this, think about how a Zap Triggers. The Zap asks for a list of the latest records, and for each new record, we run the Zap. A Zap Fork is when this happens at a different Step instead of the Trigger. The Code Step is going to return the records it finds in such a way that each following Step will be run once for each record it finds.
In the Zap Editor, during setup of the Zap, we’ll only see the first record in the test results, but when the Zap runs live, we’ll see one Task History for each time the Zap Forked that will all have the same Trigger time.
If you’re wondering about Task Usage, the Code Step only uses a single Task each time the Zap Triggers, and then each Fork of the Zap uses Tasks only if its Filter passes.
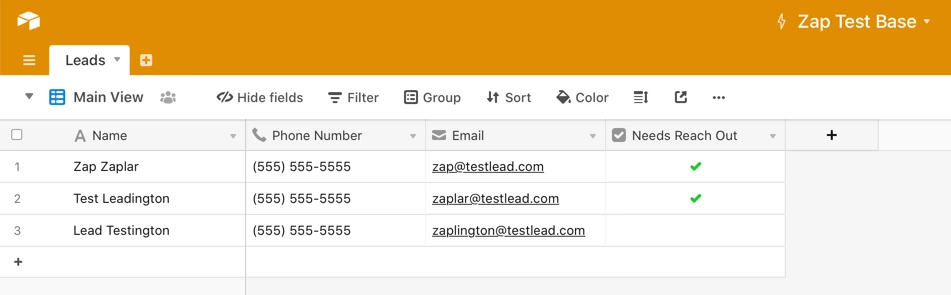
Let’s dive into the meat of this. First, let’s take a look at the Airtable:
We’ve got a few records/rows here with a Name, Phone number, Email, and a true/false checkbox for whether or not they need a reach out.
The Schedule Step is fairly self explanatory, so let’s look at the Code Step itself:
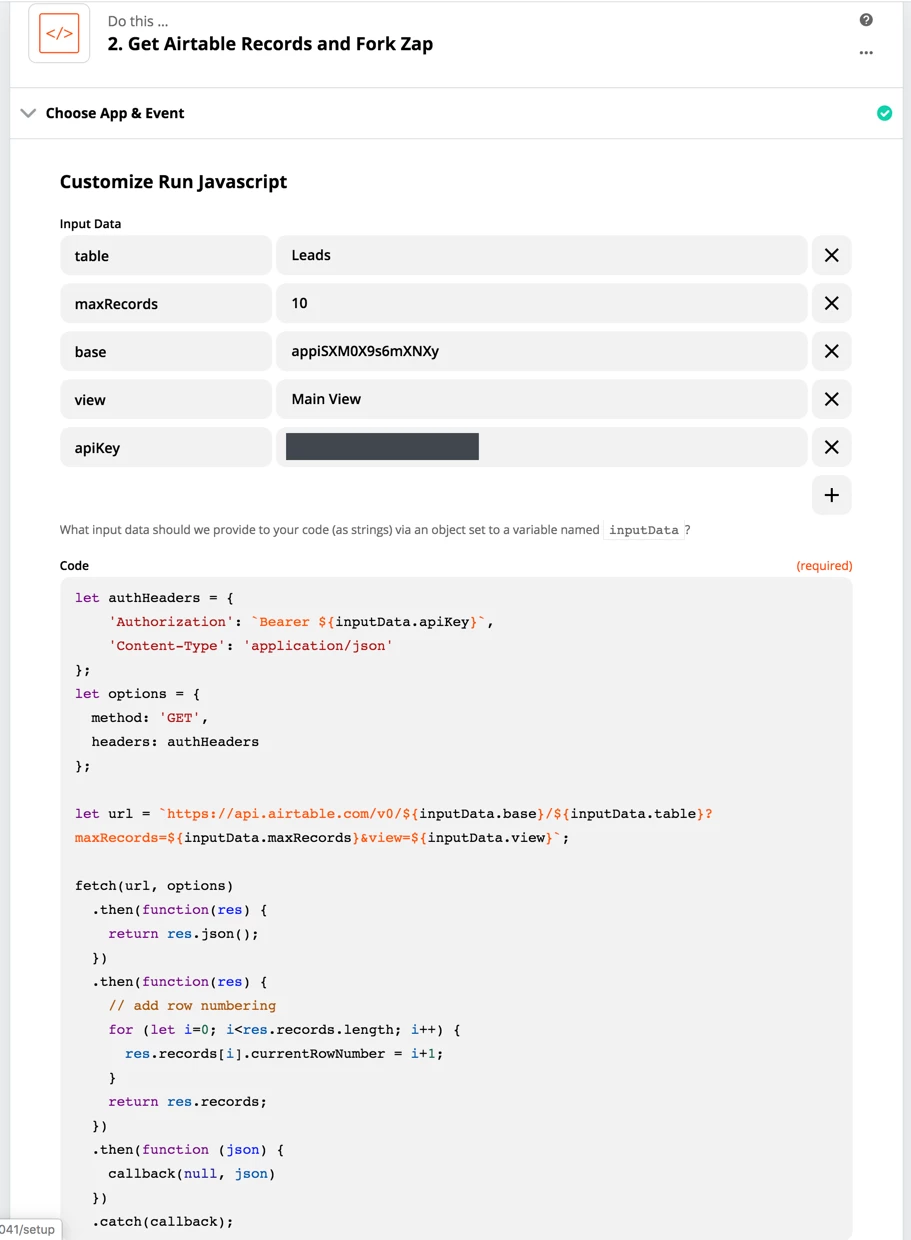
I’ve set up the code so that you won’t have to edit it directly. Instead, you can paste in the code, and then set the information specific to your Airtable account in the Input Data fields. Important: The Input Data field names (on the left side) need to be exactly the same as the screenshot. You should have the following fields names:
apiKey
base
table
view
maxRecords
If you’re wondering where the contents for those Input Data fields come from:
apiKey: In Airtable, click your User Icon in the top right, then “Account”. You’ll be able to copy your API Key from there and paste it into your Zap. Don’t share it with anyone!
maxRecords: This number is the how many rows from the top of the Airtable view you’re using that you want to run through the Zap. You can set this number as high as you like as long as the size of the data for the rows you’re pulling in stays under 6MB. If you go over 6MB, you’ll see an error about that. I’d recommend 200 as a good starting point.
base: While logged into your Airtable account, visit this link: https://airtable.com/api. Airtable will list your Bases here. Click on the one you want to pull records from to find out it’s ID. You’ll see something like this: The Base ID will be where I’ve highlighted our example one in the Introduction Section.
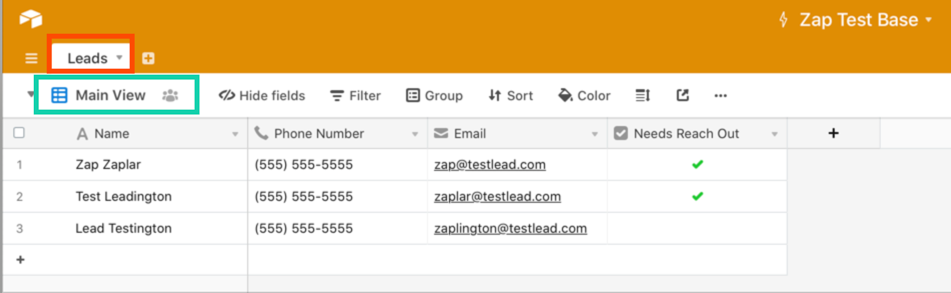
table & view: You can see the Table (red outline) and View (green outline) names in your Airtable base:
Here’s the code for reference and to paste into your Zap:
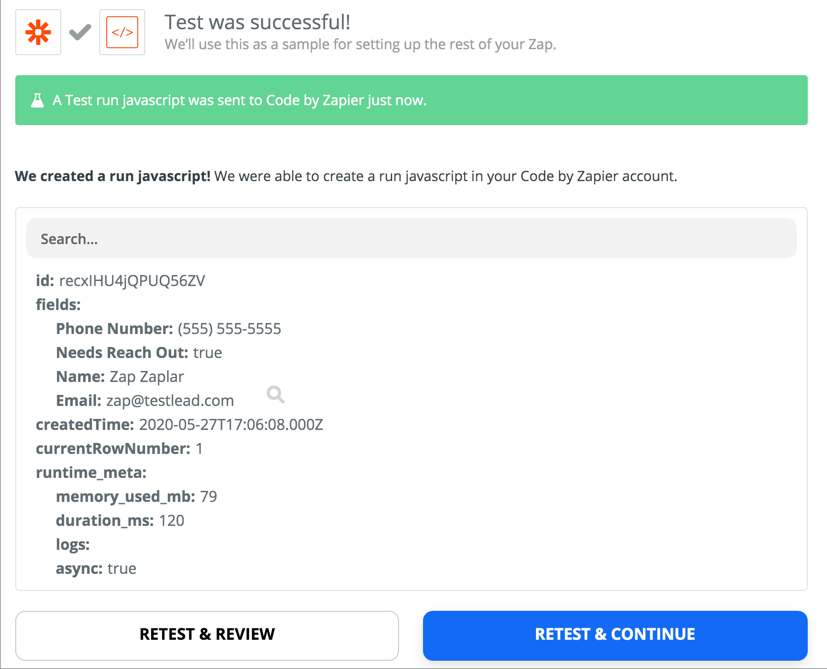
In our example, here’s what the results looks like for the Code Step when we test it:
Code Step Test results show first record only in the Editor
As you can see, only the first record in the view is shown in the Zap Editor, but all records (up to the maxRecords row) will be run when the Zap is live. The records will be pulled in in the same order as they are in the view, and you can set up ordering rules in Airtable. Note that the Code Step adds a “Current Row Number” value to each row, so that you can know what order the rows currently are in the Airtable.
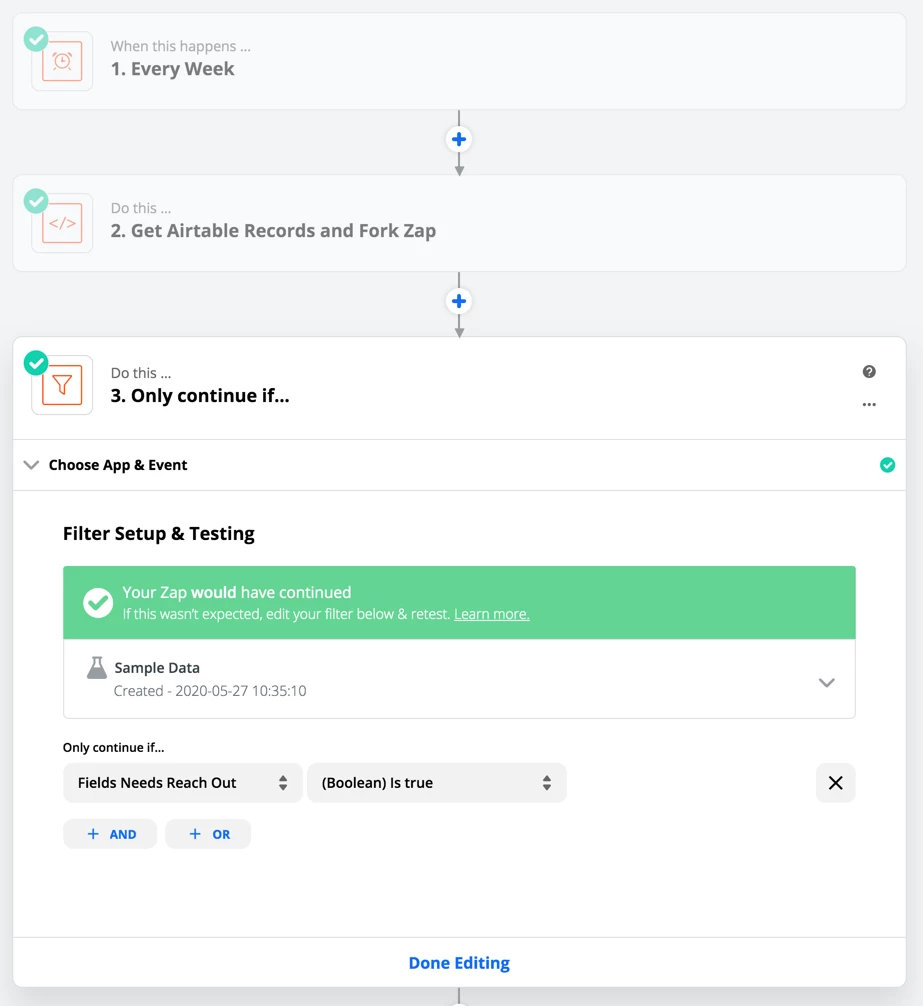
Next, here’s the example Filter that we’ll use for each record:
Example Filter condition
In this case, we’re checking to see if that Lead needs a reach out based on the info in our Airtable.
After this, you can add any actions that you like. For example, you could add a Slack Action to send a message to a channel about each lead that needs a reach out. You could use an app like Twilio to send an SMS to that Lead, or an email app to send them an email reach out. The possibilities are endless!
Please Note
This code is provided as is, without warranty, but we’ll do our best to answer questions you have about it here.
Supporting custom code is outside of the scope of Zapier Support, so if you need help with this, or other code you’re working on, the best place to ask is here in the Zapier community and/or on Stack Overflow. You’re still welcome to ask in Support via our contact form just in case it’s something unrelated to the code that isn’t working, but you may be directed to one of these resources to get help from the community.
If you use this as a jumping off point, don’t forget you’ll need to reconfigure the Filter for the values coming from your Airtable after you input your own values into and test the Code Step.
I hope you find this useful!
Tim
This post has been closed for comments. Please create a new post if you need help or have a question about this topic.