Hey automators! I’ve got something special for you today :)
This content was originally created by William Nutt, the Notion expert behind Notion VIP and Notion A-to-Z. See the original post, Automate Notion Relations with Zapier, and companion video.
With his permission, here’s his blog post. Be sure to check out his blog as well.
Zapier is essential to architecting a cohesive and streamlined system with Notion. It powers automations and integrations with other apps. But a persisting limitation is Zapier’s inability to update Relation properties. As a workaround, we can directly access the Notion API with the Code by Zapier action.
Let’s walk through the configuration with a hypothetical scenario. Members of Notion A-to-Z enjoy access to the functional demos and Zap template. If you’ve yet to join, we’d love to have you onboard.
For this tutorial, you’ll want to have an existing Zapier account and basic familiarity with Zaps, including the Webhooks by Zapier trigger.
The Scenario
As a framework for our configuration, imagine…
- A contact form has two fields: Full Name and Country.
- When submitted, the form sends a webhook to Zapier, with the values of Full Name and Country contained in query strings.
- Zapier adds the submission to the Submissions database in Notion. It contains two properties:
- Full Name — the
Titleproperty - Country — a
Relationto the Countries database
- Full Name — the
We’ll leave the form to your imagining. Let’s build the rest.
Generate a token.
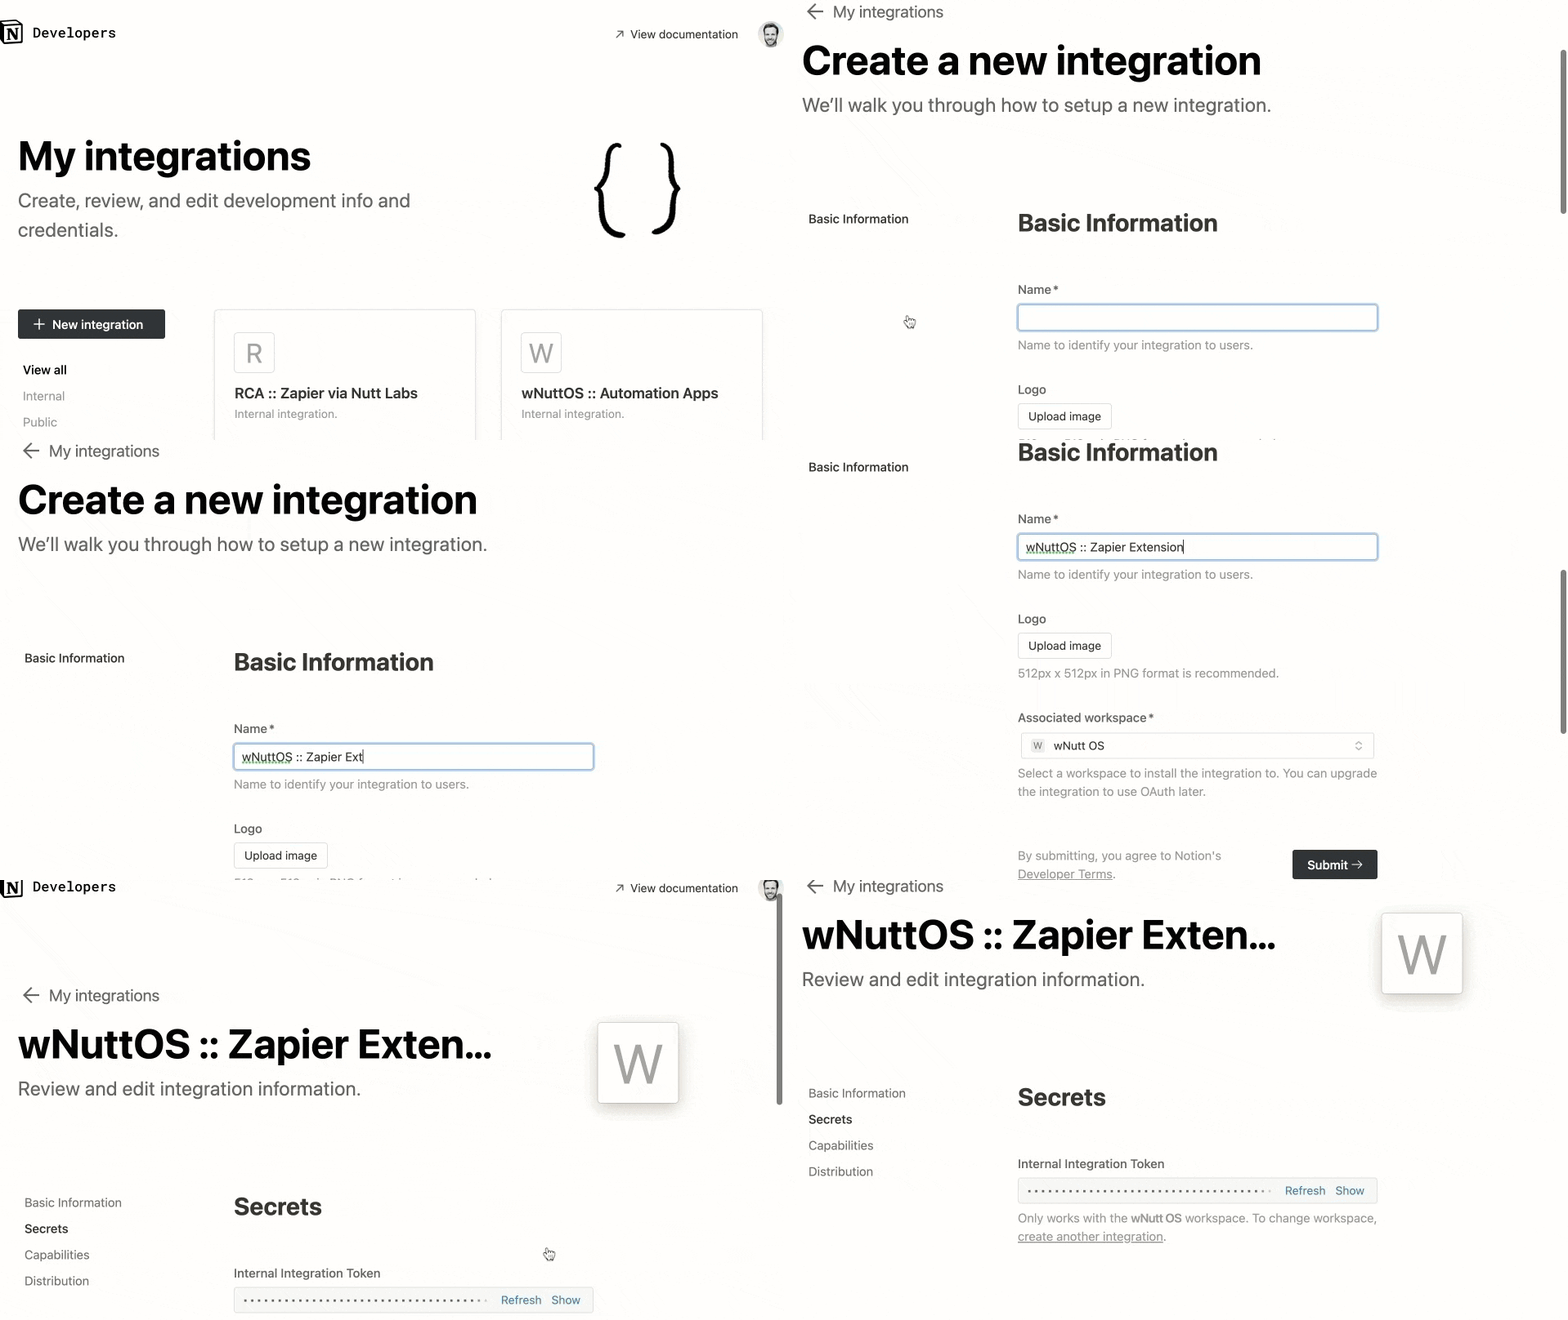
In Notion, an integration connects a workspace with third-party apps, like Zapier. Each integration includes a token that allows other apps to exchange information with Notion and make updates to the workspace.
- Visit notion.so/my-integrations.
- Create a new integration with a name like “[Workspace] :: Zapier Extension.” Ensure your intended workspace is selected, then Submit.
- Leave the tab open for copying the Internal Integration Token later.
Create the databases.
Within a Notion page:
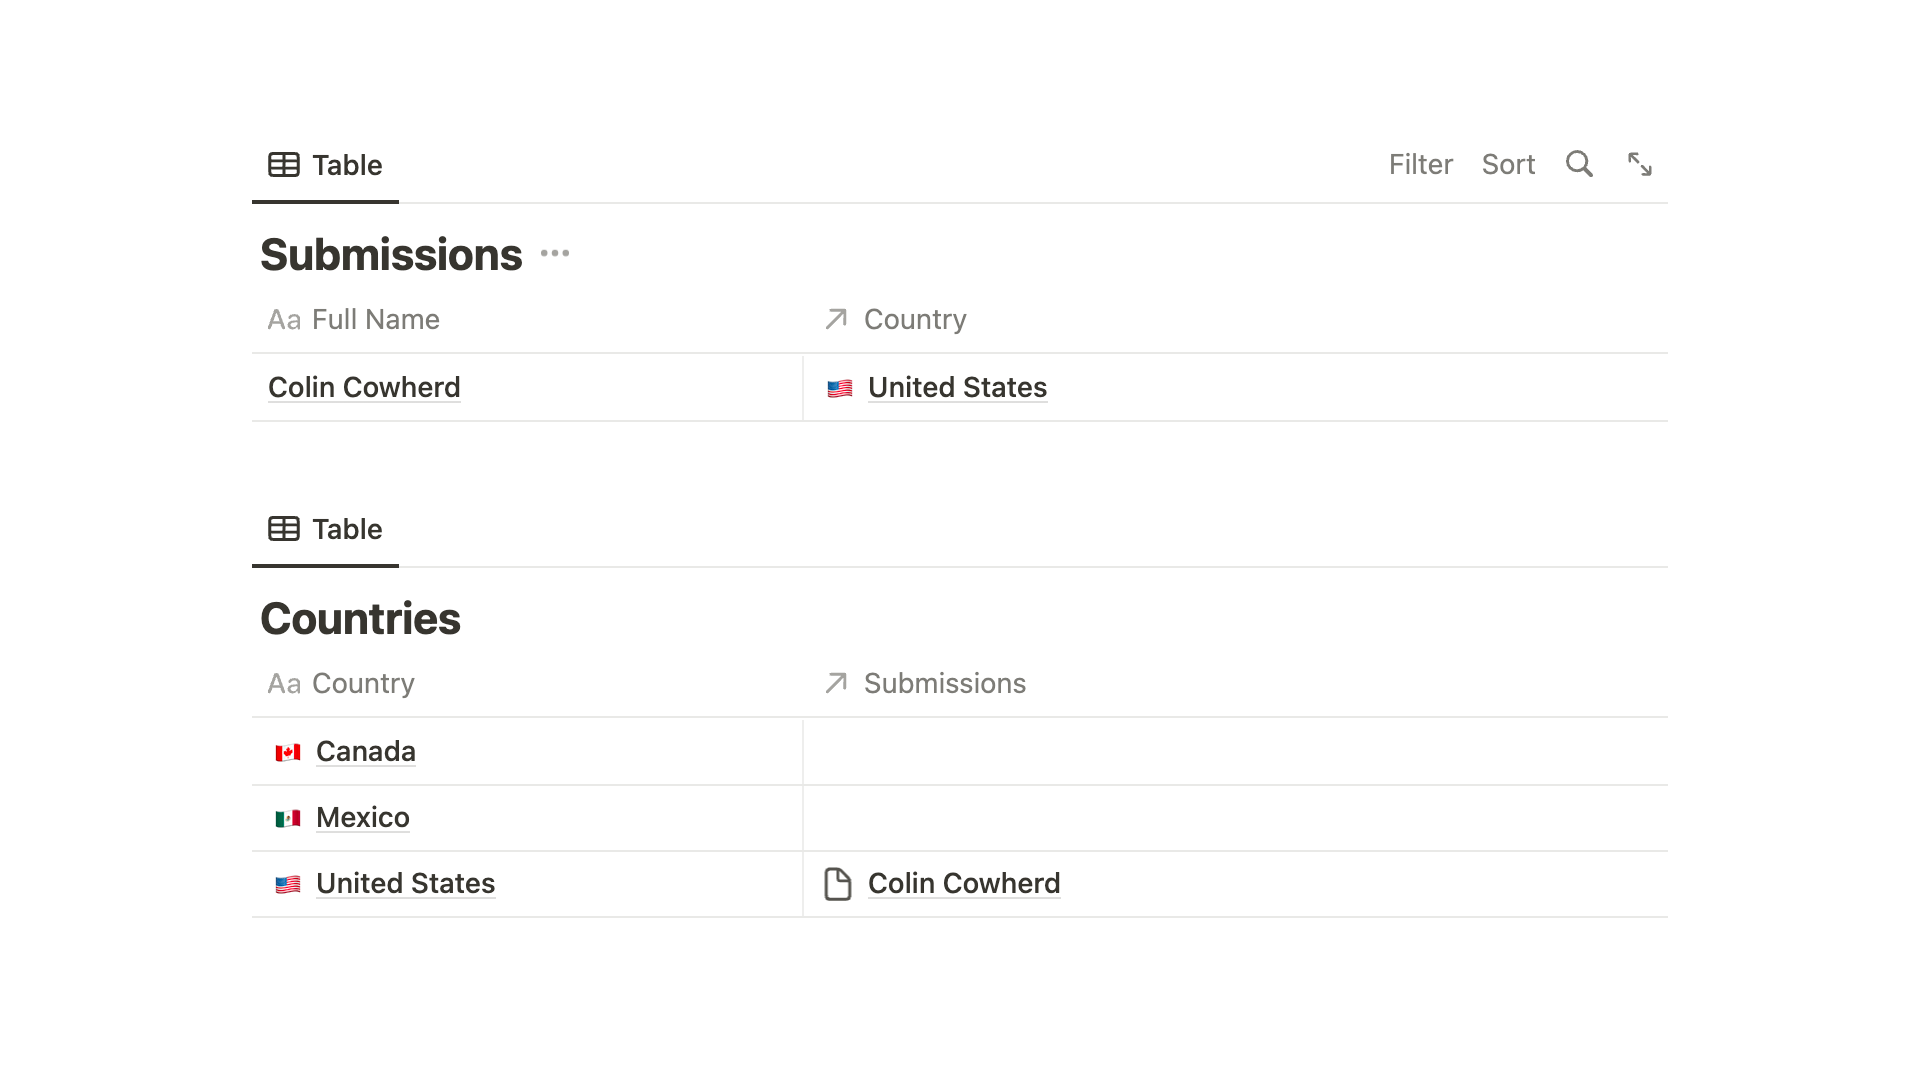
- Create a Submissions database. Rename the
Titleproperty Full Name. - Create a Countries database. Rename the
Titleproperty Country. Give it any three countries. Relatethe databases via reciprocal Country and Submissions properties.
Add your integration.
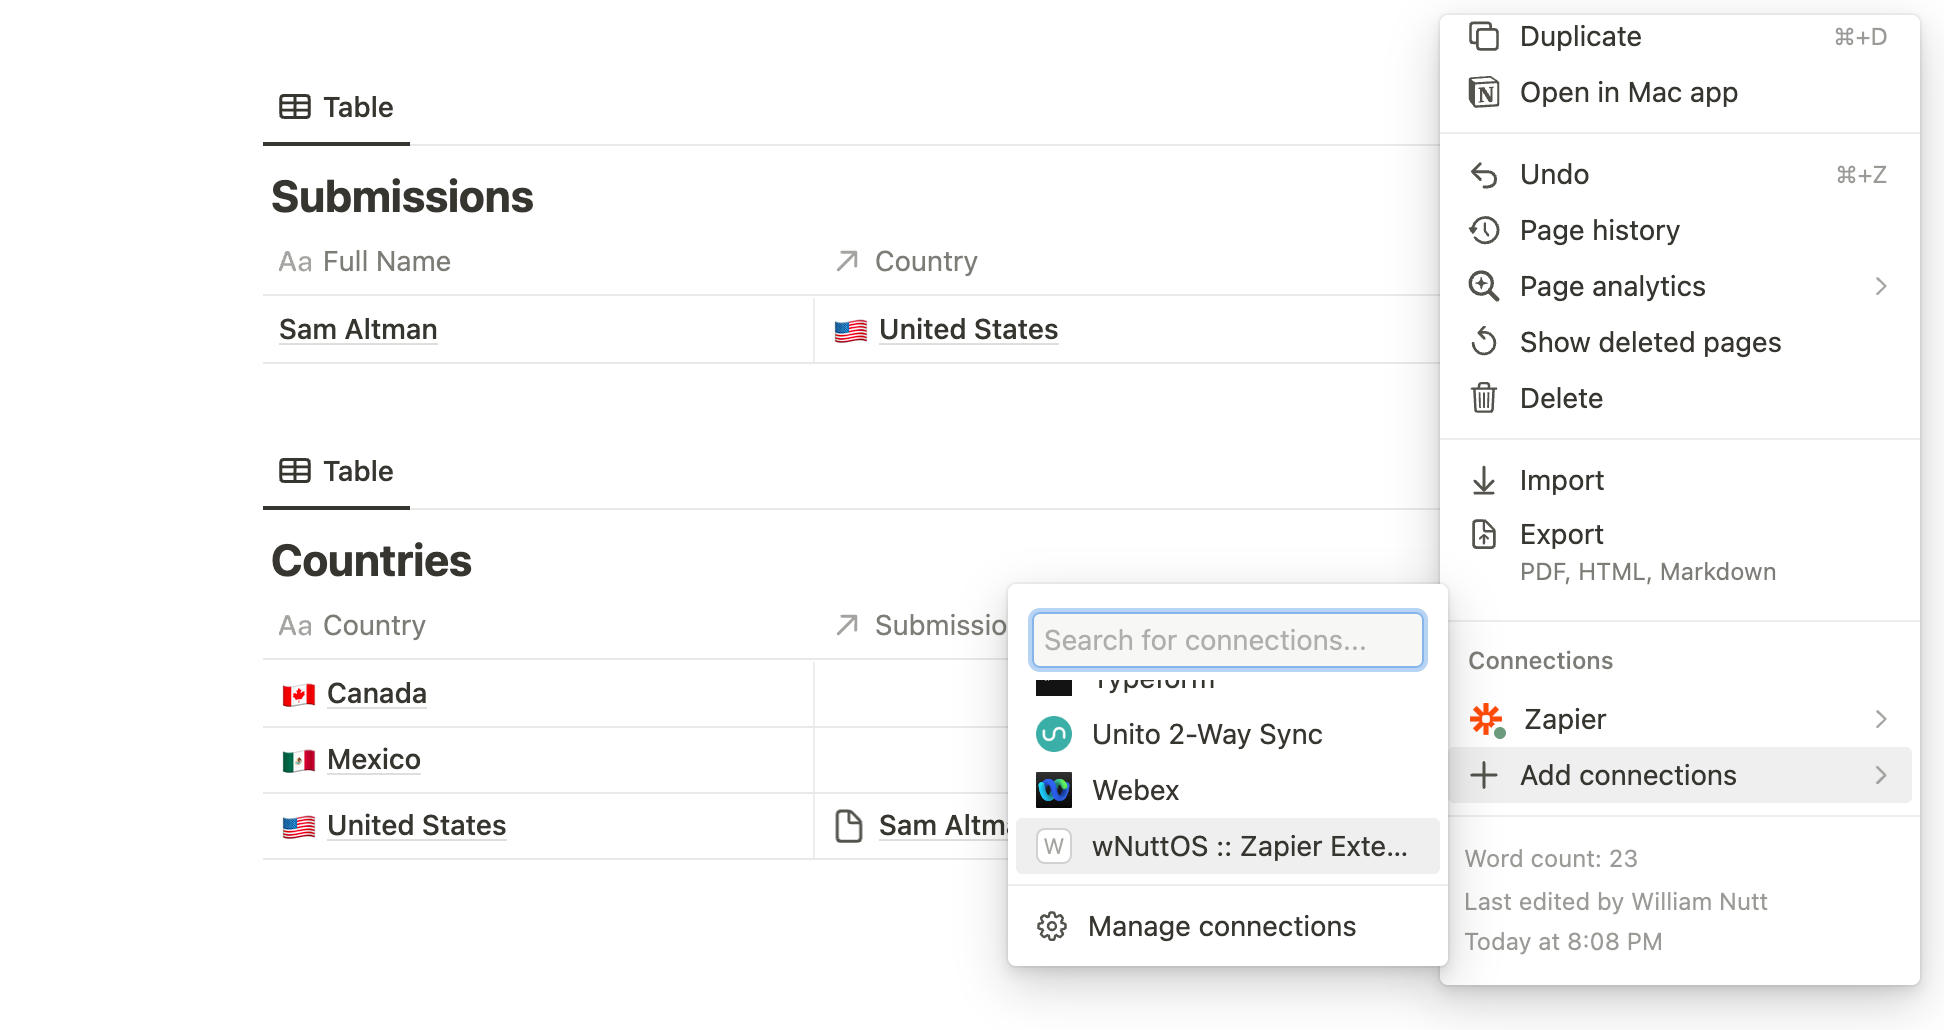
To the page containing your Submissions and Countries databases, add your integration:
- From the
•••menu at the top-right, choose+ Add connectionsat the bottom, then choose your integration.
Create the Zap.
Step 1 (Trigger) — Receive the webhook.
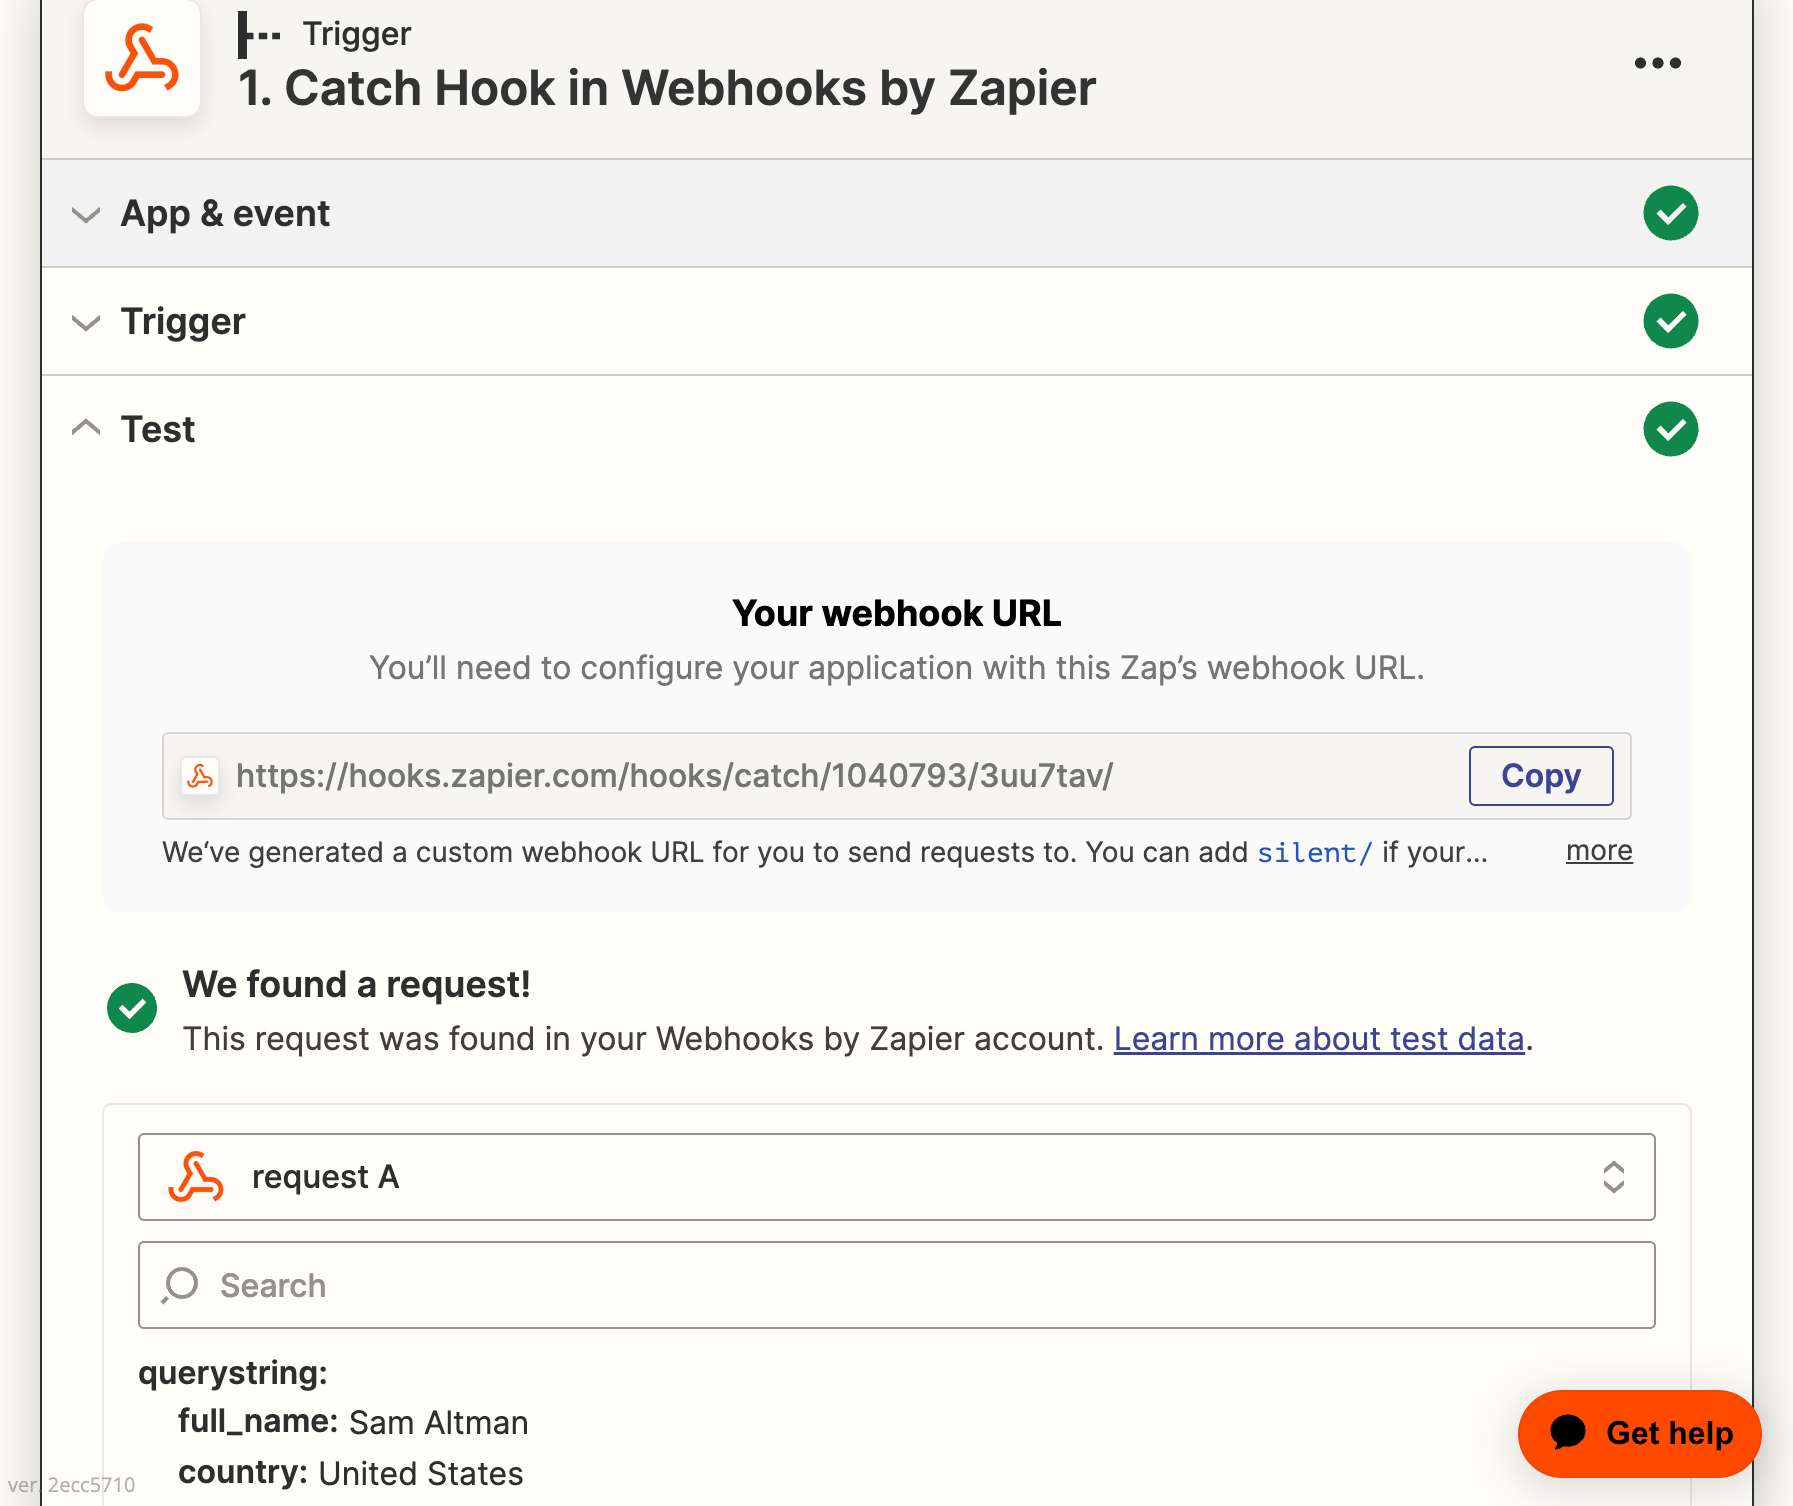
- Create a Zap triggered by a webhook that receives two values: full_name and country.
- Provide a test submission where country matches an item in your Countries database.
Step 2 — Create item in Submissions.
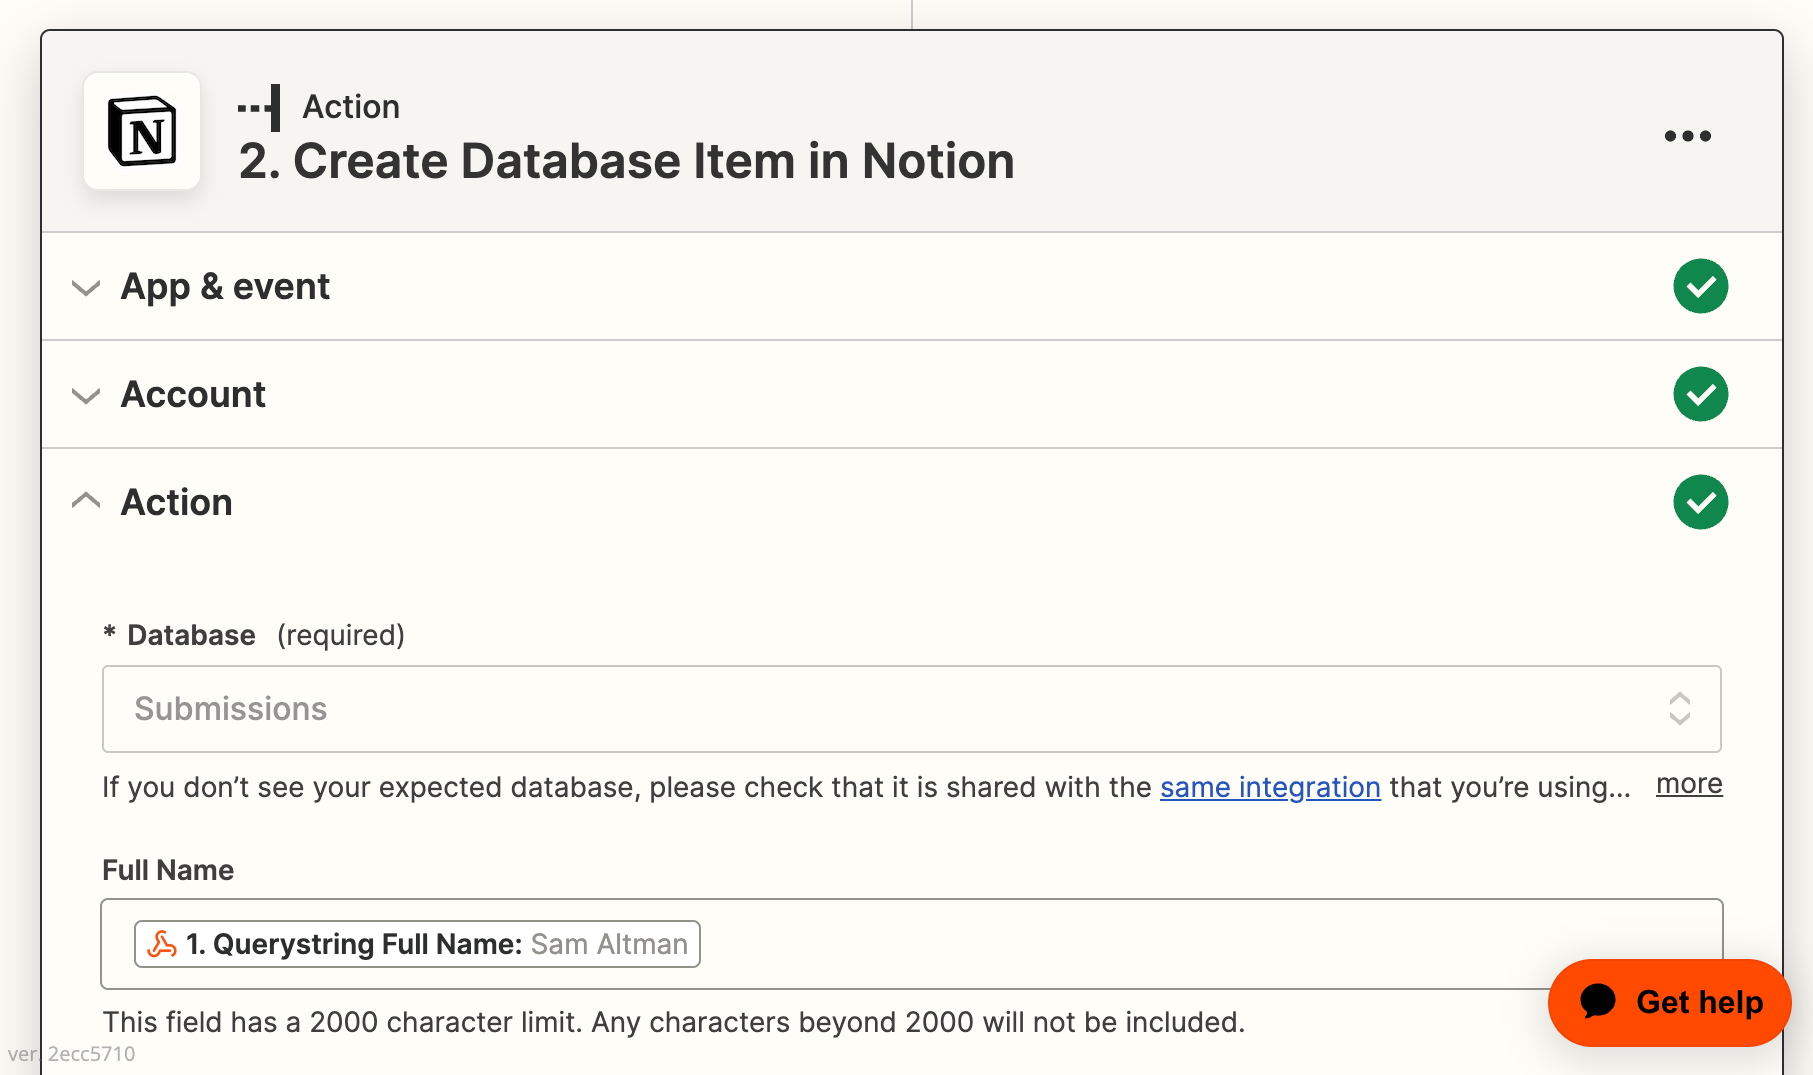
- Using Zapier’s standard integration (not your custom “Zapier Extension”), the first action after the trigger is
Create Database Item. - It creates the item in the Submissions database and populates the Full Name (
Title) property with the webhook’s full_name value. (Country remains blank.)
Step 3 — Find the country.
- The next action uses the standard Notion integration to
Find Database Item. - It searches the Countries database for the webhook’s country value.
Step 4 — Relate the country. ✨
This is where the magic happens.
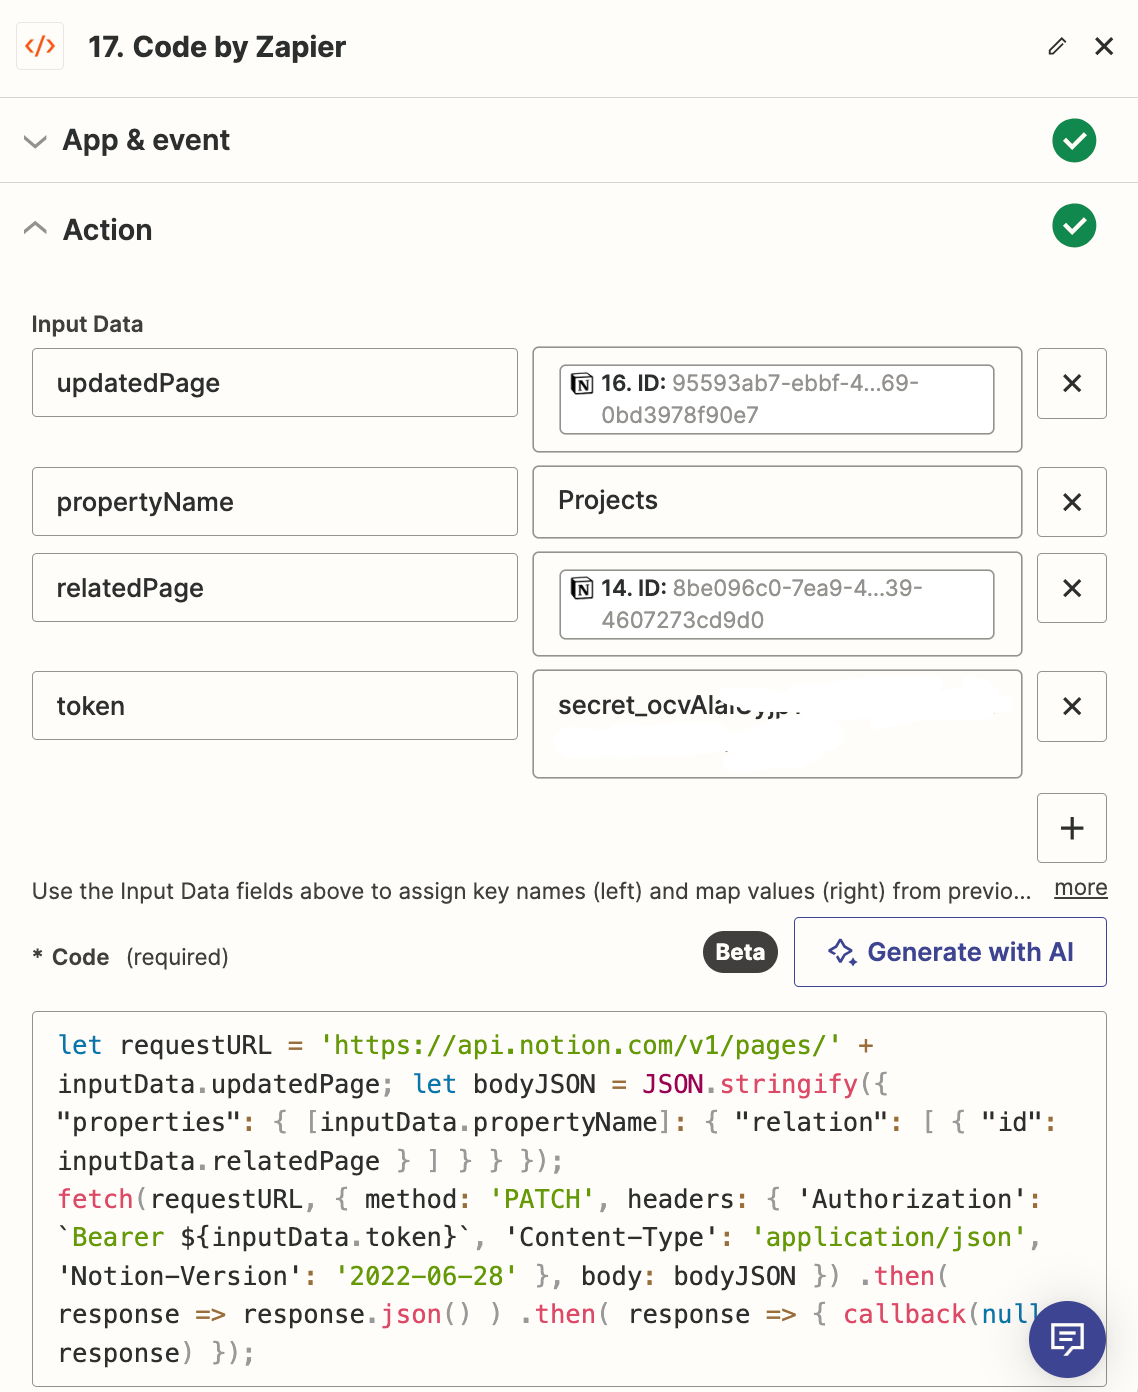
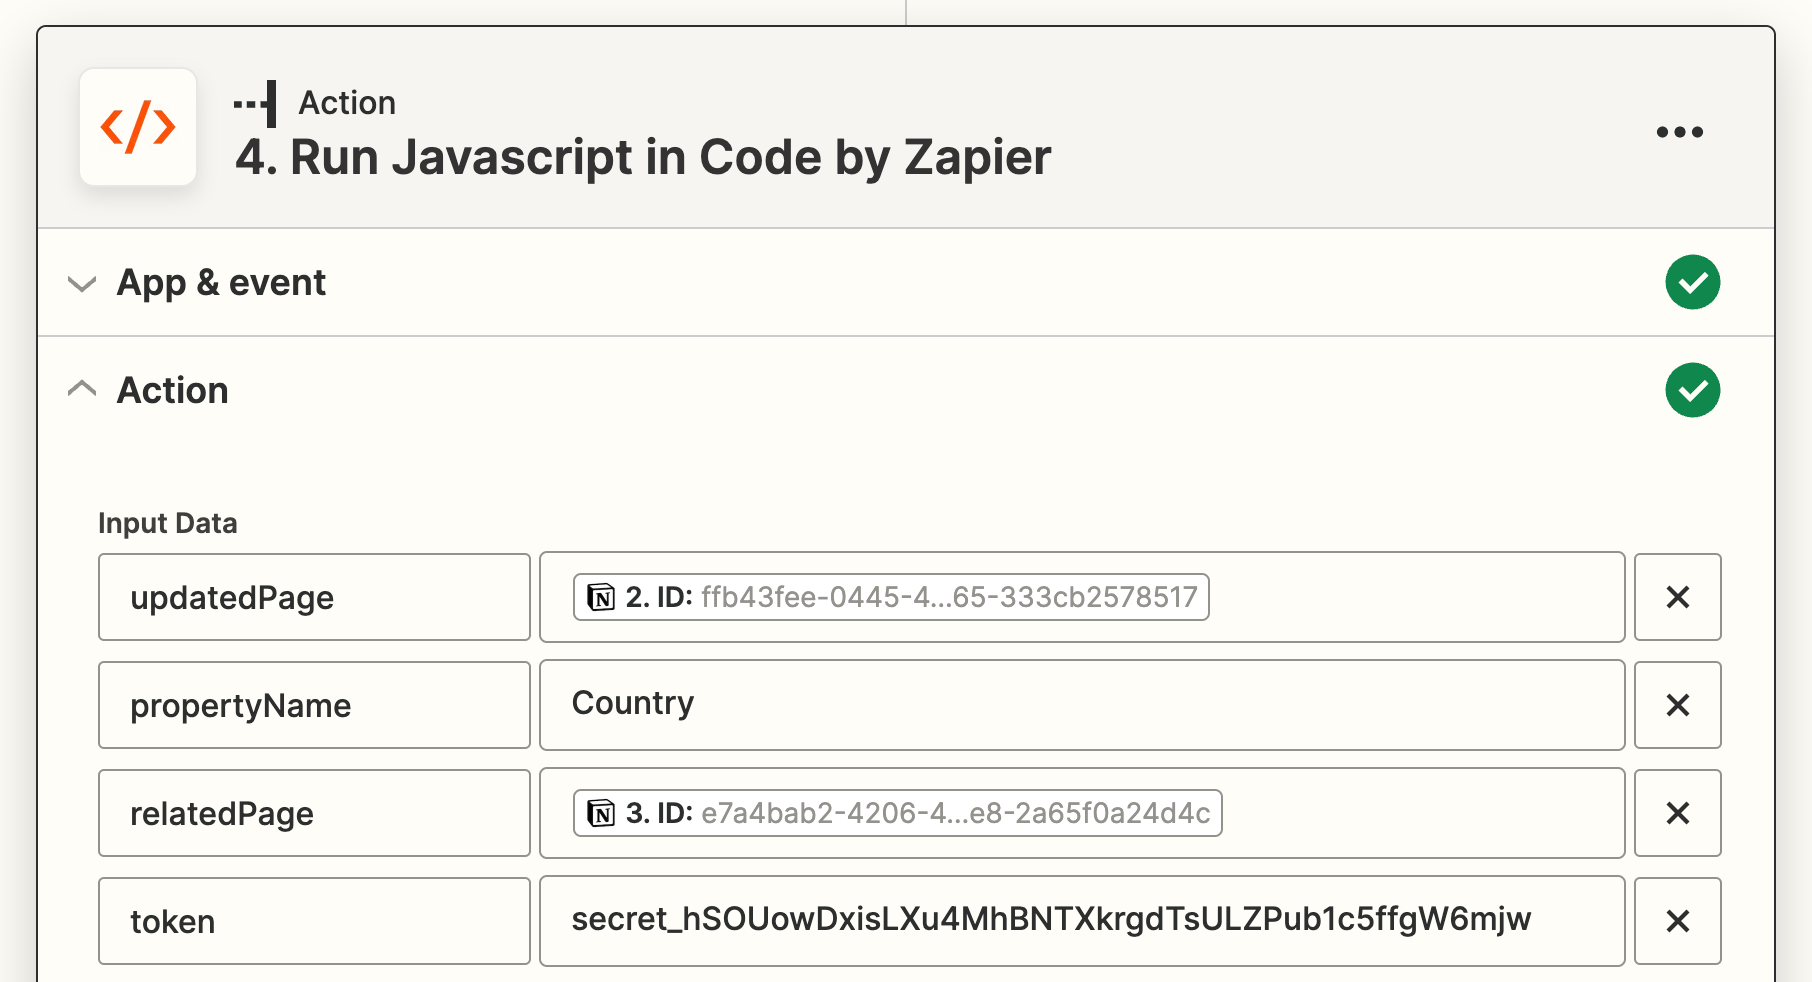
- Choose Code by Zapier as the app and Run JavaScript as the event.
- Add three input values:
updatedPage—IDfrom Step 2 (the created page in Submissions).propertyName— The name of theRelationproperty to populate. In this case, Country.relatedPage—IDfrom Step 3 (the found page in Countries).token— The Internal Integration Token from your custom integration (which you left open to copy). ClickShowthenCopy.
- Paste the following code into the
Codearea. No updates required, as all variables are provided are provided fromInput Data.
let requestURL = 'https://api.notion.com/v1/pages/' + inputData.updatedPage; let bodyJSON = JSON.stringify({ "properties": { [inputData.propertyName]: { "relation": [ { "id": inputData.relatedPage } ] } } });

fetch(requestURL, { method: 'PATCH', headers: { 'Authorization': Bearer ${inputData.token}, 'Content-Type': 'application/json', 'Notion-Version': '2022-06-28' }, body: bodyJSON }) .then( response => response.json() ) .then( response => { callback(null, response) });
For anyone who may be curious:
- This JavaScript make a
PATCHrequest to Notion’s API. - The page to update is included in the request URL.
- Your token is included in the
Authorizationheader. - The request body includes the property to update and page to
Relate.
To Relate multiple pages, you can add additional objects within the relation key’s array.
Once you’ve successfully configured the demo, bolster your Notion automations with Relation property updates. If you hit any snags along the way, shoot William your questions on Twitter, LinkedIn or YouTube.
About William Nutt
In addition to managing the two most popular independent resources, Notion VIP and the Bulletproof methodology, William works directly with Notion on a variety of special projects, including the Help & Support page, the Certified Consultants program, and a training curriculum for their global support team.


