


![]() Howdy Zappers!
Howdy Zappers!
Airtable is one of our most popular integrations. It’s a great choice when you need more than a spreadsheet but not quite as much as a database.
Let’s take a look at some ways you can take Airtable to the next level by using Zapier.
1. Combine Airtable Automations with Zapier to Create Super Workflows
There are times when using Airtable’s built-in automations will make more sense, especially if your workflow doesn’t involve any other apps. It will save you Zapier tasks, sometimes work more quickly, and it reduces the confusion of using multiple apps.
BUT… if you run into limitations with Airtable’s automation feature, you can get the best of both worlds by combining it with Zap workflows.
In Airtable
If I want to kick off a workflow when a record enters a specific view, it’s possible using Zapier. There are a couple of reasons you may want to consider using Airtable’s automation trigger, though.
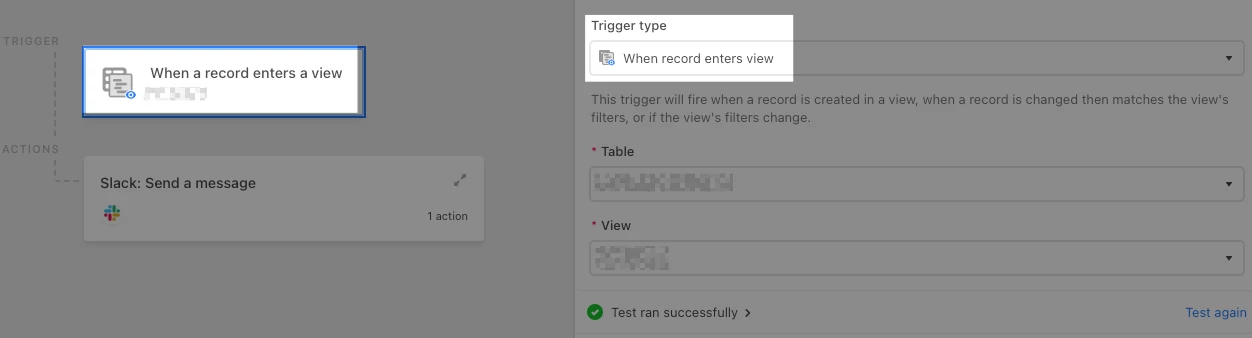
-
It triggers pretty much right away, as opposed to waiting for the polling period of a Zap (which, depending on your plan, can be anywhere from 1 minute to 15 minutes).
-
It will trigger each time the records enters the specified view, whereas the Zapier integration only triggers the first time. After that we don’t consider it a “new” record in the view, having seen it there before.
Airtable Action: If the app you need isn’t available within Airtable’s automations, you can choose one that works for you as a trigger in a Zap. This could be Google Sheets, Gmail, Slack, etc.
In Zapier
Trigger: Whatever you chose as your action in Airtable. If you’re creating a new Google Sheet row every time a record enters a specific view, then you would trigger on new rows in Google Sheets.
Action: Whichever app is available on Zapier and not available through Airtable directly. This any of the thousands of apps we support :)
NOTE: if you’re trying to trigger everything as quickly as possible, you’ll want to pick a Zapier trigger that is instant. For example, you could send an email via Airtable then use Email by Zapier (New Email) as the Zapier trigger.
2. Trigger When Records Are Updated in Airtable
This feature isn’t *super* new , but some of you may not be aware that we can now trigger on not just NEW records in Airtable, but also UPDATED ones. It requires that you add a single field to your Airtable, but it’s easy :)
In Airtable
All you need to do is add a Last Modified Time field:
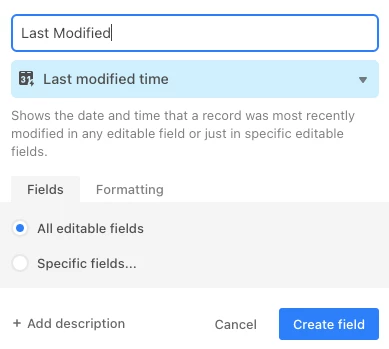
Here, you can decide whether you want to update this when any editable field is update, or choose specific ones.
In Zapier
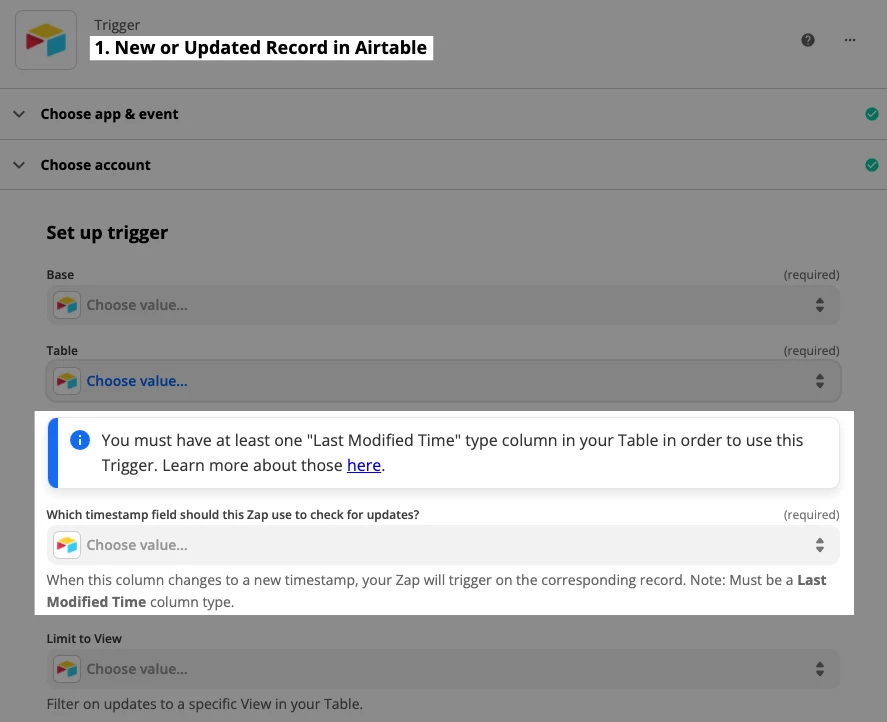
Trigger: New or Updated Record
Here, you’ll choose the field you just set up in Airtable where it says “Which timestamp field should this Zap use to check for updates?”
Full Disclosure: Airtable has a trigger like this, but if you’re looking to perform an action in an app they don’t integrate with then you can use Zapier for that :)
3. Trigger Your Zap When a Date/Time Value Has Arrived
There are likely multiple ways to make this one happen, but without using Zapier you’ll find that Airtable’s NOW() function (amongst others) doesn’t update on its own. You have to visit the table in order for it to be updated. When you build a Zap, we act as a “person” checking, so it keeps those date-based formulas updating :)
In Airtable
I’m using 3 fields to accomplish this.
- A date field, for when I want my automation to be triggered.
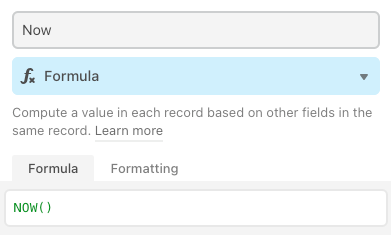
- A formula field using NOW()
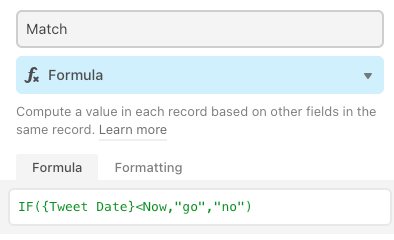
- Another formula that checks to see if my date is longer ago than “now”
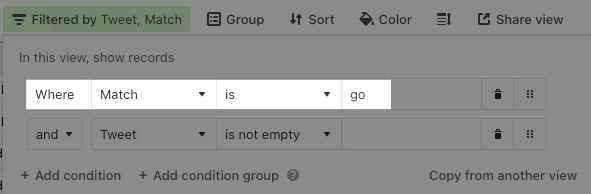
Then I created a view with a filter on that Match field:
In Zapier
Trigger: Airtable — New Record (then select the view from above)
Action: Whichever app is available on Zapier and not available through Airtable directly.
4. How to Work With Airtable Linked Records in Zapier
When you’ve got linked records in Airtable, they can come across kind of funky in your Zap workflows, showing the record ID instead of anything useful that you can add to later steps of your Zap. There’s a simple trick you can use, and it doesn’t involve looking up records by their Record ID.
In Airtable
Let’s say you have a main table, then linked records in a second table. In this example it’s classes and then levels for those classes (beginner, intermediate, advanced):
In Zapier
Trigger: Airtable — New Record
By default, here’s what we’ll see in Zapier:
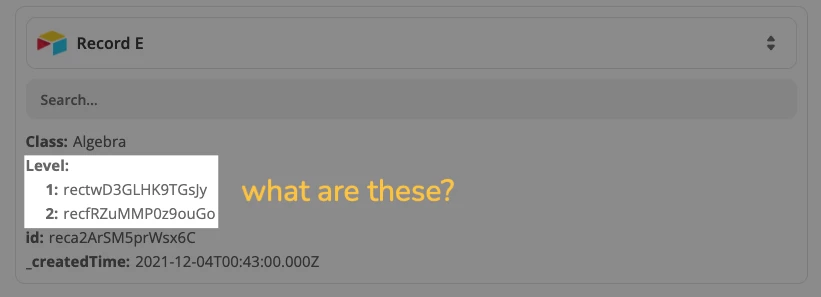
That’s not very helpful.
An Easy Fix
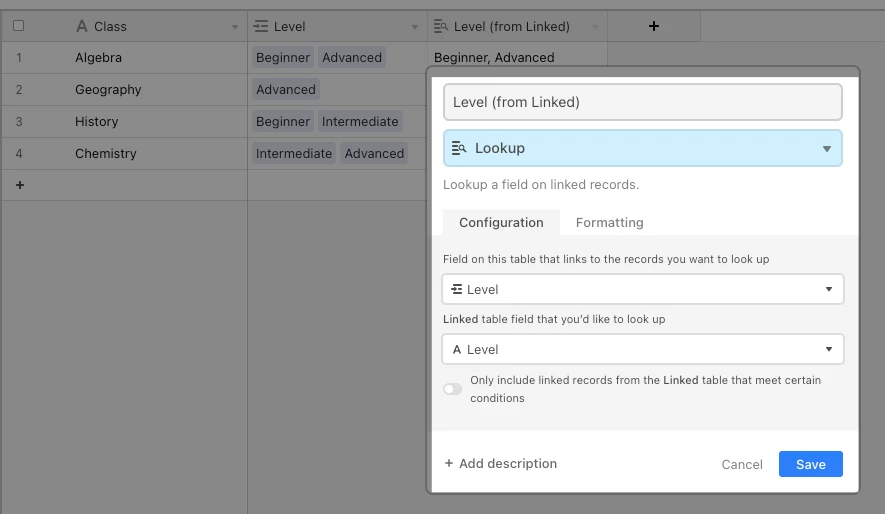
We can add a Lookup field in Airtable, to get the name of those levels instead:
Then in Zapier we get something more human-friendly:
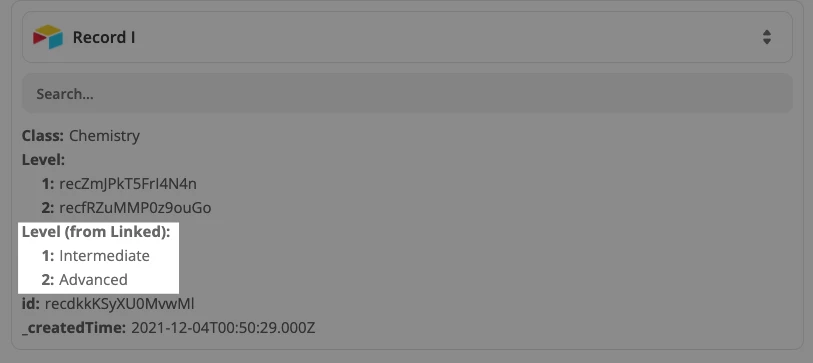
BUT WAIT!
These are still showing up as line items, meaning it’s not going to be easy to use it in later steps.
Example

If you’d prefer to have it in plain text, to use in other steps of your Zap workflows luckily that’s easy. Create a field in Airtable and use a Formula field like this (make sure you choose the linked records field and not the lookup field):
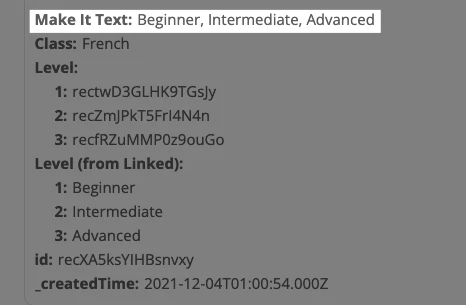
TAKEAWAYS:
- If you’d like to get a value from a linked record, you can use a Lookup field
- If you need those values to be text instead of line items, you can concatenate the linked record.
5. Use Advanced Search Formulas in Your Zap workflows
Most of the time, you’ll probably be fine with the standard search in the Airtable integration. But, did you know that you can use more advanced search formulas, should you ever have the need?
In Airtable
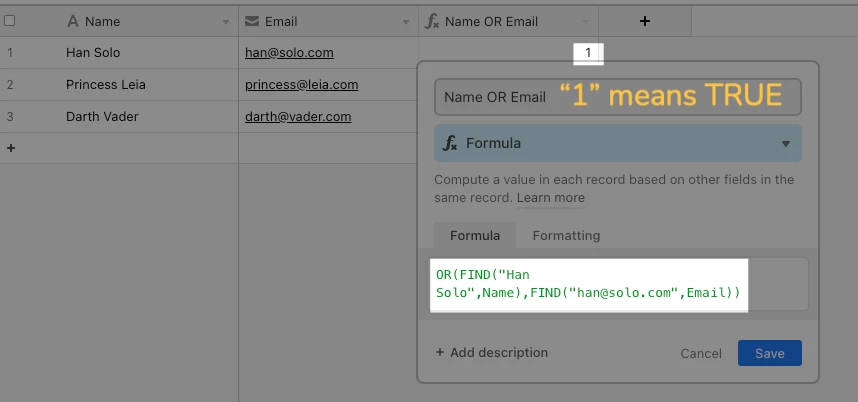
This is a simple example but let’s say you wanted to search Airtable and weren’t sure whether the person you’re looking for will have their name and/or email address. You’d like to search both.
Check the name for Han Solo and also check the email for han@solo.com. If one of those matches, return the record.
There’s no way to do that using this:
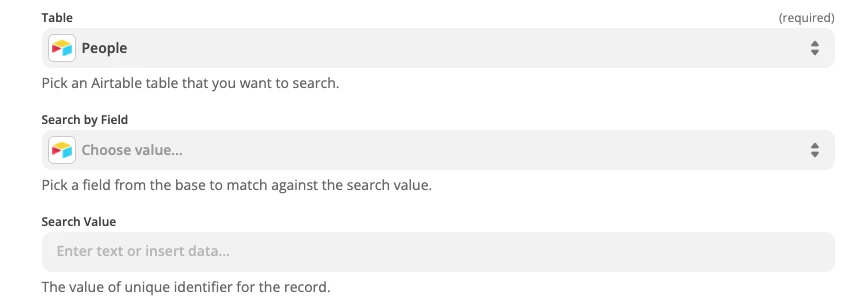
But we can write a formula that allows us to do it:

What this formula says is if find Han Solo in the Name field OR you find
han@solo.com then return the record.
NOTE: any formula you can use in Airtable’s Formula field, you can use here. The easiest way to test is by doing it in Airtable:
Wrapping Up
Well, there you have it! Hopefully some of these have given you some ideas of how you can give Airtable superpowers by combining it with the automation magic of Zapier! Until next time ![]()
")