


The use case I’ve got in mind here is for when you know your trigger step will be producing line items, but you either aren’t able to pull in sample data or you aren’t able to access the app in order to create new items.
Sometimes you can skip the trigger step’s test and you’ll have some dummy data to work with, but a) it’s not always valid in terms of the structure, so maybe you don’t get line items in that sample or b) it’s not provided at all, so you aren’t able to get anything at all from your trigger.
NOTE: some of these methods might be useful for workflows besides the use case I laid out above, which is a bonus :)
Method 1: Use a Code step as your trigger
I don’t profess to be an expert in Code but way back when I had someone help me out with this snippet and I’ve used it extensively ever since. I added it to TextExpander so I can easily make myself some line items when I want to test something in a Zap.
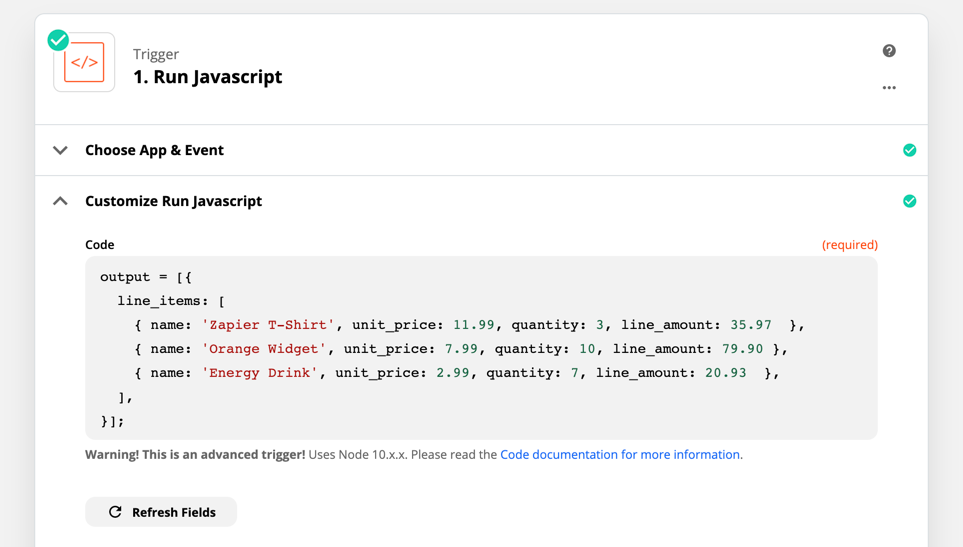
Choose the Javascript option and use the following (adjust for your needs, clearly):
output = [{

  line_items: [

    { name: 'Zapier T-Shirt', unit_price: 11.99, quantity: 3, line_amount: 35.97  },

    { name: 'Orange Widget', unit_price: 7.99, quantity: 10, line_amount: 79.90 },

    { name: 'Allbird Shoes', unit_price: 2.99, quantity: 7, line_amount: 20.93  },

  ],

}];
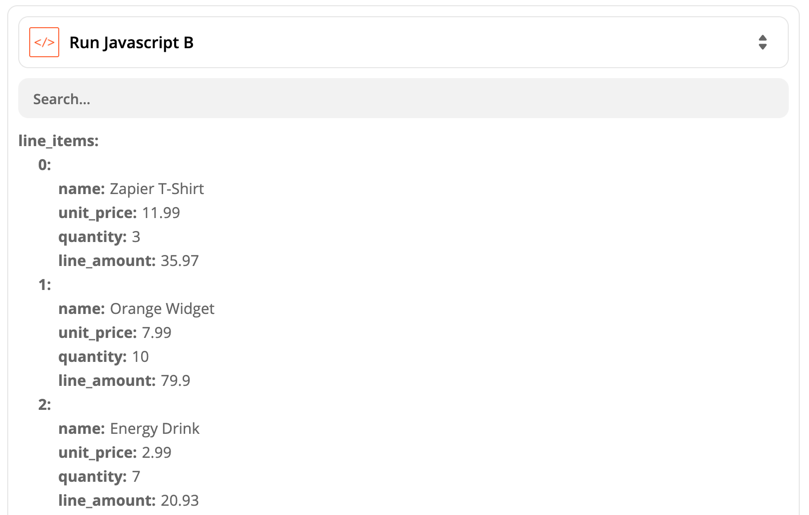
The Result
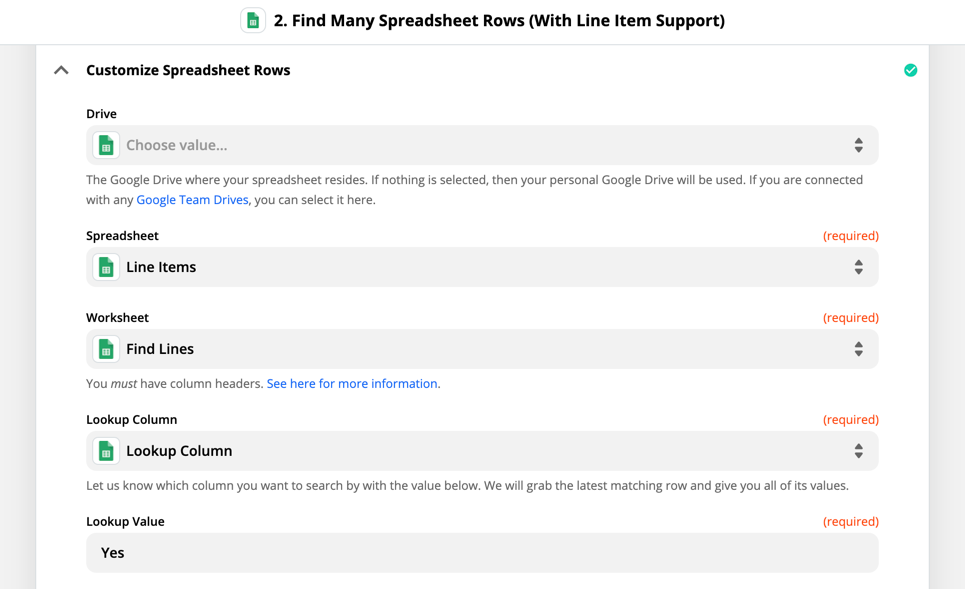
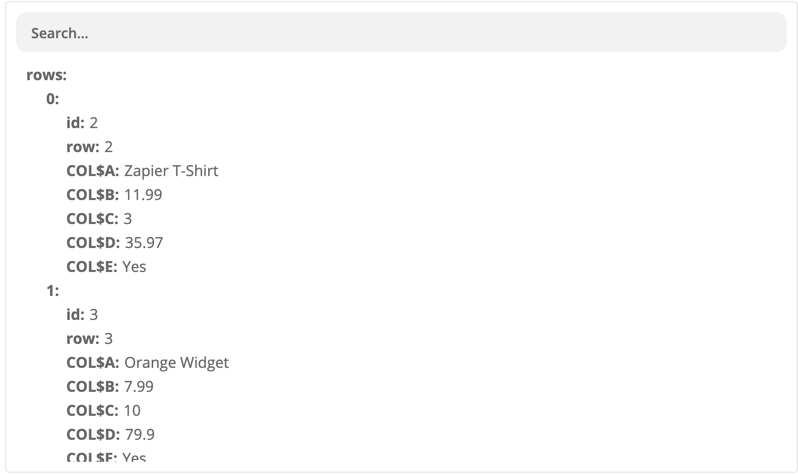
Method 2: Use Google Sheets and the Find Many Spreadsheet Rows (With Line Item Support) search action
If you go this route you could set up a Google Sheet that you re-use each time you need to simulate line items in your Zap. If you sometimes need variations, you could create multiple worksheets within that one spreadsheet.
The concept is simple: you create a header row and populate your columns, then use one of those columns for the lookup (put the same value in each row).
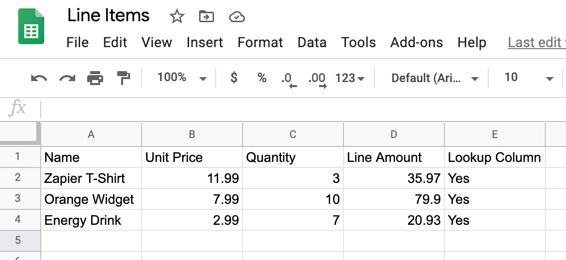
The search step will then return line items. The one I’m using will return up to 10 rows (we have another action that will return up to 20).
The Result
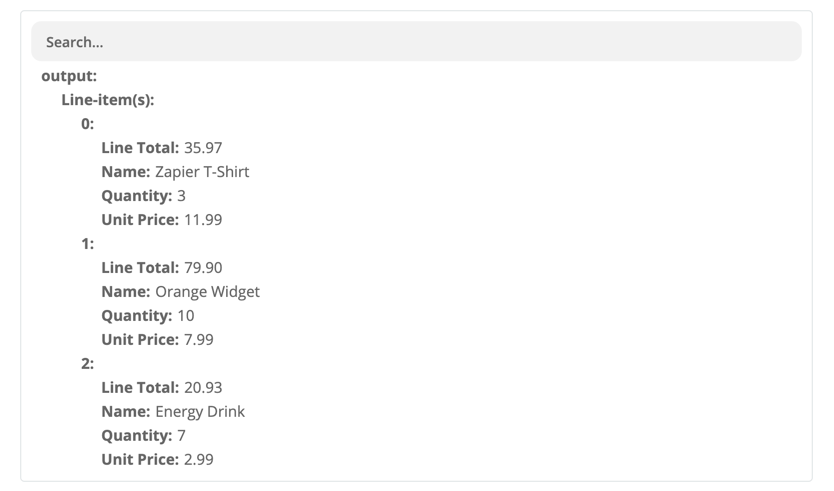
Method 3: Use Formatter by Zapier and the Line Itemizer function
This is the one that I thought might come in handy in other circumstances. Here’s how I set up the same items as my two previous examples:
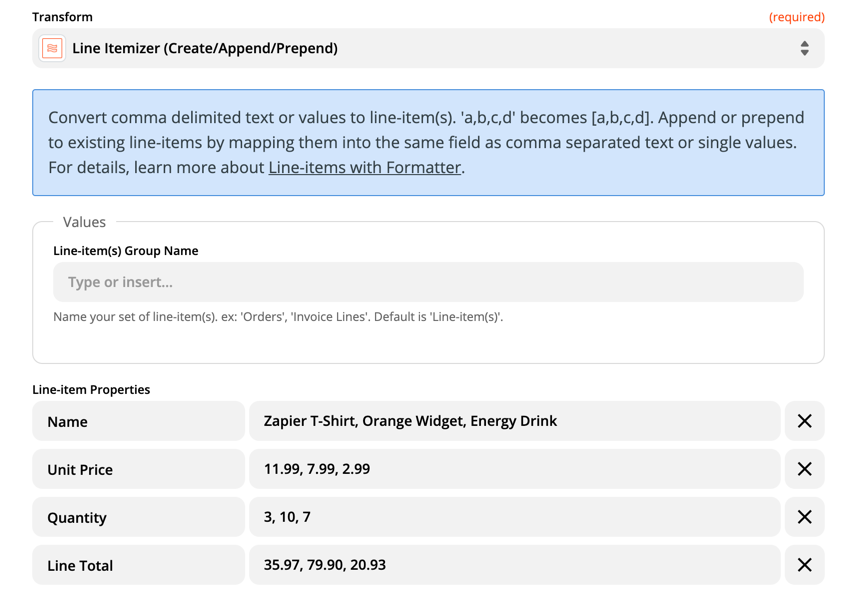
As you can see, you create one line item property for each of the things that were columns in our Google Sheet, then separate the values by a comma.
NOTE: make sure to get the order of each of your values correct, or else we might have energy drinks that cost $11.99 each!
The Result
Hope you’ve found this helpful, and as always, we’ll see you next week!