
Hey friends! I stumbled across a question asked in Community recently which got me thinking about whether there was better way to get a count of the number of reactions a Slack message has had:
This question has been asked before, e.g. here:
https://community.zapier.com/general-questions-3/trigger-zap-based-on-number-of-reactions-2324
The proposed solutions are cumbersome, though.
I wondered if it would be possible to let the zap add a `:check:` reaction as a latch, and then check for the existence of that reaction. However I couldn't see how to check for the existence of a reaction. Does anyone know of a way?
The Challenge
The Slack integration isn’t currently able to give us a count of the total number of reactions a message has had. We could keep a record of each reaction as it’s added by storing this information into a spreadsheet or database app of some kind and then do some calculations to get the current total, but that not really ideal. We need to find a more efficient way to see how many reactions a Slack message has had.
The Solution
Mod Edit - July 5th 2024: Instead of setting up a Slack App or Webhooks action you can now use an API Request action to retrieve the reactions for a Slack message. As with the webhook action described later in this guide, the reactions.get API endpoint needs to be used and the channel ID and timestamp for the message need to be selected like so:
This would then return the same Message Reactions Count field that contains the number of each of the different emoji reactions a message has had.
Use a Webhooks by Zapier step to connect to Slack’s API and get a count of the number of reactions a message has had. If you’re thinking to yourself “Webhooks? Argh, this is going to be complicated ![]() ”, it’s ok. Webhooks are honestly not as scary as they may seem. Plus, I’m going to share plenty of screenshots along the way to help break all the necessary steps down. You've got this!
”, it’s ok. Webhooks are honestly not as scary as they may seem. Plus, I’m going to share plenty of screenshots along the way to help break all the necessary steps down. You've got this! ![]()
In Slack
First, we’re going to need to create an App in Slack. I know, I know it sounds like it’s going to be a lot of work but we’re just going to be doing the bare minimum here to get this workaround up and running. I promise, it’s not as scary or time-consuming as it may seem.
Create your App
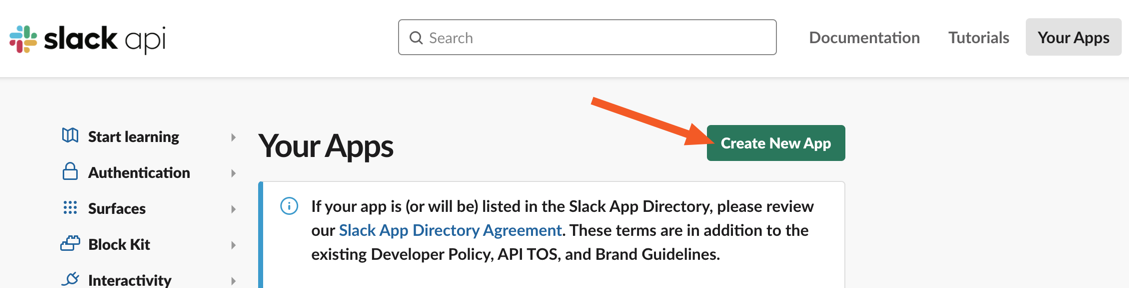
Head over to the Your Apps page in Slack and click on the Create New App button:
This will open up a pop up window where you can select how you want to create your app (From scratch or From an app manifest). In this example I’m just going to go with the From scratch option:

Next, enter a name for your app in the App Name field. And select the Slack workspace you want it added to:

Not too difficult so far, right? Now let’s head to the OAuth & Permissions page to set some permissions for our app. After you enter create the app, you’ll be presented with a couple of different ways to get to that page:

Clicking either of the highlighted links (shown in the image above) will take you to the OAuth & Permissions page.
Select your OAuth scope
Once you’ve got to the OAuth & Permissions page, scroll down to the Scopes section click on Add an OAuth Scope button:

This will add a dropdown menu where you can select the permission scope for the app. As we only need to read the reactions that are added we’ll want to select the reactions:read option:

Great, we’re nearly there now. Let’s scroll back up the OAuth & Permissions page and click the Install to Workspace button at the top:

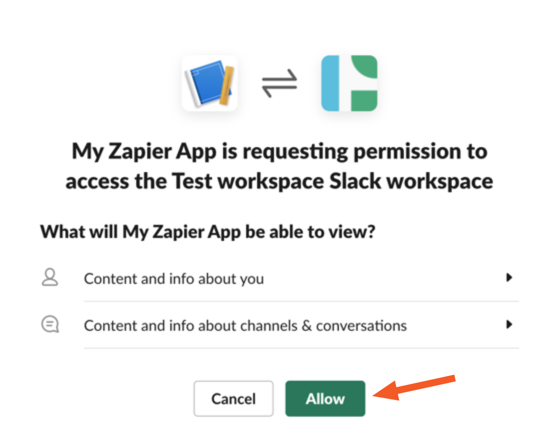
You’ll then see a screen asking for permission to access your workspace. Click Allow to get the OAuth Token added to your Slack Workspace.
Copy the OAuth token
At the top of the OAuth & Permissions page in Slack you’ll now see that there’s a User OAuth Token available to copy:

Woohoo! ![]() Keep this token somewhere safe for now, we’re going to need this later when we’re setting up the webhook step.
Keep this token somewhere safe for now, we’re going to need this later when we’re setting up the webhook step.
In Zapier
Phew! Now that our Slack App is set up, let’s head on over to Zapier and set up the Zap.
Set up your Slack Trigger
We're going use the New Reaction Added trigger for this Zap. And set it up to trigger whenever anyone uses a  reaction (reactji) on a message in any public channel:

Once you’ve got your trigger set up to check for whatever reaction is appropriate for your use case it’s time to tackle the Webhook step.
Set up your Webhook Action
For this to work we’re going to need to set up a Webhooks by Zapier action step using the GET action Event option:

Next, in the URL field enter https://slack.com/api/reactions.get (this is the Slack API endpoint that we’ll send our GET request to in order to get information about the reactions that have been added to the message).
Under that in the Query String Params section you’ll want to set up two params one for the channel and one for the timestamp.
For the channel select the Message Channel ID field from our trigger step (step 1).
For the the timestamp, select the Message Ts field. This will help to narrow down our search to find the exact message that triggered the Zap. The set up should look something like this:

We’re almost done with this, we just need to scroll down and add two key and value pairs into the Headers section. One for the Authorization and one for the Content-Type.
For the Authorization key you’ll enter a value of Bearer and then paste in the OAuth token we obtained from Slack earlier. Oh, and make sure to leave a space inbetween the word Bearer and the token itself, or it won’t work!
Then for the Content-Type key give it a value of application/x-www-form-urlencoded.
In the end, we should end up with something that looks like this

Let’s test it out to check it worked:

Yay, it worked! Hmm, but what should we do with this number now that we have it?
Use a Filter
From here you could user a Filter step to check whether the Count field is a specific value. Say we only want to let the Zap run for the first reaction received, we’d set up a Filter step to continue if the value in the Message Reactions Count is less than 2:

Of course, that’s not the only Filter set up you could use. Let’s say you wanted to send an email or perform some other kind of action once a message gets a certain number of reactions, say 20. That’s totally possible too! We’d just set the Filter to check that the Message Reactions Count field from the Webhook step is 20:

These are just a couple of examples to get you started. Hopefully it’ll inspire you to come up with other inventive ways to check reaction counts in your Zaps!
Further Reading
Well that’s all from me for now. Happy Zapping! ![]()

