GUIDE: Use Calendly API to Create Single-Use Scheduling Links
Tips and Inspiration contributed by: Troy Tessalone - Automation Ace
RESOURCES
Calendly API Personal Access Token: https://developer.calendly.com/how-to-authenticate-with-personal-access-tokens
Calendly API Endpoint: https://calendly.stoplight.io/docs/api-docs/b3A6MzQyNTM0OQ-create-single-use-scheduling-link
Webhooks: https://zapier.com/apps/webhook/help
CONFIG
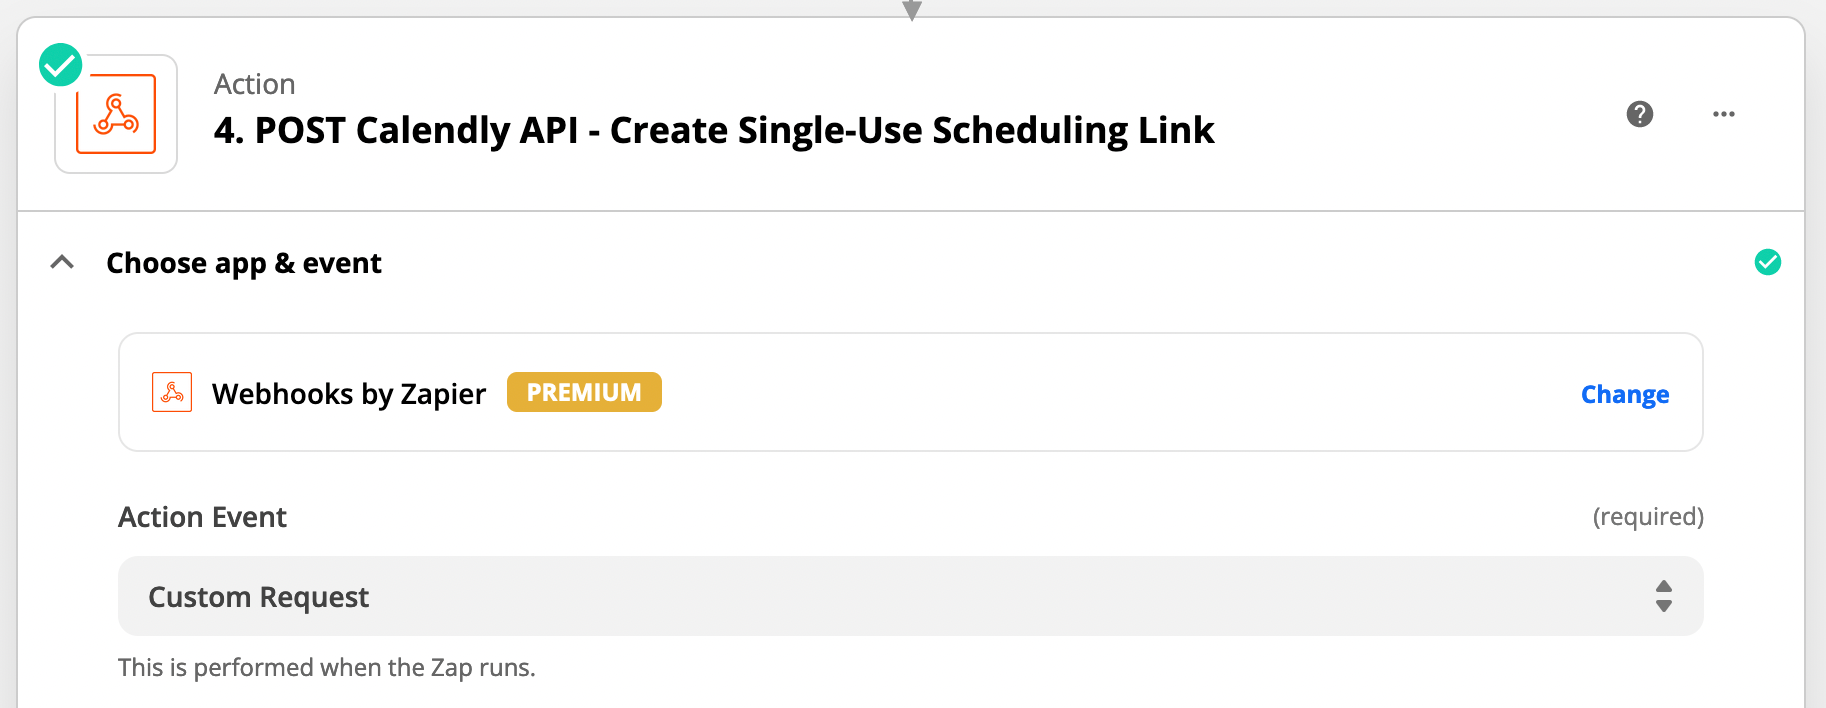
- Use the Webhooks app
- Action Event: Custom Request
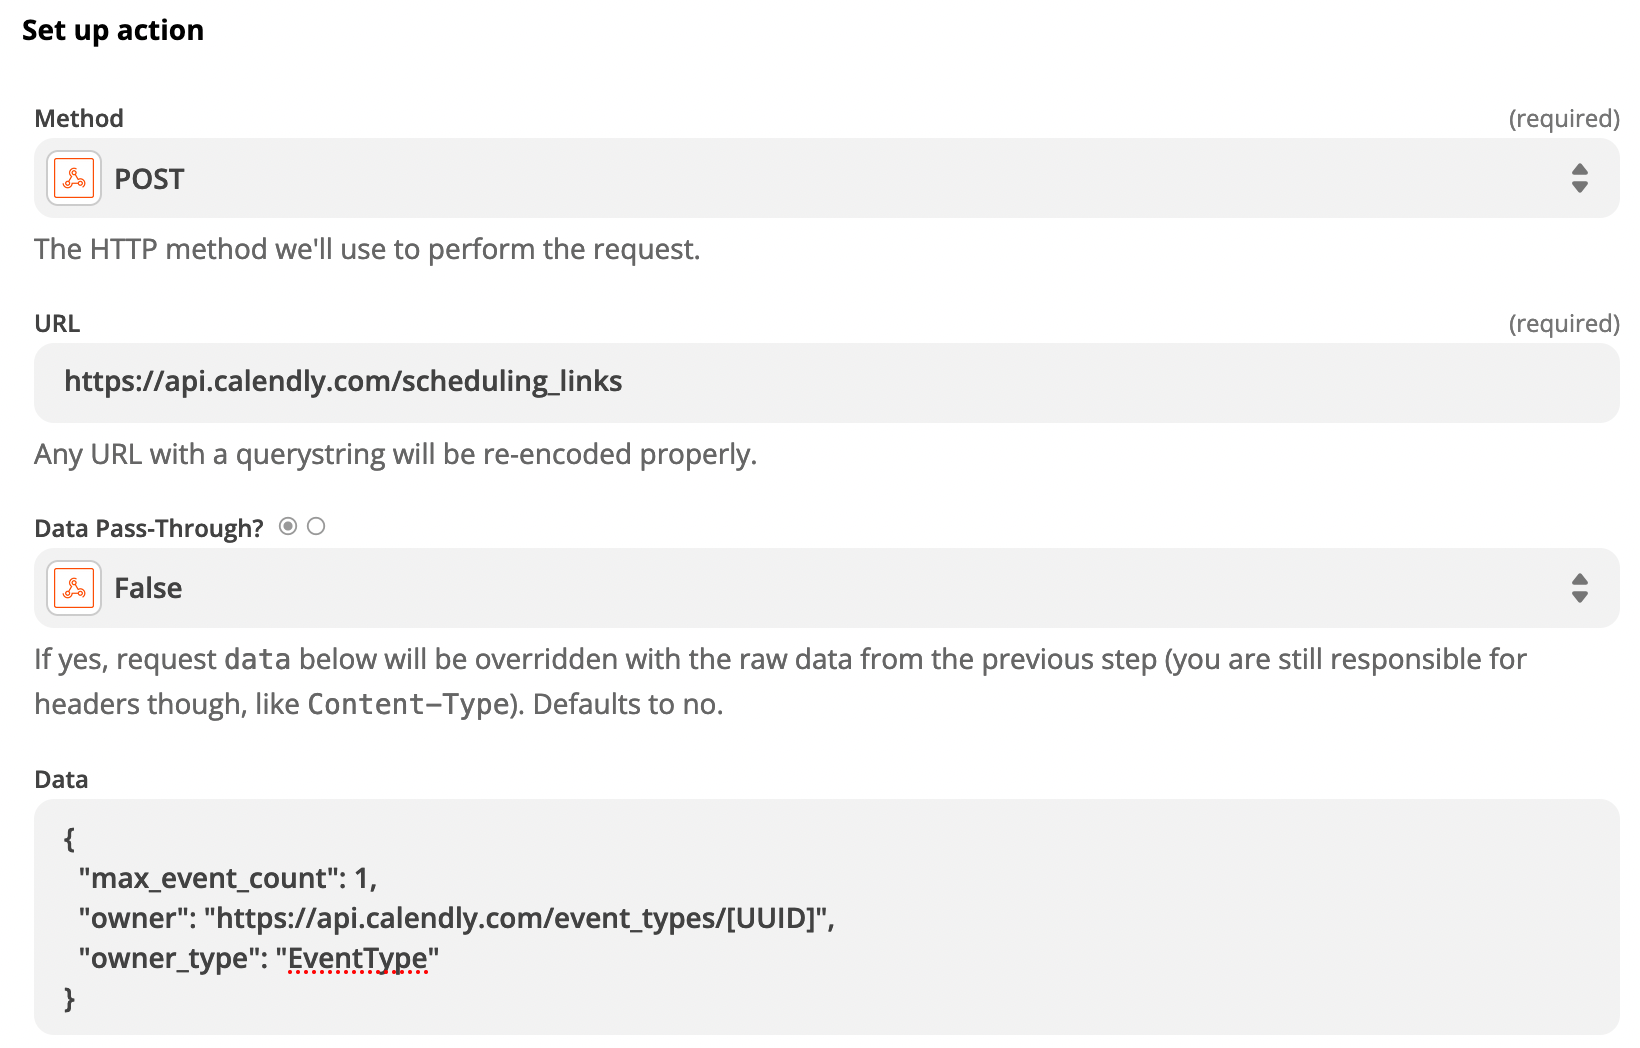
- Method: POST
- In the Data field, replace the [uuid] with your Calendly Event UUID
- NOTE: You can find this by testing the Calendly Zap trigger for Invitee Created
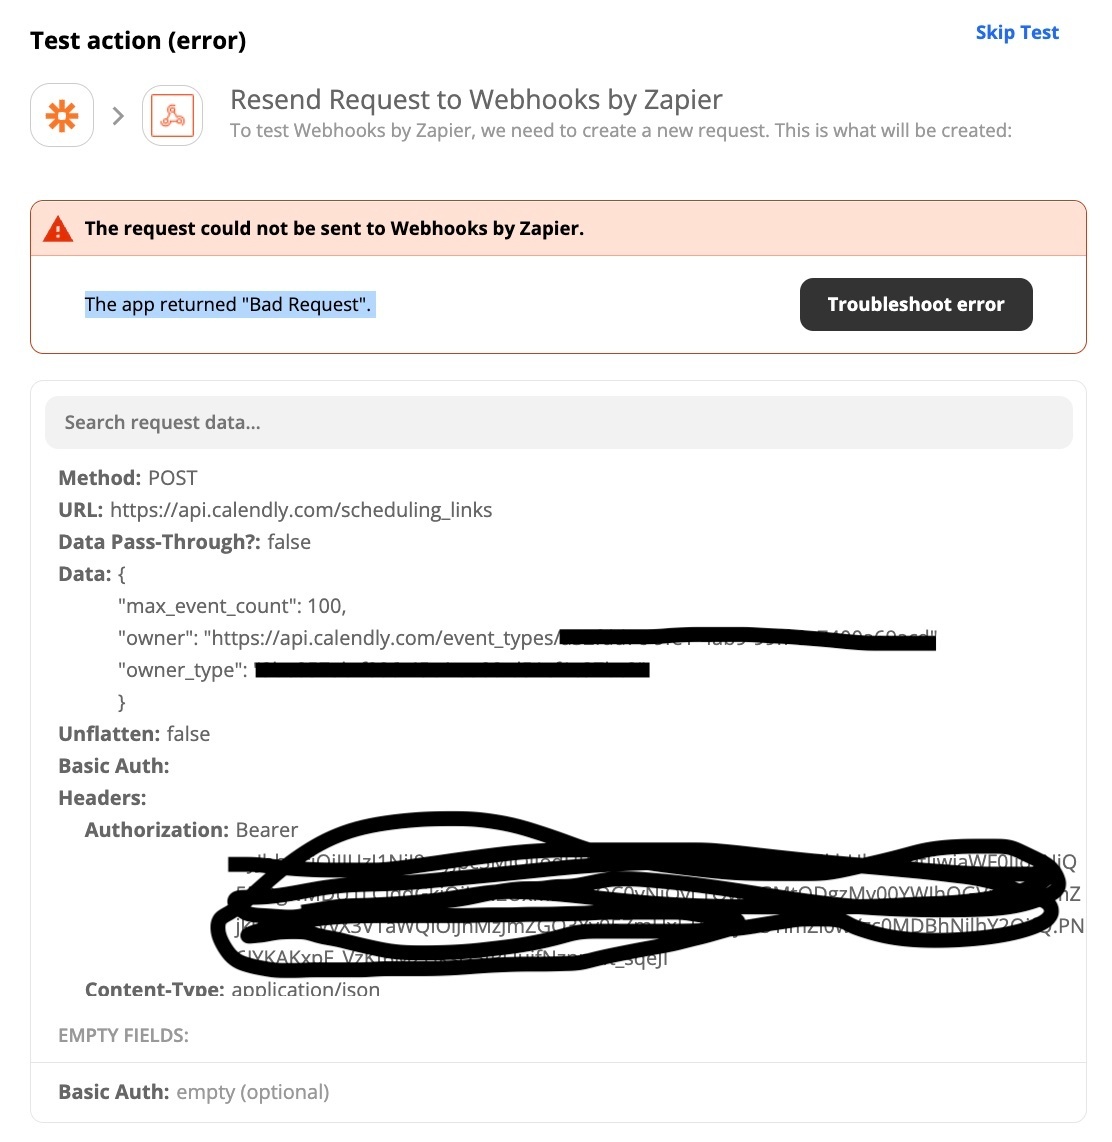
- In the Authorization Header, replace with your [PERSONAL ACCESS TOKEN]


")